Scrambled Oatmeal Breakfast Bars: 5-Star Morning Magic
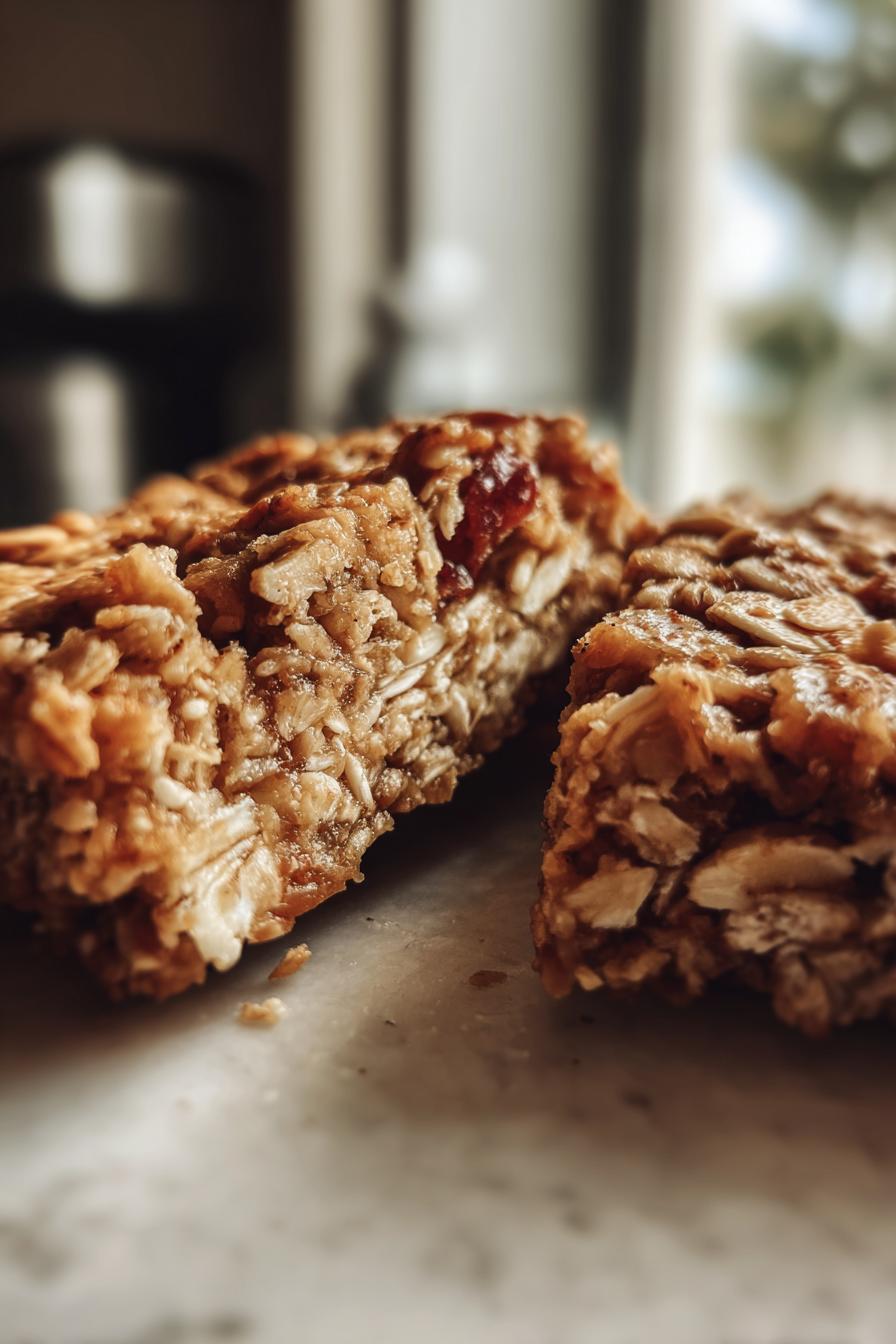
You know those mornings when you’re rushing out the door but still want something wholesome for breakfast? That’s exactly why I started making these Scrambled Oatmeal Breakfast Bars. They’ve become my go-to solution for busy weekdays – packed with hearty oats and just the right touch of honey sweetness. What I love most is how they combine the comforting texture of oatmeal with the convenience of a grab-and-go bar. No more skipping breakfast or settling for sad, store-bought options! These bars keep me full until lunch, and the best part? My kids actually beg for seconds. Who knew something so simple could be such a game-changer?
Why You’ll Love Scrambled Oatmeal Breakfast Bars
These Scrambled Oatmeal Breakfast Bars have become my weekday breakfast superheroes, and here’s why they’ll steal your heart too:
Quick and Easy to Make
Honestly, I can mix these up in my sleep now! Just 10 minutes of prep is all it takes – dump everything in one bowl, give it a good stir, and pop it in the oven. While it bakes, I can get dressed, pack lunches, or (let’s be real) enjoy that first glorious sip of coffee undisturbed.
Nutritious and Filling
Unlike those sugary cereal bars, these actually keep me full until lunch. The oats and eggs pack a perfect punch of fiber and protein, while the honey gives just enough natural sweetness. My energy stays steady all morning without that awful mid-morning crash.
Customizable to Your Taste
Here’s where the real fun begins! I love tossing in whatever I have on hand – walnuts for crunch, raisins for chewiness, or sometimes even dark chocolate chips because… well, chocolate. My neighbor adds shredded coconut, and my kids beg for mini chocolate chips (who am I to say no?). The basic recipe is like your favorite jeans – it looks good with anything you pair it with!
Ingredients for Scrambled Oatmeal Breakfast Bars
Gathering these simple ingredients is half the battle – and trust me, you probably have most of them in your pantry right now! Here’s what you’ll need to make magic happen:
- 2 cups rolled oats (old-fashioned, not instant) – These are the heart and soul of our bars. I’ve tried instant oats before, and while they work in a pinch, the texture just isn’t the same. Old-fashioned oats give that perfect chewy bite we all love.
- 2 large eggs, beaten – They’re our binder and protein powerhouse all in one. Pro tip: Let them sit out for 10 minutes to take the chill off before mixing – they’ll incorporate better with the other ingredients.
- 2 tbsp honey (or maple syrup for vegan option) – My kids call this “nature’s candy,” and I don’t correct them! The honey adds just the right sweetness without being overpowering. On lazy Sundays, I sometimes drizzle extra on top before baking for a caramelized crust.
- 1/2 cup milk (dairy or plant-based) – Any milk works here – I’ve used everything from almond to oat milk when we’re running low on regular milk. The liquid helps everything come together beautifully.
- 1 tsp pure vanilla extract – Don’t skimp here! That warm vanilla aroma makes the whole kitchen smell like a bakery. I once used imitation vanilla in a pinch, and the flavor difference was noticeable.
- 1/2 tsp ground cinnamon – My secret weapon for making these bars taste extra cozy. Sometimes I get adventurous and add a pinch of nutmeg too when I’m feeling fancy.
- 1/4 tsp fine sea salt – Just enough to balance all the sweetness. I prefer sea salt for its clean taste, but regular table salt works too.
- 1/4 cup chopped nuts (e.g., almonds or walnuts, optional) – Totally optional, but I love the crunch they add. Walnuts are my personal favorite – their slight bitterness plays so nicely with the honey. But if nuts aren’t your thing, just leave ’em out!
How to Make Scrambled Oatmeal Breakfast Bars
Now for the fun part – turning these simple ingredients into golden, delicious breakfast bars! Don’t let the name “scrambled” fool you – this couldn’t be easier. Follow these steps, and you’ll have perfect bars every time.
Preheat and Prepare
First things first – crank that oven to 350°F (180°C). While it’s heating up, grab your favorite 8×8 inch baking dish (metal works best for even browning, but glass is fine too). Here’s my little trick: rub a dab of butter all over the bottom and sides, or spray with cooking spray. Trust me, you don’t want to skip this step – nothing’s sadder than delicious bars stuck to the pan!
Mix the Ingredients
Grab your biggest mixing bowl – no need to dirty multiple bowls here! Dump in the oats, eggs, honey, milk, vanilla, cinnamon, and salt. Now grab a sturdy spoon and mix until everything’s evenly combined. You’ll notice the mixture looks loose at first, but keep stirring – those oats will soak up the liquid beautifully. If you’re adding nuts or other mix-ins, fold them in last. Pro tip: Don’t overmix! Just stir until everything’s incorporated – we’re not making bread here.
Bake to Perfection
Pour your oat mixture into the prepared pan, using the back of your spoon to spread it evenly into the corners. Slide it into your preheated oven and set your timer for 25 minutes. Around the 20-minute mark, start peeking through the oven window – you’re looking for golden edges pulling away slightly from the sides. The center should feel firm when gently pressed. If it still seems too soft, give it another 3-5 minutes. Mine usually take exactly 27 minutes, but ovens vary!
Cooling and Cutting
Here’s where patience pays off – resist the urge to cut into these beauties right away! Let them cool completely in the pan on a wire rack (about 30 minutes). This cooling time lets the bars set properly so they hold their shape when cut. Once cooled, run a butter knife around the edges, then lift the whole slab out onto a cutting board. Cut into 8 neat rectangles – or get creative with squares if you prefer. The first bite’s always the best – that perfect combo of chewy oats and subtle sweetness!
Tips for Perfect Scrambled Oatmeal Breakfast Bars
After making these bars more times than I can count (seriously, my family won’t let me stop), I’ve picked up some foolproof tricks to guarantee perfect results every time:
- Metal baking dishes are your best friend – I learned this the hard way after a batch came out unevenly cooked in my pretty ceramic dish. Metal conducts heat better, giving you those perfectly golden edges and a tender center. My trusty old aluminum pan never lets me down!
- Cooling time isn’t optional – I know it’s tempting to dig in right away (that cinnamon smell is irresistible!), but cutting warm bars leads to crumbly disasters. Let them sit until completely cool – about 30 minutes. They’ll hold their shape beautifully when sliced.
- Sweetness is adjustable – My husband likes his bars barely sweet, while the kids beg for more honey. The solution? Drizzle extra honey on top before baking or mix in dried fruit like chopped dates or raisins. Taste your batter (yes, it’s safe to eat raw!) and adjust to your preference.
- The overnight trick – Sometimes I mix everything the night before and refrigerate the batter in the baking dish. In the morning, I just pop it straight into a cold oven, then set to 350°F – the gradual heating makes the texture even more tender!
Variations for Scrambled Oatmeal Breakfast Bars
One of my favorite things about this recipe is how easily it adapts to whatever mood or craving strikes! Here are two delicious twists that regularly make appearances in my kitchen rotation:
Chocolate Chip Version
Okay, let’s be real – everything’s better with chocolate! For this crowd-pleasing version, I stir in 1/4 cup of dark chocolate chips right before baking. The bittersweet chocolate melts into little pockets of joy that make mornings feel like a treat. My kids go wild when they spot these in their lunch boxes! Pro tip: Mini chocolate chips distribute more evenly throughout the bars, but regular-sized ones create those glorious melty bites we all love.
Fruit-Studded Bars
When I want something a bit lighter but still sweet, I reach for dried fruit. A generous 1/4 cup of plump raisins or tart cranberries adds wonderful texture and natural sweetness. My personal favorite combo? Golden raisins with a sprinkle of orange zest – it’s like sunshine in every bite! If your fruit seems dry, soak it in warm water for 5 minutes first to plump it up. This prevents the fruit from absorbing moisture from our bars during baking.
Storing Scrambled Oatmeal Breakfast Bars
Here’s the beautiful thing about these bars – they actually get better as they sit! But proper storage makes all the difference between enjoying them for days and ending up with a sad, stale mess. Here’s exactly how I keep mine fresh:
At room temperature, they’ll stay perfect for about 2 days if stored in an airtight container. I like using my glass snapware with the rubber seal – it keeps them from drying out. Just be sure to let them cool completely first! Any lingering warmth creates condensation that turns your crispy edges soggy (learned that lesson the hard way).
For longer storage, the fridge is your best friend. Wrapped tightly in foil or plastic, they’ll keep for up to 5 days. I actually prefer them cold sometimes – the texture firms up nicely, and the flavors seem more concentrated. My husband grabs them straight from the fridge on his way to work!
Now for my freezer trick – this is how I always have breakfast ready for crazy weeks. Once cooled, I cut the bars and wrap each one individually in parchment paper, then pop them in a freezer bag. They’ll keep beautifully for up to a month! In the morning, I just grab one and let it thaw in my lunchbox, or microwave for 15 seconds if I’m impatient. They taste just-baked every time!
Nutritional Information for Scrambled Oatmeal Breakfast Bars
Let’s talk numbers – but don’t worry, these are the good kind! One of these Scrambled Oatmeal Breakfast Bars gives you a hearty start to the day without weighing you down. Here’s the scoop on what you’re getting in each serving (based on the basic recipe with walnuts):
- Calories: About 180 – just enough to fuel your morning without feeling heavy
- Protein: 6g from those mighty eggs and oats – keeps hunger at bay
- Fiber: 3g to keep things moving (we all need that morning boost!)
- Sugar: Only 8g – and all natural from the honey
- Healthy fats: 5g, mostly from the nuts and eggs – the good kind your brain loves
Now, full disclosure – these numbers can dance around a bit depending on your exact ingredients. Use almond milk instead of whole dairy? That’ll shave off a few calories. Go wild with chocolate chips? Well, we won’t judge (or count) those extra happy calories! The beauty of homemade means you control what goes in. Just remember – whether you’re counting macros or just counting smiles, these bars deliver goodness in every bite.
Common Questions About Scrambled Oatmeal Breakfast Bars
I’ve gotten so many great questions about these bars from friends and readers – let me share the answers to the ones that pop up most often!
Can I use instant oats?
You can, but the texture won’t be quite the same. Instant oats are pre-cooked and cut smaller, so they absorb liquid faster and make the bars more dense. Old-fashioned rolled oats give that perfect chewy bite we love. If instant is all you have, reduce the milk by 2 tablespoons to compensate. But trust me – it’s worth tracking down the good stuff!
Are these bars gluten-free?
They can be! Just make sure to use certified gluten-free oats (regular oats are often processed in facilities with wheat). All the other ingredients are naturally gluten-free. My gluten-sensitive neighbor makes these weekly and swears they’re her safest breakfast option!
Can I skip the eggs?
Absolutely! For a vegan version, mix 2 tablespoons of ground flaxseed with 5 tablespoons water (let it sit for 5 minutes to thicken). This “flax egg” works beautifully as a binder. The bars might be slightly more crumbly, but just as delicious. My daughter’s college roommate makes them this way and raves about the results!
How do I know when they’re done baking?
Look for golden edges pulling away from the pan and a firm center that springs back when lightly pressed. The toothpick test works too – it should come out with moist crumbs, not wet batter. If in doubt, give them an extra 2 minutes – better slightly overbaked than under!
Can I double the recipe?
Yes! Just use a 9×13 inch pan instead and add 5-7 minutes to the baking time. I always make a double batch on Sundays – half for the week, half for the freezer. Future you will thank past you on busy mornings!
Now it’s your turn – try this recipe and share your results! Tag me on Instagram or leave a comment below telling me what mix-ins you used. Can’t wait to hear how your Scrambled Oatmeal Breakfast Bars turn out!
PrintScrambled Oatmeal Breakfast Bars: 5-Star Morning Magic
A simple and healthy breakfast option with oats, eggs, and honey for a quick morning meal.
- Prep Time: 10 mins
- Cook Time: 25 mins
- Total Time: 35 mins
- Yield: 8 bars 1x
- Category: Breakfast
- Method: Baked
- Cuisine: American
- Diet: Vegetarian
Ingredients
- 2 cups rolled oats
- 2 eggs
- 2 tbsp honey
- 1/2 cup milk
- 1 tsp vanilla extract
- 1/2 tsp cinnamon
- 1/4 tsp salt
- 1/4 cup chopped nuts (optional)
Instructions
- Preheat your oven to 350°F (180°C).
- Mix oats, eggs, honey, milk, vanilla, cinnamon, and salt in a bowl.
- Stir in chopped nuts if using.
- Pour the mixture into a greased baking dish.
- Bake for 25-30 minutes until firm and golden.
- Let cool before cutting into bars.
Notes
- Store in an airtight container for up to 3 days.
- Substitute maple syrup for honey if preferred.
- Add dried fruit for extra sweetness.
Nutrition
- Serving Size: 1 bar
- Calories: 180
- Sugar: 8g
- Sodium: 90mg
- Fat: 5g
- Saturated Fat: 1g
- Unsaturated Fat: 3g
- Trans Fat: 0g
- Carbohydrates: 28g
- Fiber: 3g
- Protein: 6g
- Cholesterol: 45mg