35-Minute Healthy Turmeric Quinoa Pilaf – Golden Magic!
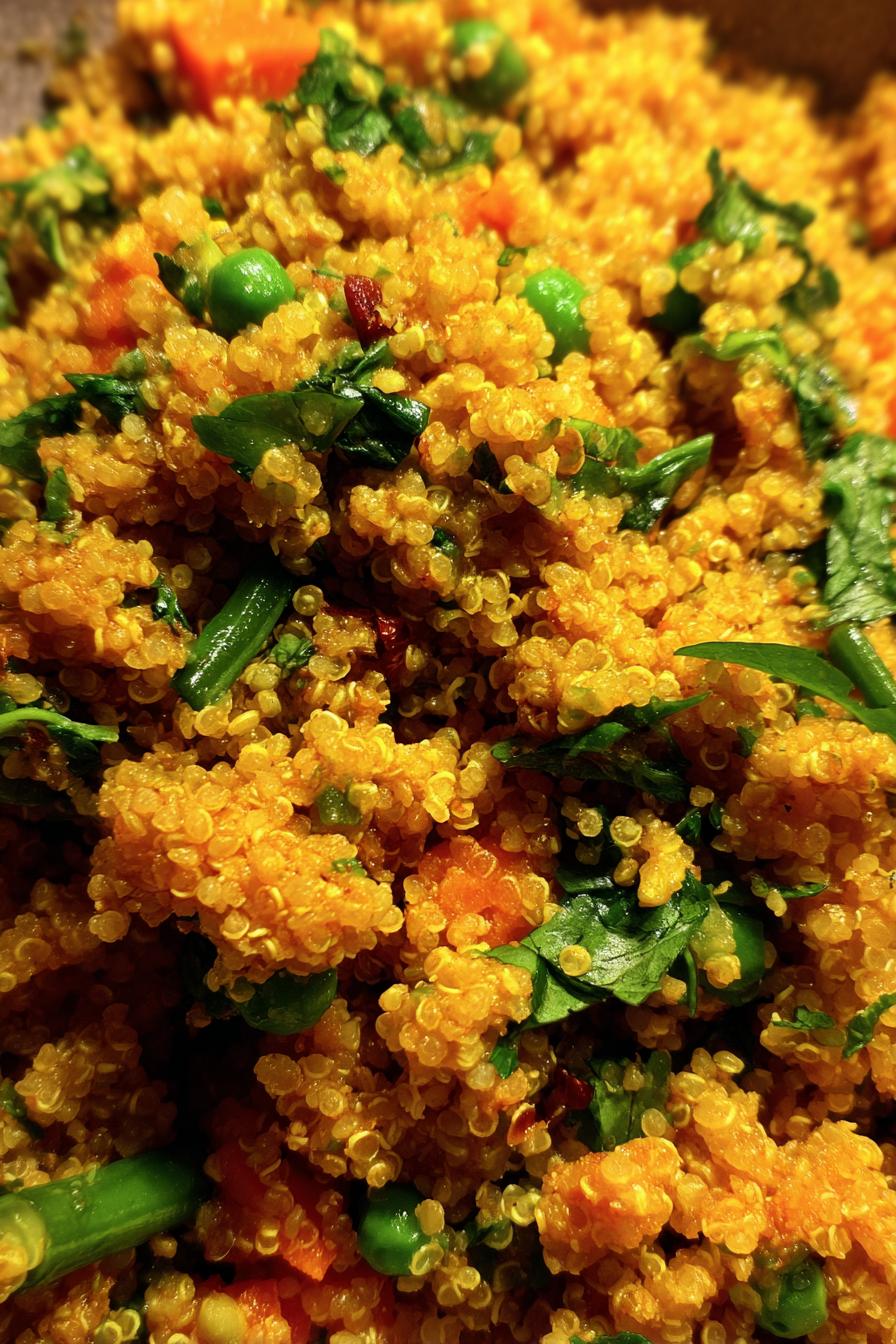
Let me tell you about my go-to weeknight miracle – this healthy turmeric quinoa pilaf that’s saved me from more takeout menus than I can count. I stumbled onto this golden-hued gem years ago when I needed something quick, nutritious, and packed with protein to fuel my crazy schedule. The magic happens when earthy turmeric teams up with fluffy quinoa – you get all the anti-inflammatory benefits of turmeric plus the complete protein punch from quinoa in one vibrant bowl. What started as a desperate “what’s left in my pantry?” dinner has become my signature dish that friends always ask me to bring to potlucks. Trust me, this fuss-free pilaf tastes way more impressive than its 30-minute cooking time suggests, and that gorgeous yellow color makes it look like you slaved away for hours!
Why You’ll Love This Healthy Turmeric Quinoa Pilaf
I’m not exaggerating when I say this golden bowl of goodness checks every box for a perfect weeknight meal. Here’s why it’s become my kitchen MVP:
- Crazy quick: From pan to plate in 30 minutes flat – faster than pizza delivery and way better for you. I’ve made this half-asleep on busy mornings and it still turns out perfect.
- Nutrition powerhouse: Between the quinoa’s complete protein and turmeric’s anti-inflammatory superpowers, this dish fuels my body without weighing me down. My doctor actually complimented my bloodwork last checkup!
- Flavor that pops: That earthy turmeric mingling with sweet peas and carrots? Absolute magic. The first time my neighbor tried it, she thought I’d used some fancy spice blend.
- Shape-shifter: I’ve served it warm as a main, cold in lunchboxes, stuffed in peppers – even as a next-day breakfast bowl with a fried egg on top. Leftovers (if you have any) get better overnight!
Honestly? The only downside is how often people will beg you to make it once they taste it. Consider yourself warned!
Ingredients for Healthy Turmeric Quinoa Pilaf
Gather these simple ingredients – most might already be in your kitchen! I’ve made this enough times to know precise measurements matter, but don’t stress if you need to eyeball a little. Here’s what you’ll need:
- 1 cup quinoa – Rinsed well (trust me, skipping this makes it bitter)
- 2 cups liquid – Water works, but vegetable broth adds SO much flavor
- 1 tsp turmeric powder – The star of the show! Fresh is great if you have it
- 1 tbsp olive oil – My go-to, but coconut oil adds nice flavor too
- 1 small onion, diced – About the size of a baseball – I like yellow for sweetness
- 2 cloves garlic, minced – More if you’re a garlic lover like me!
- 1 carrot, diced – Cut small so it cooks fast – no bigger than pea-sized
- 1/2 cup peas – Frozen works perfectly here (thawed is best but straight from freezer in a pinch)
- Salt & black pepper – To taste – I start with 1/2 tsp salt
- 1/4 cup fresh cilantro, chopped – Stems and all – they pack flavor!
Pro tip: Keep extra turmeric handy – I always add an extra pinch because I love that golden color and earthy flavor. And if you’re out of peas? Corn or diced bell peppers make great stand-ins!
Equipment You’ll Need
One thing I love about this recipe? You don’t need any fancy gadgets! Here’s what I grab from my kitchen:
- Medium saucepan – About 2-quart size works perfectly
- Wooden spoon – For stirring without scratching your pan
- Measuring cups and spoons – For those perfect turmeric and quinoa ratios
- Chef’s knife – To tackle those onions and carrots
- Cutting board – My trusty sidekick for all the chopping
That’s it! No food processors or special tools required – just good old-fashioned cooking the way grandma would do it (if grandma was obsessed with quinoa).
How to Make Healthy Turmeric Quinoa Pilaf
Okay, let’s get cooking! I promise this is easier than it looks – just follow these simple steps and you’ll have golden, fluffy perfection in no time. I’ve made this so often I could probably do it in my sleep, but I’ll walk you through every detail so yours turns out just right.
Preparing the Quinoa
First things first – don’t skip rinsing! I learned this the hard way when my first batch turned out unpleasantly bitter. Here’s how I do it:
- Measure out 1 cup quinoa and pour it into a fine mesh strainer.
- Rinse under cold running water for at least 1 minute, swishing with your fingers until the water runs completely clear. (This removes the natural coating called saponin that causes bitterness.)
- Optional but awesome: For extra nutty flavor, spread the rinsed quinoa on a clean towel to dry, then toast it in a dry pan over medium heat for 2-3 minutes until you smell a lovely popcorn-like aroma. Just don’t walk away – it can burn fast!
Cooking the Vegetables
Now for the flavor base – this is where the magic starts:
- Heat 1 tbsp olive oil in your saucepan over medium heat. Wait about 30 seconds until it shimmers – too hot and the garlic will burn!
- Add diced onion and minced garlic. Stir frequently for about 3 minutes until the onions turn translucent. (If they start browning, lower the heat – we’re not making caramelized onions here!)
- Toss in the diced carrot, peas, and 1 tsp turmeric. Stir everything together for another 2 minutes until the veggies brighten and your kitchen smells amazing. The turmeric will bloom in the oil, releasing all its golden goodness!
Combining and Simmering
Time to bring it all together – this is where patience pays off:
- Add the rinsed quinoa to the veggie mixture and give it a good stir to coat every grain with that golden turmeric oil.
- Pour in 2 cups of liquid (water or broth) and bring to a boil. Don’t stir once it’s boiling – we want those bubbles to work their magic!
- As soon as it boils, immediately reduce heat to low, cover tightly with a lid, and set your timer for 15 minutes. No peeking! The steam needs to stay trapped inside.
- When the timer goes off, check for doneness – the liquid should be fully absorbed and you’ll see little “tails” curling from the quinoa grains. If it’s still wet, cover and give it 2 more minutes.
- Remove from heat and let it sit covered for 5 minutes (this is crucial for perfect texture!). Then fluff gently with a fork, season with salt and pepper, and stir in fresh cilantro.
And there you have it – golden, fluffy, nutritious perfection ready to devour! Pro tip: If it seems a bit dry, drizzle with a teaspoon of olive oil before serving for extra richness.
Tips for Perfect Healthy Turmeric Quinoa Pilaf
After making this dish more times than I can count, I’ve picked up some tricks that take it from good to “oh wow!” Here are my can’t-miss tips:
- Toast your quinoa – Those extra 2 minutes in a dry pan deepen the flavor like you wouldn’t believe. I can always tell when I’ve skipped this step!
- Broth is better than water – The difference in flavor is night and day. I keep Better Than Bouillon in my fridge just for this recipe.
- Fresh herbs make it pop – Cilantro’s my go-to, but parsley or even mint work wonders. Add them right before serving for maximum brightness.
- Let it rest – Those 5 minutes off heat make the texture perfect – I promise it’s worth waiting!
- Finish with lemon – A quick squeeze at the end cuts through the earthiness beautifully.
Bonus tip: Double the batch – it reheats like a dream and saves me on busy nights!
Variations of Healthy Turmeric Quinoa Pilaf
One of my favorite things about this recipe? It’s like a blank canvas waiting for your personal touch! Here are some delicious ways I’ve mixed it up over the years:
- Crunch it up: Stir in toasted almonds or cashews right before serving – that satisfying crunch takes it to another level. I’m partial to pistachios myself!
- Veggie swap: Out of peas? Try diced zucchini, chopped kale, or even roasted sweet potatoes. Last week I used roasted cauliflower and it was heavenly.
- Sweet surprise: A handful of golden raisins or dried cranberries adds the perfect sweet contrast – my kids go crazy for this version.
- Protein boost: Chickpeas or shredded chicken turn this into a complete meal. I often toss in leftover rotisserie chicken on busy nights.
The possibilities are endless – once you’ve mastered the basic recipe, have fun making it your own!
Serving Suggestions for Healthy Turmeric Quinoa Pilaf
Oh, the ways I’ve served this golden goodness! My absolute favorite is as a cozy standalone meal – just pile it high in a bowl with extra cilantro and a squeeze of lemon. But here are my go-to pairings when I want to dress it up:
- With grilled chicken – The turmeric plays beautifully with simple lemon-pepper chicken. I slice the chicken and arrange it right on top for a pretty presentation.
- Alongside roasted veggies – Cauliflower, Brussels sprouts, or sweet potatoes make perfect partners. The earthy flavors complement each other so well.
- Stuffed in bell peppers – I bake the mixture inside halved peppers for about 20 minutes. The colors look stunning together!
- Under poached eggs – Breakfast pilaf? Yes please! The runny yolk mixes with the quinoa for absolute magic.
Pro tip: Serve it warm in winter, chilled in summer – it works beautifully both ways!
Storing and Reheating Healthy Turmeric Quinoa Pilaf
Here’s the beautiful thing about this pilaf – it actually gets better as leftovers! I always make extra because it’s so versatile. Store it in an airtight container in the fridge for up to 3 days (though mine never lasts that long). When reheating, sprinkle a teaspoon of water over the top before microwaving – it brings back that perfect fluffy texture. For a quick lunch, I’ll even eat it cold straight from the fridge! The turmeric flavor deepens overnight, making every bite even more delicious.
Nutritional Information for Healthy Turmeric Quinoa Pilaf
Let me break down why I feel so good after eating this dish – and it’s not just that happy food glow! One serving (about 1 cup) of this turmeric quinoa pilaf packs a serious nutritional punch. Now, I’m no dietitian, but I’ve done my homework on these numbers. Keep in mind these are estimates since brands and ingredient sizes can vary a bit.
- Calories: About 220 – perfect for a satisfying yet light meal
- Protein: 8g from that powerhouse quinoa (that’s more than an egg!)
- Fiber: 5g to keep you full and happy – nearly 20% of your daily needs
- Healthy fats: Just 6g total, mostly from heart-healthy olive oil
- Turmeric benefits: All those anti-inflammatory compounds with minimal calories
What’s not in it matters too – no cholesterol, hardly any saturated fat, and only 3g of natural sugars. My doctor friend says the combo of plant protein, complex carbs, and turmeric makes this one of the healthiest dishes in my rotation. And the best part? It tastes so good you’d never guess it’s this good for you!
Note: Nutrition info is calculated using standard ingredients. Using broth instead of water adds about 15mg sodium per serving, and adding nuts will increase healthy fats and calories slightly. As my grandma always said – food is about nourishment AND joy, so enjoy every bite!
Frequently Asked Questions About Healthy Turmeric Quinoa Pilaf
After sharing this recipe with countless friends (and their friends, and their cousins…), I’ve heard all the questions! Here are the ones that come up most often – with my tried-and-true answers:
Can I use frozen vegetables instead of fresh?
Absolutely! I keep frozen peas and carrots in my freezer for emergency pilaf situations. No need to thaw – just toss them in straight from the freezer. They might need an extra minute of cooking time. Frozen veggie blends work great too – my “everything but the kitchen sink” version often has corn and green beans mixed in!
How can I make the flavor more robust?
Two words: toast and bloom. First, toast your quinoa (like I mentioned earlier) for nuttier flavor. Then, let the turmeric “bloom” in the hot oil for 30 seconds before adding other ingredients – it intensifies the flavor beautifully. A squeeze of lemon at the end brightens everything up too!
My quinoa turned out mushy – what went wrong?
Oh no! Most likely culprit? Too much liquid or not enough draining after rinsing. Make sure to really shake out all that rinse water, and measure your cooking liquid precisely. Also – resist the urge to stir during simmering! That gentle, undisturbed steam is what gives you fluffy grains.
Can I make this ahead for meal prep?
You’re speaking my language! This pilaf is my meal prep superstar. It keeps beautifully for 3 days in the fridge – just store it airtight. The turmeric actually makes the flavors meld even better overnight. For freezing, I portion it into individual containers and thaw in the fridge overnight. A quick reheat with a splash of water brings it right back to life.
Is there a substitute for cilantro?
Not a cilantro fan? No problem! Flat-leaf parsley gives a similar fresh pop without that polarizing cilantro taste. I’ve also used fresh dill (amazing with lemon) or even basil for a different twist. In a pinch, a teaspoon of dried parsley works too – just add it with the turmeric to rehydrate.
35-Minute Healthy Turmeric Quinoa Pilaf – Golden Magic!
A nutritious and flavorful quinoa dish infused with turmeric, packed with protein and antioxidants.
- Prep Time: 10 minutes
- Cook Time: 20 minutes
- Total Time: 30 minutes
- Yield: 4 servings 1x
- Category: Main Dish
- Method: Stovetop
- Cuisine: Global
- Diet: Vegetarian
Ingredients
- 1 cup quinoa
- 2 cups water or vegetable broth
- 1 tsp turmeric powder
- 1 tbsp olive oil
- 1 small onion, diced
- 2 cloves garlic, minced
- 1 carrot, diced
- 1/2 cup peas
- Salt to taste
- Black pepper to taste
- 1/4 cup fresh cilantro, chopped
Instructions
- Rinse quinoa under cold water until water runs clear.
- Heat olive oil in a saucepan over medium heat.
- Add onion and garlic, sauté until translucent.
- Stir in turmeric, carrot, and peas, cook for 2 minutes.
- Add quinoa and water or broth, bring to a boil.
- Reduce heat, cover, and simmer for 15 minutes or until liquid is absorbed.
- Fluff with a fork, season with salt and pepper.
- Garnish with fresh cilantro before serving.
Notes
- For extra flavor, toast quinoa in a dry pan before cooking.
- Add nuts or seeds for crunch.
- Store leftovers in an airtight container for up to 3 days.
Nutrition
- Serving Size: 1 cup
- Calories: 220
- Sugar: 3g
- Sodium: 150mg
- Fat: 6g
- Saturated Fat: 1g
- Unsaturated Fat: 4g
- Trans Fat: 0g
- Carbohydrates: 35g
- Fiber: 5g
- Protein: 8g
- Cholesterol: 0mg