Holiday Cookie Exchange Ideas to Delight Your Guests!

Introduction to Holiday Cookie Exchange Ideas
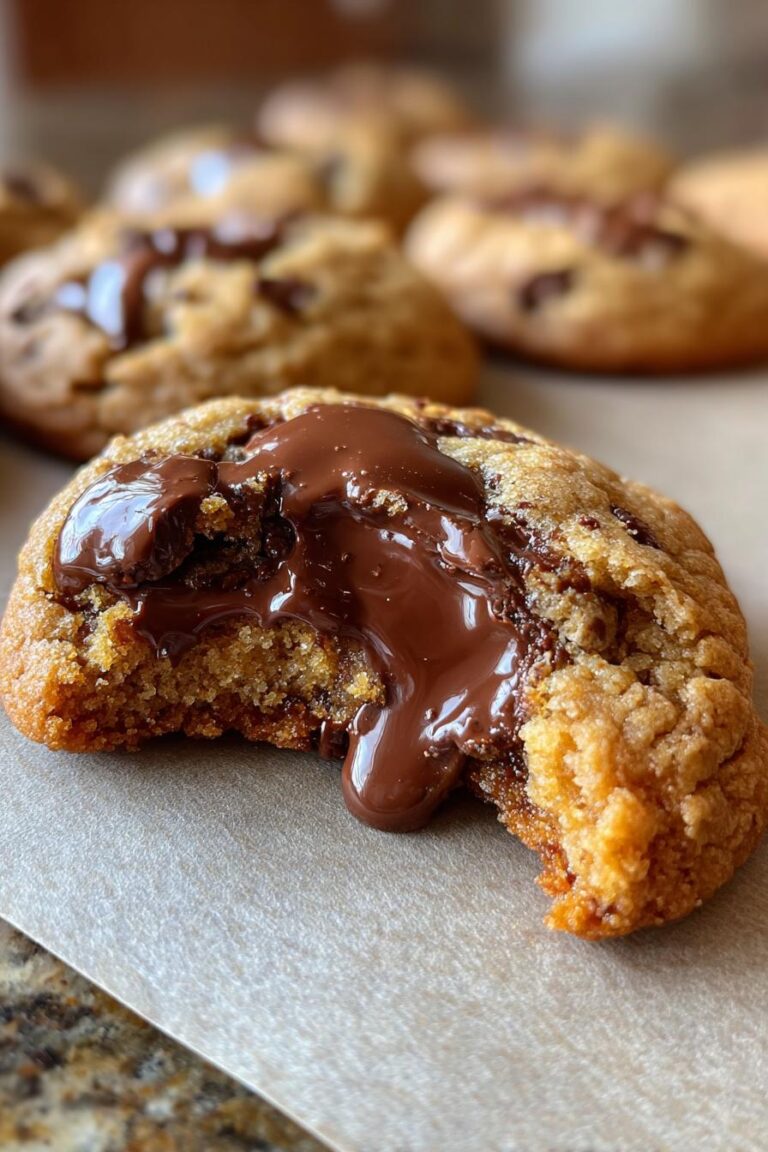
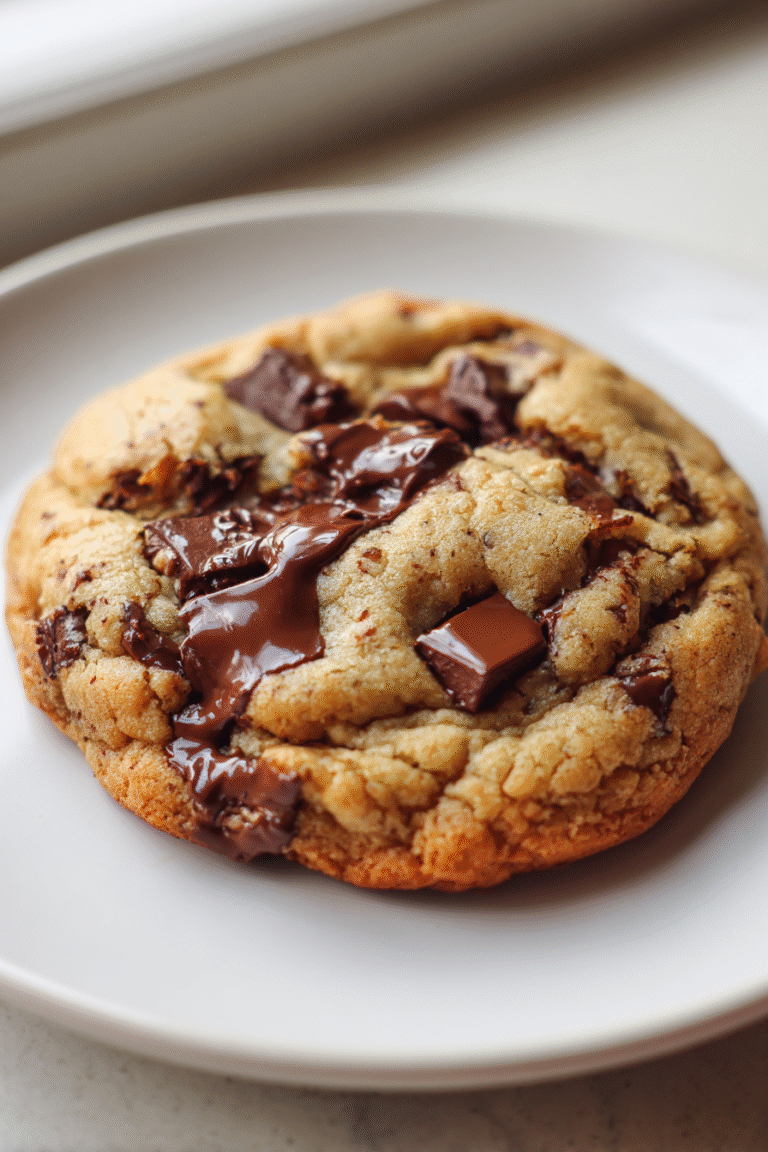
As the holiday season approaches, the excitement of gathering with friends and family fills the air. One of my favorite traditions is hosting a cookie exchange, where everyone brings their best treats to share. It’s a delightful way to celebrate the season and create lasting memories. These Holiday Cookie Exchange Ideas are perfect for busy moms and professionals like us, offering a quick solution to impress your loved ones. With just a few simple ingredients, you can whip up cookies that not only taste amazing but also look festive on any dessert table!
Why You’ll Love This Holiday Cookie Exchange Ideas
These Holiday Cookie Exchange Ideas are a lifesaver for busy schedules. They come together quickly, allowing you to spend more time with loved ones and less time in the kitchen. The rich, buttery flavor combined with gooey chocolate chips creates a cookie that’s simply irresistible. Plus, they’re versatile! You can easily customize them to suit your family’s tastes or dietary needs, making them a hit for everyone at your gathering.
Ingredients for Holiday Cookie Exchange Ideas
Gathering the right ingredients is the first step to creating these delightful cookies. Here’s what you’ll need:
- All-purpose flour: This is the backbone of your cookies, providing structure and texture.
- Unsalted butter: Softened butter adds richness and helps achieve that melt-in-your-mouth quality.
- Granulated sugar: This sweetener gives your cookies a lovely crispness and sweetness.
- Brown sugar: Packed brown sugar adds moisture and a hint of caramel flavor, making your cookies chewy.
- Large eggs: Eggs bind the ingredients together and contribute to the cookies’ fluffiness.
- Vanilla extract: A splash of vanilla enhances the overall flavor, making each bite more aromatic.
- Baking soda: This leavening agent helps your cookies rise and become light and airy.
- Salt: Just a pinch balances the sweetness and enhances the flavors.
- Chocolate chips: The star of the show! They melt beautifully and add a rich, chocolatey goodness. Feel free to swap them for nuts or dried fruits for a different twist.
For those who want to get creative, consider adding festive sprinkles or even a dash of peppermint extract for a holiday flair. You can find the exact measurements for these ingredients at the bottom of the article, ready for printing!
How to Make Holiday Cookie Exchange Ideas
Now that you have your ingredients ready, let’s dive into the fun part—making these delicious cookies! Follow these simple steps, and you’ll have a batch of cookies that will wow your guests at the cookie exchange.
Step 1: Preheat the Oven
First things first, preheat your oven to 350°F (175°C). Preheating is crucial because it ensures that your cookies bake evenly. If you skip this step, your cookies might spread too much or not rise properly. Trust me, a well-preheated oven is the secret to cookie perfection!
Step 2: Cream the Butter and Sugars
In a large bowl, cream together the softened butter, granulated sugar, and brown sugar until the mixture is smooth and fluffy. This process is essential for creating a light texture in your cookies. The air you incorporate while creaming helps them rise beautifully. Don’t rush this step; take your time to get it just right!
Step 3: Add Eggs and Vanilla
Next, beat in the eggs one at a time. This helps to incorporate them evenly into the batter. Then, stir in the vanilla extract. The vanilla adds a warm, inviting flavor that makes your cookies taste homemade. It’s like a hug in every bite!
Step 4: Combine Dry Ingredients
In a separate bowl, whisk together the all-purpose flour, baking soda, and salt. Gradually blend this dry mixture into the creamed mixture. Mixing the dry ingredients separately helps to ensure that the baking soda and salt are evenly distributed. This step is key to achieving that perfect cookie texture!
Step 5: Fold in Chocolate Chips
Now, it’s time to fold in the chocolate chips. Gently mix them into the dough until they’re evenly distributed. If you want to switch things up, consider using nuts or dried fruits instead. They add a delightful twist and can cater to different tastes!
Step 6: Drop Cookies on Sheets
Using a spoon or cookie scoop, drop rounded spoonfuls of dough onto ungreased cookie sheets. Make sure to leave enough space between each cookie, as they will spread while baking. Aim for about two inches apart. This little tip will help you avoid a cookie monster mash-up!
Step 7: Bake to Perfection
Place the cookie sheets in the preheated oven and bake for 10 to 12 minutes. Keep an eye on them! You want the edges to be nicely browned while the centers remain soft. If you’re unsure, a toothpick inserted in the center should come out with a few moist crumbs.
Step 8: Cool and Serve
Once baked, let the cookies cool on wire racks. This cooling process allows them to firm up and makes them easier to handle. Store your cookies in an airtight container to keep them fresh. They’ll be ready to impress your guests at the cookie exchange!
Tips for Success
- Always measure your ingredients accurately for consistent results.
- Use room temperature butter for easier creaming and better texture.
- Don’t overmix the dough after adding flour; this keeps cookies tender.
- Chill the dough for 30 minutes if it’s too soft to scoop.
- Experiment with different mix-ins like nuts or dried fruits for variety.
Equipment Needed for Holiday Cookie Exchange Ideas
- Mixing bowls: A large bowl for mixing and a smaller one for dry ingredients. Any size will do!
- Electric mixer: A hand mixer works great, but a whisk and some elbow grease can do the job too.
- Baking sheets: Use any flat, oven-safe tray; parchment paper can help with cleanup.
- Cookie scoop or spoon: A scoop ensures even cookie sizes, but a regular spoon works just fine.
- Wire racks: These are perfect for cooling cookies, but a plate can work in a pinch.
Variations on Holiday Cookie Exchange Ideas
- Nutty Delight: Swap chocolate chips for chopped walnuts or pecans for a crunchy texture.
- Dried Fruit Medley: Incorporate dried cranberries, apricots, or raisins for a chewy, fruity twist.
- Gluten-Free Option: Use a gluten-free all-purpose flour blend to make these cookies suitable for gluten-sensitive guests.
- Vegan Version: Replace butter with coconut oil and use flax eggs instead of regular eggs for a plant-based treat.
- Minty Fresh: Add a teaspoon of peppermint extract and top with crushed candy canes for a festive flavor.
Serving Suggestions for Holiday Cookie Exchange Ideas
- Pair your cookies with a warm cup of cocoa or spiced cider for a cozy treat.
- Present cookies on a festive platter, garnished with seasonal greenery or ornaments.
- Offer a variety of dips, like chocolate or caramel, for an interactive dessert experience.
- Include a selection of milk, almond milk, or eggnog for a delightful beverage spread.
FAQs about Holiday Cookie Exchange Ideas
As you prepare for your holiday cookie exchange, you might have a few questions. Here are some common queries I’ve encountered, along with helpful answers to guide you through the process.
Can I make the cookie dough ahead of time?
Absolutely! You can prepare the dough a day in advance and store it in the refrigerator. Just remember to let it sit at room temperature for a few minutes before scooping and baking. This makes it easier to handle!
How do I store leftover cookies?
To keep your cookies fresh, store them in an airtight container at room temperature. If you want to keep them longer, consider freezing them. Just layer them with parchment paper to prevent sticking!
What if I have dietary restrictions among my guests?
Don’t worry! You can easily adapt these Holiday Cookie Exchange Ideas. Consider making a gluten-free batch or a vegan version to accommodate different dietary needs. Everyone deserves a sweet treat!
How can I make my cookies look festive?
Adding festive sprinkles or drizzling melted chocolate on top can elevate the presentation. You can also use cookie cutters to create fun shapes that fit the holiday theme!
What’s the best way to transport cookies to the exchange?
Use a sturdy container with a lid to transport your cookies. If you’re stacking them, place parchment paper between layers to prevent them from sticking together. This way, they’ll arrive looking as good as they taste!
Final Thoughts on Holiday Cookie Exchange Ideas
As the aroma of freshly baked cookies fills your home, you can’t help but feel the warmth of the holiday spirit. These Holiday Cookie Exchange Ideas not only bring joy to your taste buds but also create cherished moments with family and friends. Each cookie is a little piece of love, crafted with care and shared with laughter. Whether you’re a seasoned baker or a novice, this recipe is a delightful way to spread cheer. So, gather your loved ones, share your creations, and make this holiday season unforgettable with sweet memories and delicious treats!
PrintHoliday Cookie Exchange Ideas to Delight Your Guests!

A collection of delightful holiday cookie exchange ideas that will impress your guests and make your gathering memorable.
- Prep Time: 20 minutes
- Cook Time: 12 minutes
- Total Time: 32 minutes
- Yield: 24 cookies 1x
- Category: Dessert
- Method: Baking
- Cuisine: American
- Diet: Vegetarian
Ingredients
- 2 cups all-purpose flour
- 1 cup unsalted butter, softened
- 1 cup granulated sugar
- 1 cup brown sugar, packed
- 2 large eggs
- 1 teaspoon vanilla extract
- 1 teaspoon baking soda
- 1/2 teaspoon salt
- 2 cups chocolate chips
Instructions
- Preheat your oven to 350°F (175°C).
- In a large bowl, cream together the butter, granulated sugar, and brown sugar until smooth.
- Beat in the eggs one at a time, then stir in the vanilla.
- Combine the flour, baking soda, and salt; gradually blend into the creamed mixture.
- Fold in the chocolate chips.
- Drop by rounded spoonfuls onto ungreased cookie sheets.
- Bake for 10 to 12 minutes in the preheated oven, or until edges are nicely browned.
- Let cool on wire racks before serving.
Notes
- Feel free to substitute chocolate chips with nuts or dried fruits.
- Store cookies in an airtight container to maintain freshness.
- Consider adding festive sprinkles for a holiday touch.
Nutrition
- Serving Size: 1 cookie
- Calories: 150
- Sugar: 10g
- Sodium: 100mg
- Fat: 7g
- Saturated Fat: 4g
- Unsaturated Fat: 2g
- Trans Fat: 0g
- Carbohydrates: 20g
- Fiber: 1g
- Protein: 2g
- Cholesterol: 20mg