Garlic Butter Chickpeas: A Flavorful Delight Awaits!
Introduction to Garlic Butter Chickpeas
As a busy mom, I know how challenging it can be to whip up a meal that’s both quick and delicious. That’s where my garlic butter chickpeas come in! This dish is a delightful blend of rich flavors and wholesome ingredients, making it perfect for those hectic weeknights. With just a handful of pantry staples, you can create a meal that not only satisfies your family but also impresses your friends. Trust me, once you try these garlic butter chickpeas, they’ll become a go-to recipe in your kitchen!
Why You’ll Love This Garlic Butter Chickpeas
These garlic butter chickpeas are a lifesaver for busy days! They come together in just 15 minutes, making them a perfect weeknight side dish or a quick lunch. The rich, buttery flavor combined with the aromatic garlic creates a taste sensation that’s hard to resist. Plus, they’re packed with protein and fiber, so you can feel good about serving them to your family. What’s not to love?
Ingredients for Garlic Butter Chickpeas
Gathering the right ingredients is key to making these garlic butter chickpeas shine. Here’s what you’ll need:
- Chickpeas: A can of chickpeas is the star of this dish. They’re protein-packed and provide a hearty texture.
- Butter: This adds richness and depth. You can use unsalted butter for more control over the seasoning.
- Garlic: Freshly minced garlic brings an irresistible aroma and flavor. It’s the heart of this recipe!
- Paprika: This spice adds a warm, smoky flavor. Feel free to use smoked paprika for an extra kick.
- Salt and Pepper: Essential for enhancing the flavors. Adjust to your taste preference.
- Fresh Parsley: A sprinkle of chopped parsley adds a pop of color and freshness. It’s the perfect finishing touch!
For those who like a bit of heat, consider adding red pepper flakes. They can elevate the dish to a whole new level!
All the exact measurements are at the bottom of the article, ready for you to print out. Happy cooking!
How to Make Garlic Butter Chickpeas
Now that you have your ingredients ready, let’s dive into making these garlic butter chickpeas. This process is simple and quick, perfect for those busy evenings when you need a delicious meal in no time. Follow these steps, and you’ll have a flavorful dish that everyone will love!
Step 1: Melt the Butter
Start by placing a skillet on the stove over medium heat. Add the butter and let it melt slowly. Keep an eye on it! You want it to melt without burning. The goal is to create a rich, buttery base for our chickpeas. If it starts to brown, lower the heat a bit.
Step 2: Sauté the Garlic
Once the butter is melted, it’s time to add the minced garlic. Stir it into the butter and let it sauté for about a minute. The aroma will fill your kitchen, and trust me, it’s heavenly! This step is crucial because the garlic infuses the butter with flavor, making every bite of chickpeas delicious.
Step 3: Add the Chickpeas
Now, grab your drained chickpeas and add them to the skillet. Stir them gently to coat each chickpea in that luscious garlic butter. This is where the magic happens! The chickpeas will soak up all that flavor, making them irresistible.
Step 4: Season and Cook
Next, sprinkle in the paprika, salt, and pepper. Give everything a good stir to combine. Let the chickpeas cook for an additional 5-7 minutes, stirring occasionally. This allows them to get a bit crispy and enhances the flavors. You’ll notice the chickpeas turning golden brown, which is a sign they’re ready!
Step 5: Garnish and Serve
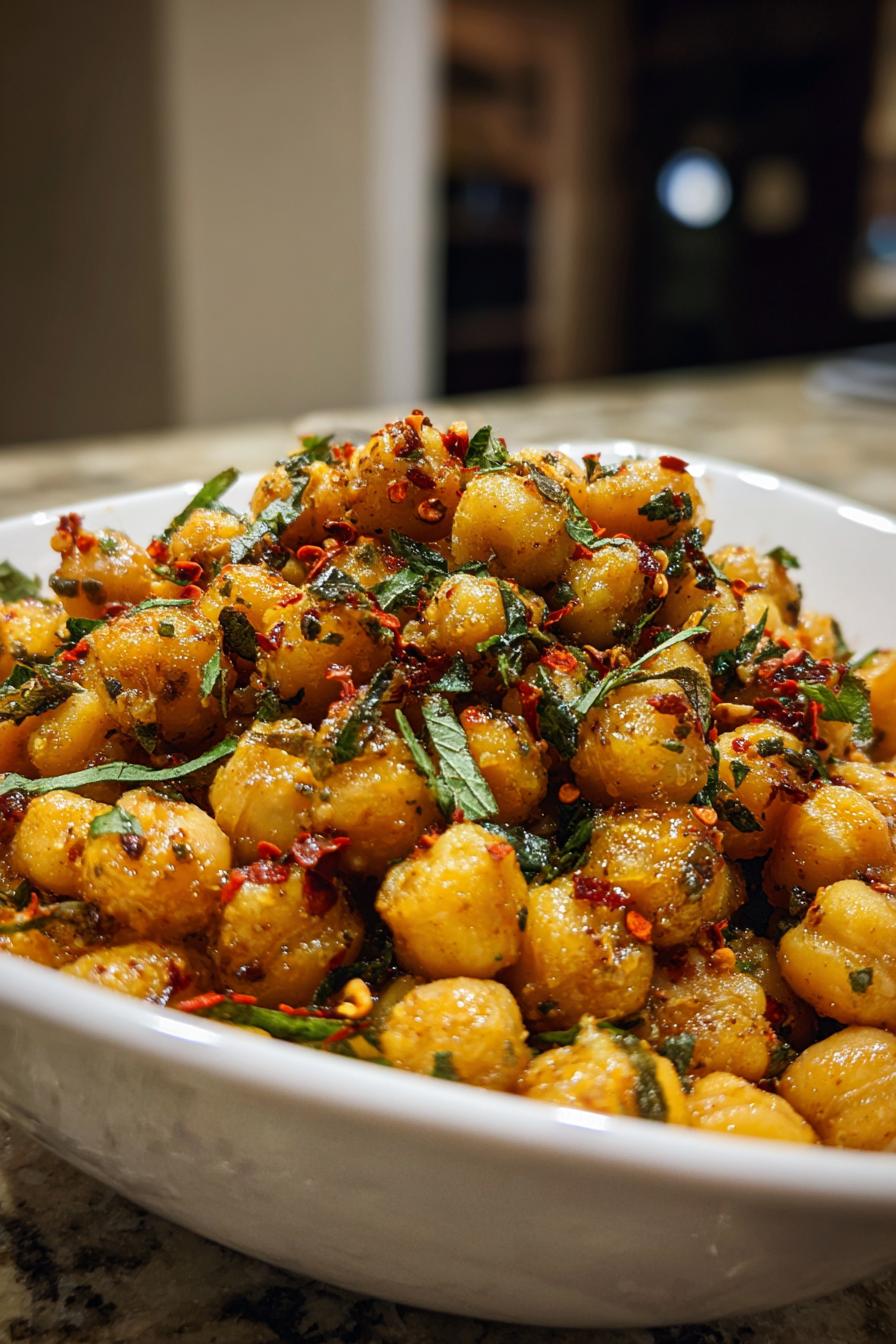
Once cooked, remove the skillet from the heat. It’s time to add a touch of freshness! Garnish your garlic butter chickpeas with chopped parsley. This not only adds color but also a burst of flavor. Serve them warm, and watch your family devour this delightful dish!
Tips for Success
- Rinse the chickpeas well to remove excess sodium and improve texture.
- Use fresh garlic for the best flavor; pre-minced garlic lacks the same punch.
- Don’t rush the sautéing process; let the garlic become fragrant for maximum flavor.
- Adjust seasoning to your taste; everyone’s palate is different!
- For a creamier texture, mash a few chickpeas while cooking.
Equipment Needed
- Skillet: A non-stick skillet works best, but any skillet will do.
- Spatula: A wooden or silicone spatula is perfect for stirring.
- Measuring Spoons: Handy for measuring butter and spices.
- Can Opener: Essential for opening the chickpeas.
Variations of Garlic Butter Chickpeas
- Spicy Garlic Butter Chickpeas: Add red pepper flakes or a dash of cayenne pepper for a fiery kick.
- Lemon Garlic Butter Chickpeas: Squeeze fresh lemon juice over the chickpeas before serving for a zesty twist.
- Herbed Garlic Butter Chickpeas: Mix in dried herbs like thyme or oregano for an aromatic flavor boost.
- Cheesy Garlic Butter Chickpeas: Sprinkle grated Parmesan cheese on top just before serving for a savory finish.
- Vegan Garlic Butter Chickpeas: Substitute butter with olive oil or vegan butter for a plant-based option.
Serving Suggestions for Garlic Butter Chickpeas
- Serve over fluffy rice or quinoa for a hearty meal.
- Pair with a crisp green salad for a refreshing contrast.
- Enjoy with warm pita bread or crusty baguette to soak up the garlic butter.
- Complement with a chilled glass of white wine or sparkling water.
FAQs about Garlic Butter Chickpeas
Can I use dried chickpeas instead of canned?
Absolutely! If you prefer dried chickpeas, just soak and cook them beforehand. This will add a bit more time to your prep, but the flavor is worth it!
How can I store leftovers?
Leftover garlic butter chickpeas can be stored in an airtight container in the refrigerator for up to three days. Just reheat them in a skillet or microwave before serving.
Can I make this dish vegan?
Yes! Simply swap the butter for olive oil or a vegan butter alternative. The flavor will still be fantastic!
What can I serve with garlic butter chickpeas?
These chickpeas pair wonderfully with rice, quinoa, or a fresh salad. They also make a great topping for baked potatoes!
Can I freeze garlic butter chickpeas?
While it’s best enjoyed fresh, you can freeze them. Just make sure to cool them completely before transferring to a freezer-safe container. They can last up to three months!
Final Thoughts
Cooking should be a joyful experience, and my garlic butter chickpeas embody that spirit! This dish not only brings a burst of flavor to your table but also offers a quick solution for busy nights. I love how simple ingredients can transform into something so delightful. Whether you’re serving it as a side or a main dish, it’s sure to impress. Plus, the smiles on my family’s faces when they dig in make all the effort worthwhile. I hope you enjoy making this recipe as much as I do. Happy cooking!
PrintGarlic Butter Chickpeas: A Flavorful Delight Awaits!

Garlic Butter Chickpeas are a delicious and easy-to-make dish that combines the rich flavors of garlic and butter with protein-packed chickpeas.
- Prep Time: 5 minutes
- Cook Time: 10 minutes
- Total Time: 15 minutes
- Yield: 4 servings 1x
- Category: Side Dish
- Method: Stovetop
- Cuisine: Mediterranean
- Diet: Vegetarian
Ingredients
- 1 can chickpeas (15 oz), drained and rinsed
- 4 tablespoons butter
- 4 cloves garlic, minced
- 1 teaspoon paprika
- Salt and pepper to taste
- Fresh parsley, chopped (for garnish)
Instructions
- In a skillet, melt the butter over medium heat.
- Add the minced garlic and sauté until fragrant, about 1 minute.
- Add the drained chickpeas to the skillet and stir to coat them in the garlic butter.
- Sprinkle in the paprika, salt, and pepper, and cook for an additional 5-7 minutes, stirring occasionally.
- Remove from heat and garnish with fresh parsley before serving.
Notes
- For a spicier version, add red pepper flakes.
- Serve as a side dish or over rice for a complete meal.
- Leftovers can be stored in an airtight container in the refrigerator for up to 3 days.
Nutrition
- Serving Size: 1/4 of the recipe
- Calories: 180
- Sugar: 1g
- Sodium: 200mg
- Fat: 12g
- Saturated Fat: 7g
- Unsaturated Fat: 4g
- Trans Fat: 0g
- Carbohydrates: 15g
- Fiber: 5g
- Protein: 6g
- Cholesterol: 30mg