Miso caramel tart: Discover the sweet umami twist!
Introduction to Miso Caramel Tart
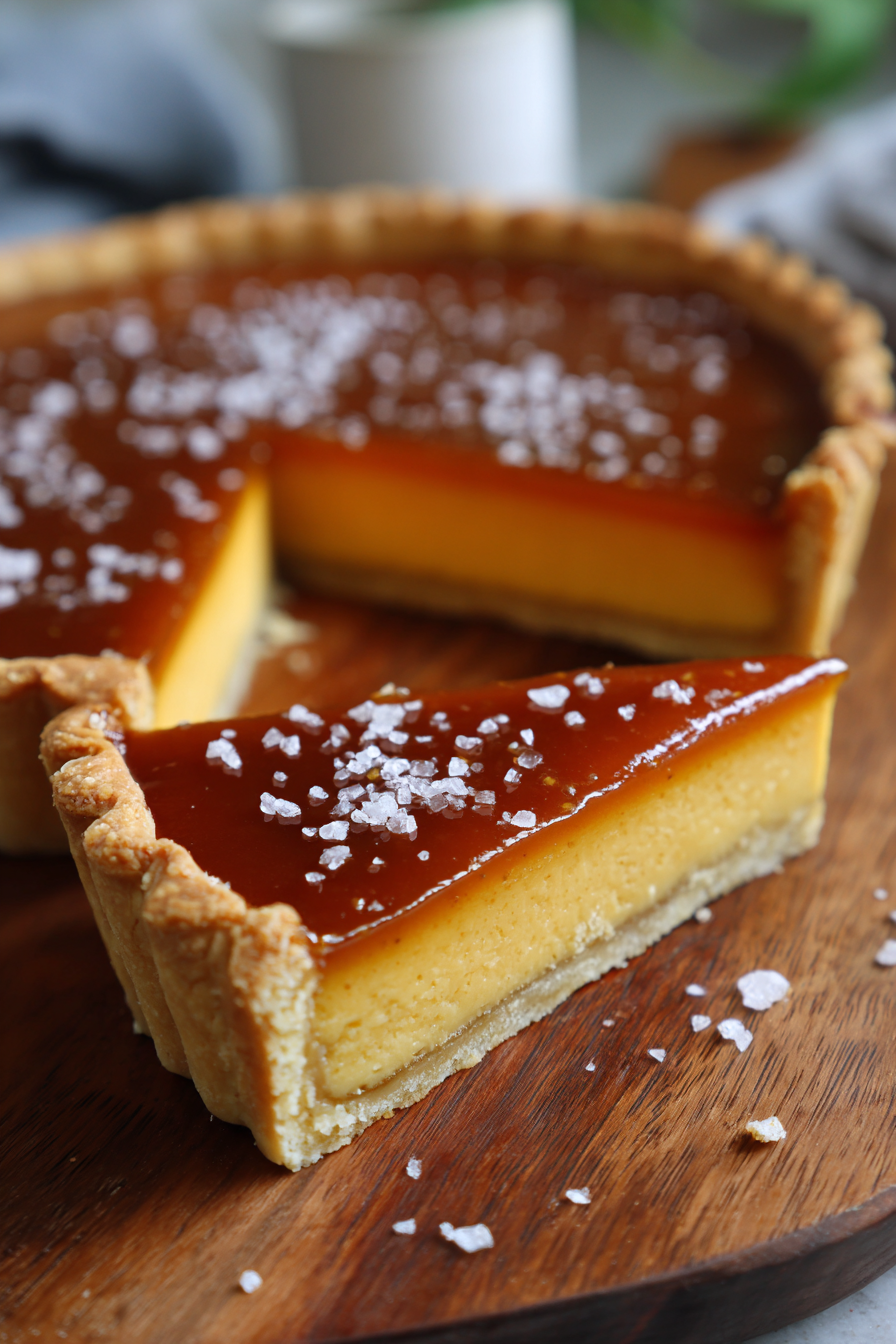
Welcome to the delightful world of the miso caramel tart! If you’re like me, juggling a busy life while trying to whip up something special can feel overwhelming. This unique dessert is a game-changer, combining the sweet allure of caramel with the savory depth of miso. It’s perfect for impressing your loved ones or simply treating yourself after a long day. With just a few ingredients and minimal fuss, you can create a stunning tart that will have everyone asking for seconds. Let’s dive into this culinary adventure together!
Why You’ll Love This Miso Caramel Tart
This miso caramel tart is not just a dessert; it’s a celebration of flavors! It’s incredibly easy to make, even on your busiest days. The sweet and savory combination will surprise your taste buds, making it a standout at any gathering. Plus, it’s a quick recipe that doesn’t skimp on elegance. You’ll love how it impresses guests while being simple enough for a weeknight treat!
Ingredients for Miso Caramel Tart
Gathering the right ingredients is the first step to creating your delicious miso caramel tart. Here’s what you’ll need:
- All-purpose flour: This is the base for your tart crust, providing structure and a tender bite.
- Unsalted butter: Softened butter adds richness and flavor to the crust, making it melt-in-your-mouth delicious.
- Powdered sugar: This sweetener gives the crust a delicate sweetness and helps achieve a fine texture.
- Salt: Just a pinch enhances the flavors, balancing the sweetness of the caramel.
- Miso paste: The star of the show! It brings a unique umami flavor that elevates the caramel to new heights.
- Granulated sugar: Essential for creating that luscious caramel flavor, it sweetens the filling beautifully.
- Heavy cream: This adds creaminess to the filling, making it rich and decadent.
- Large eggs: They help bind the filling together, giving it a smooth and silky texture.
- Vanilla extract: A splash of vanilla rounds out the flavors, adding warmth and depth.
Feel free to experiment with different types of miso for varied flavors. White miso is milder, while red miso offers a bolder taste. You can find these ingredients at your local grocery store or specialty markets. For exact measurements, check the bottom of the article where you can find a printable version!
How to Make Miso Caramel Tart
Step 1: Preheat the Oven
First things first, let’s get that oven preheating to 350°F (175°C). Preheating is crucial because it ensures even baking. If you skip this step, your tart might not set properly, and we don’t want that! So, while you prepare the crust, your oven will be warming up, ready to work its magic.
Step 2: Prepare the Tart Crust
In a mixing bowl, combine the all-purpose flour, softened butter, powdered sugar, and salt. Use your fingers or a pastry cutter to mix until the texture resembles coarse crumbs. You want it crumbly but not too dry. This crust will be the perfect base for our sweet and savory filling!
Step 3: Bake the Tart Shell
Now, press the crust mixture into your tart pan evenly. Make sure to cover the bottom and sides well. Bake it in the preheated oven for about 15 minutes. You’ll know it’s done when it’s lightly golden. Keep an eye on it; burnt crust is not the goal here!
Step 4: Make the Miso Caramel Filling
In a saucepan over medium heat, combine the miso paste and granulated sugar. Stir until the mixture melts together, creating a smooth blend. This step is where the magic happens! The miso adds a depth of flavor that will surprise your taste buds. Just be careful not to let it boil!
Step 5: Combine Ingredients
Once your miso caramel mixture has cooled slightly, stir in the heavy cream. Then, whisk in the eggs and vanilla extract until everything is well combined. The mixture should be smooth and glossy. This is the filling that will make your tart unforgettable!
Step 6: Fill the Tart Shell
Carefully pour the miso caramel filling into the baked tart shell. Use a spatula to spread it evenly. This ensures every slice has that delicious filling. Don’t worry if it looks a bit wobbly; it will set beautifully in the oven!
Step 7: Bake the Tart
Return the tart to the oven and bake for an additional 20-25 minutes. You’ll know it’s done when the edges are set but the center still has a slight jiggle. This is key for that perfect texture. Trust me, it’s worth the wait!
Step 8: Cool and Serve
Once baked, remove the tart from the oven and let it cool completely in the pan. This cooling time allows the filling to firm up. When you’re ready to serve, slice it up and consider adding a dollop of whipped cream on top. It’s the perfect finishing touch!
Tips for Success
- Use room temperature ingredients for a smoother filling.
- Don’t rush the cooling process; it helps the tart set properly.
- Experiment with different miso types for unique flavor profiles.
- Keep an eye on the baking time; every oven is different!
- For a fun twist, add a sprinkle of sea salt on top before serving.
Equipment Needed
- Tart pan: A standard tart pan works best, but a pie dish can be a great alternative.
- Mixing bowls: Use any size you have on hand; just make sure they’re sturdy.
- Whisk: A simple whisk will do, but an electric mixer can save time.
- Spatula: A rubber spatula is perfect for scraping and spreading.
- Measuring cups and spoons: Essential for accuracy, but you can eyeball it if needed!
Variations of Miso Caramel Tart
- Chocolate Miso Caramel Tart: Add melted dark chocolate to the filling for a rich, decadent twist.
- Nutty Miso Caramel Tart: Incorporate chopped nuts like pecans or walnuts into the filling for added crunch and flavor.
- Gluten-Free Option: Substitute all-purpose flour with a gluten-free blend to make the crust suitable for gluten-sensitive diets.
- Vegan Miso Caramel Tart: Use coconut cream instead of heavy cream and flax eggs as a substitute for regular eggs.
- Fruit-Infused Tart: Top the tart with fresh fruits like sliced pears or apples for a refreshing contrast to the rich filling.
Serving Suggestions for Miso Caramel Tart
- Pair with a dollop of freshly whipped cream for added richness.
- Serve alongside a scoop of vanilla ice cream for a delightful contrast.
- Drizzle with a bit of chocolate sauce for an extra indulgent touch.
- Garnish with a sprinkle of sea salt to enhance the flavors.
- Enjoy with a cup of green tea for a refreshing balance.
FAQs about Miso Caramel Tart
Can I use different types of miso for this tart?
Absolutely! Each type of miso brings its own unique flavor. White miso is milder and sweeter, while red miso has a stronger, more robust taste. Feel free to experiment and find your favorite!
How should I store leftovers of the miso caramel tart?
Store any leftovers in the refrigerator, covered, for up to three days. Just make sure to let it cool completely before wrapping it up. It’s delicious chilled!
Can I make this tart ahead of time?
Yes! This miso caramel tart is perfect for making ahead. You can bake it a day in advance and let it chill in the fridge. Just remember to add any toppings right before serving!
What can I serve with the miso caramel tart?
Pair it with whipped cream, vanilla ice cream, or fresh fruit. A drizzle of chocolate sauce or a sprinkle of sea salt can elevate the flavors even more!
Is this tart suitable for special diets?
Yes! You can easily adapt this recipe for gluten-free or vegan diets. Just swap out the flour and cream as needed, and you’ll have a delicious dessert for everyone!
Final Thoughts
Creating a miso caramel tart is more than just baking; it’s an experience that brings joy to your kitchen. The delightful blend of sweet and savory flavors will leave your family and friends in awe. I love how this tart transforms simple ingredients into a stunning dessert that sparks conversation and smiles. Whether you’re celebrating a special occasion or just treating yourself, this recipe is a reminder that cooking can be both fun and rewarding. So, roll up your sleeves, embrace the process, and enjoy every delicious bite of your homemade creation!
PrintMiso caramel tart: Discover the sweet umami twist!
A unique dessert that combines the sweetness of caramel with the savory depth of miso, creating a delightful umami flavor in a tart.
- Prep Time: 20 minutes
- Cook Time: 40 minutes
- Total Time: 1 hour
- Yield: 8 servings 1x
- Category: Dessert
- Method: Baking
- Cuisine: Fusion
- Diet: Vegetarian
Ingredients
- 1 cup all-purpose flour
- 1/2 cup unsalted butter, softened
- 1/4 cup powdered sugar
- 1/4 teaspoon salt
- 1/4 cup miso paste
- 1 cup granulated sugar
- 1/2 cup heavy cream
- 2 large eggs
- 1 teaspoon vanilla extract
Instructions
- Preheat the oven to 350°F (175°C).
- In a bowl, mix flour, butter, powdered sugar, and salt until crumbly.
- Press the mixture into a tart pan and bake for 15 minutes.
- In a saucepan, combine miso paste and granulated sugar over medium heat until melted.
- Stir in heavy cream, then remove from heat and let cool slightly.
- Whisk in eggs and vanilla extract until smooth.
- Pour the miso caramel mixture into the tart shell.
- Bake for an additional 20-25 minutes until set.
- Let cool before serving.
Notes
- Serve with a dollop of whipped cream for added richness.
- Store leftovers in the refrigerator for up to 3 days.
- Experiment with different types of miso for varied flavors.
Nutrition
- Serving Size: 1 slice
- Calories: 320
- Sugar: 25g
- Sodium: 150mg
- Fat: 18g
- Saturated Fat: 10g
- Unsaturated Fat: 8g
- Trans Fat: 0g
- Carbohydrates: 35g
- Fiber: 1g
- Protein: 4g
- Cholesterol: 80mg