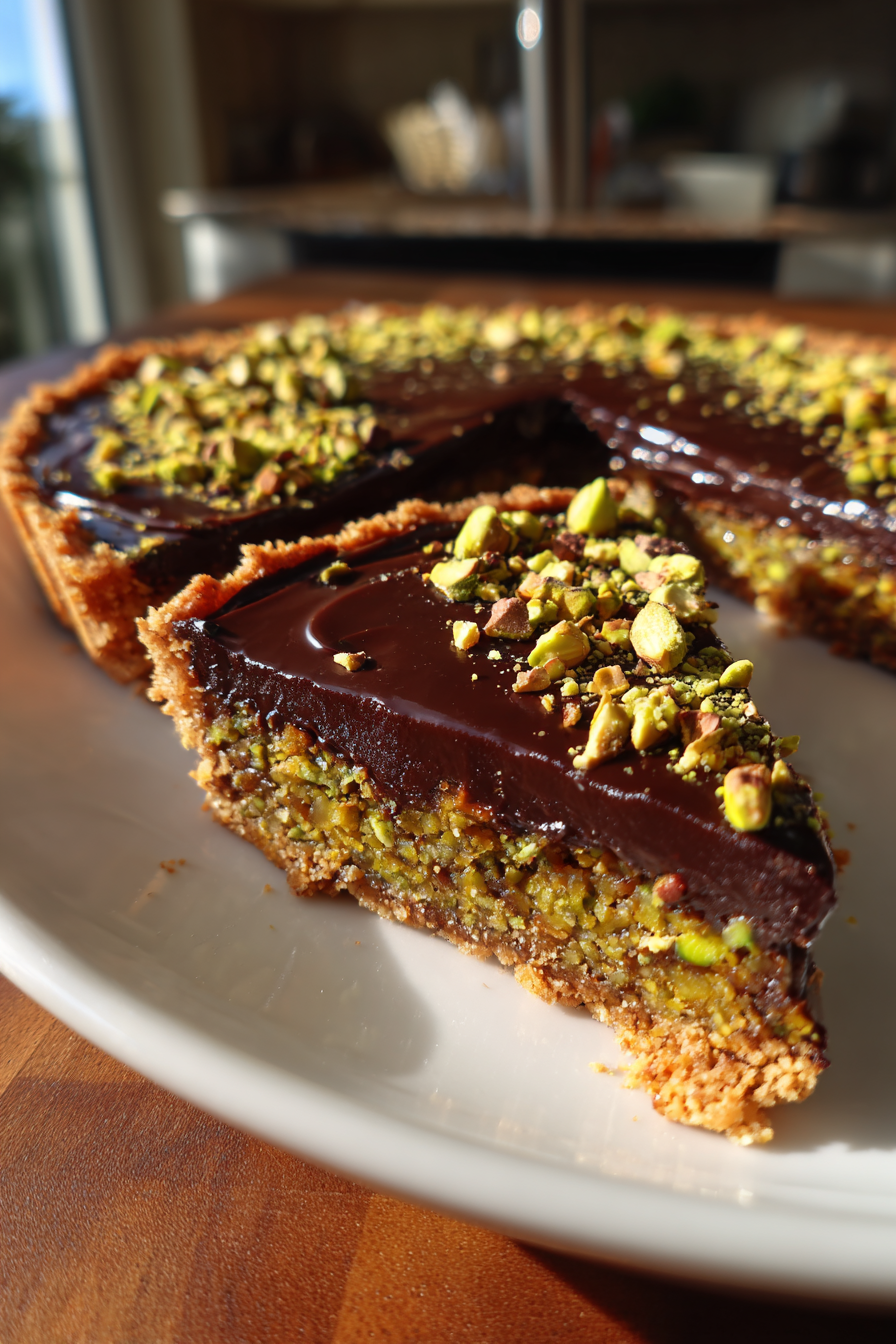
Chocolate pistachio tarts: A dessert you’ll crave forever!
Introduction to Chocolate Pistachio Tarts
As a busy mom, I know how precious time can be, especially when it comes to whipping up something special in the kitchen. That’s why I absolutely adore these chocolate pistachio tarts! They’re not just a dessert; they’re a delightful experience that combines rich chocolate with the crunch of pistachios. Perfect for impressing guests or simply treating yourself after a long day, these tarts are quick to make and even easier to enjoy. Trust me, once you try them, you’ll find yourself craving these little bites of heaven again and again!
Why You’ll Love This Chocolate Pistachio Tarts
These chocolate pistachio tarts are a dream come true for anyone short on time but big on flavor. They come together quickly, making them perfect for busy weeknights or last-minute gatherings. The combination of creamy chocolate and crunchy pistachios creates a taste sensation that will leave your family and friends raving. Plus, they look stunning on any dessert table, so you can impress without the stress!
Ingredients for Chocolate Pistachio Tarts
Gathering the right ingredients is the first step to creating these delightful chocolate pistachio tarts. Here’s what you’ll need:
- All-purpose flour: This forms the base of your tart shell, giving it structure and a tender crumb.
- Unsweetened cocoa powder: It adds a rich chocolate flavor to the crust, making it irresistible.
- Powdered sugar: This sweetens the crust and helps create a smooth texture.
- Unsalted butter: Softened butter brings richness and helps bind the crust together.
- Salt: Just a pinch enhances the flavors and balances the sweetness.
- Granulated sugar: This adds sweetness to the filling, complementing the dark chocolate.
- Heavy cream: Essential for making the luscious chocolate filling, it adds creaminess.
- Dark chocolate: The star of the show! Choose high-quality chocolate for the best flavor.
- Pistachios: Chopped pistachios provide a delightful crunch and nutty flavor, elevating the tarts.
- Vanilla extract: A splash of vanilla enhances the overall flavor profile, making it more aromatic.
Feel free to get creative! You can swap in almond flour for a gluten-free option or use milk chocolate if you prefer a sweeter taste. For exact measurements, check the bottom of the article where you can find everything you need for printing.
How to Make Chocolate Pistachio Tarts
Now that you have all your ingredients ready, let’s dive into the fun part—making these chocolate pistachio tarts! Follow these simple steps, and you’ll be on your way to creating a dessert that will wow everyone.
Step 1: Preheat the Oven
First things first, preheat your oven to 350°F (175°C). Preheating is crucial because it ensures that your tart shells bake evenly. If you skip this step, you might end up with undercooked or unevenly baked crusts. Trust me, a little patience here goes a long way!
Step 2: Prepare the Tart Shells
In a large mixing bowl, combine the all-purpose flour, cocoa powder, powdered sugar, and salt. Whisk them together until they’re well blended. Next, add the softened butter. Use your fingers or a pastry cutter to mix until the mixture resembles coarse crumbs. This is the foundation of your tart shell, so make sure it’s crumbly yet holds together when pressed.
Step 3: Bake the Tart Shells
Now, it’s time to shape the crust! Press the crumbly mixture into your tart pans, making sure to cover the bottom and sides evenly. Bake them in the preheated oven for about 10-12 minutes. You’ll know they’re done when they look set and slightly firm to the touch. Let them cool completely before adding the filling; this step is key to avoiding a soggy tart!
Step 4: Make the Chocolate Filling
While your tart shells are cooling, let’s whip up that luscious chocolate filling. In a saucepan, heat the heavy cream over medium heat until it just starts to boil. Remove it from the heat and add the chopped dark chocolate. Stir until the chocolate melts completely and the mixture is smooth. This is where the magic happens! Don’t forget to stir in the vanilla extract and half of the chopped pistachios for that extra flavor.
Step 5: Assemble the Tarts
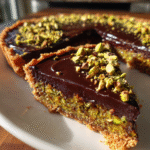
Once your tart shells are cool, it’s time to fill them! Pour the rich chocolate mixture into each shell, filling them to the top. Then, sprinkle the remaining chopped pistachios on top for a beautiful finish. The contrast of the green pistachios against the dark chocolate is simply stunning!
Step 6: Chill and Serve
Finally, pop the tarts into the refrigerator and let them chill for at least 2 hours. This chilling time allows the filling to set properly, making it easier to slice and serve. Plus, it enhances the flavors, making each bite even more delightful. When you’re ready to serve, just slice and enjoy the compliments!
Tips for Success
- Use high-quality dark chocolate for a richer flavor.
- Make sure your tart shells are completely cool before adding the filling to avoid sogginess.
- Chill the tarts for at least 2 hours to ensure the filling sets perfectly.
- Feel free to experiment with different nuts or add a pinch of sea salt on top for extra flavor.
- These tarts can be made a day in advance, making them perfect for entertaining!
Equipment Needed
- Tart pans: You can use individual tartlet pans or a larger tart pan.
- Mixing bowls: A large bowl for mixing the crust and a smaller one for the filling.
- Whisk: A simple whisk works wonders for blending ingredients.
- Pastry cutter or fork: For mixing the butter into the dry ingredients.
- Spatula: Perfect for pouring and spreading the chocolate filling.
Variations of Chocolate Pistachio Tarts
- Nut-Free Option: Replace pistachios with sunflower seeds or pumpkin seeds for a nut-free alternative.
- Gluten-Free Crust: Use almond flour or a gluten-free flour blend to make the tart shells gluten-free.
- Mint Chocolate Twist: Add a few drops of peppermint extract to the chocolate filling for a refreshing minty flavor.
- Fruit Topping: Top the tarts with fresh raspberries or strawberries for a fruity contrast to the rich chocolate.
- Vegan Version: Substitute butter with coconut oil and use dairy-free chocolate and plant-based cream for a vegan-friendly treat.
Serving Suggestions for Chocolate Pistachio Tarts
- Pair with a dollop of whipped cream or a scoop of vanilla ice cream for extra indulgence.
- Serve alongside a fresh fruit salad to balance the richness of the tarts.
- Drizzle with a bit of chocolate sauce for a stunning presentation.
- Enjoy with a cup of coffee or a glass of dessert wine for a delightful treat.
- Garnish with fresh mint leaves for a pop of color and freshness.
FAQs about Chocolate Pistachio Tarts
Can I make chocolate pistachio tarts ahead of time?
Absolutely! These tarts can be made a day in advance. Just store them in the refrigerator until you’re ready to serve. This makes them perfect for entertaining or busy weeknights!
What can I substitute for pistachios?
If you’re looking for a nut-free option, sunflower seeds or pumpkin seeds work beautifully. You can also try almonds or hazelnuts for a different flavor profile.
How do I store leftover tarts?
Store any leftover chocolate pistachio tarts in an airtight container in the refrigerator. They’ll stay fresh for up to three days, but trust me, they won’t last that long!
Can I use milk chocolate instead of dark chocolate?
Yes, you can! Using milk chocolate will give the tarts a sweeter flavor. Just keep in mind that the richness will be different, but still delicious!
What’s the best way to serve these tarts?
These tarts shine when served chilled. Pair them with whipped cream, fresh berries, or a drizzle of chocolate sauce for an extra special touch. Enjoy!
Final Thoughts
Creating these chocolate pistachio tarts is more than just baking; it’s about crafting a moment of joy. Each bite is a delightful dance of rich chocolate and crunchy pistachios that brings smiles to faces, young and old alike. Whether you’re celebrating a special occasion or simply treating yourself after a long day, these tarts are sure to impress. I love how they can be made ahead of time, allowing you to savor the sweet moments without the stress. So, roll up your sleeves and indulge in this delicious adventure—you won’t regret it!
PrintChocolate pistachio tarts: A dessert you’ll crave forever!
Delicious chocolate pistachio tarts that combine rich chocolate with crunchy pistachios for a delightful dessert experience.
- Prep Time: 30 minutes
- Cook Time: 15 minutes
- Total Time: 2 hours 45 minutes
- Yield: 12 tarts 1x
- Category: Dessert
- Method: Baking
- Cuisine: American
- Diet: Vegetarian
Ingredients
- 1 cup all-purpose flour
- 1/2 cup unsweetened cocoa powder
- 1/4 cup powdered sugar
- 1/2 cup unsalted butter, softened
- 1/4 teaspoon salt
- 1/4 cup granulated sugar
- 1/2 cup heavy cream
- 1 cup dark chocolate, chopped
- 1/2 cup pistachios, chopped
- 1 teaspoon vanilla extract
Instructions
- Preheat the oven to 350°F (175°C).
- In a bowl, mix flour, cocoa powder, powdered sugar, and salt.
- Add softened butter and mix until crumbly.
- Press the mixture into tart pans and bake for 10-12 minutes.
- In a saucepan, heat heavy cream until just boiling.
- Remove from heat and add chopped chocolate, stirring until smooth.
- Stir in vanilla extract and half of the chopped pistachios.
- Pour the chocolate mixture into the cooled tart shells.
- Sprinkle the remaining pistachios on top.
- Chill in the refrigerator for at least 2 hours before serving.
Notes
- Ensure the tart shells are completely cooled before adding the chocolate filling.
- For a richer flavor, use high-quality dark chocolate.
- These tarts can be made a day in advance.
Nutrition
- Serving Size: 1 tart
- Calories: 250
- Sugar: 15g
- Sodium: 50mg
- Fat: 15g
- Saturated Fat: 8g
- Unsaturated Fat: 5g
- Trans Fat: 0g
- Carbohydrates: 30g
- Fiber: 2g
- Protein: 4g
- Cholesterol: 30mg