Yogurt ice cream popsicles that you’ll crave all summer!
Introduction to Yogurt Ice Cream Popsicles
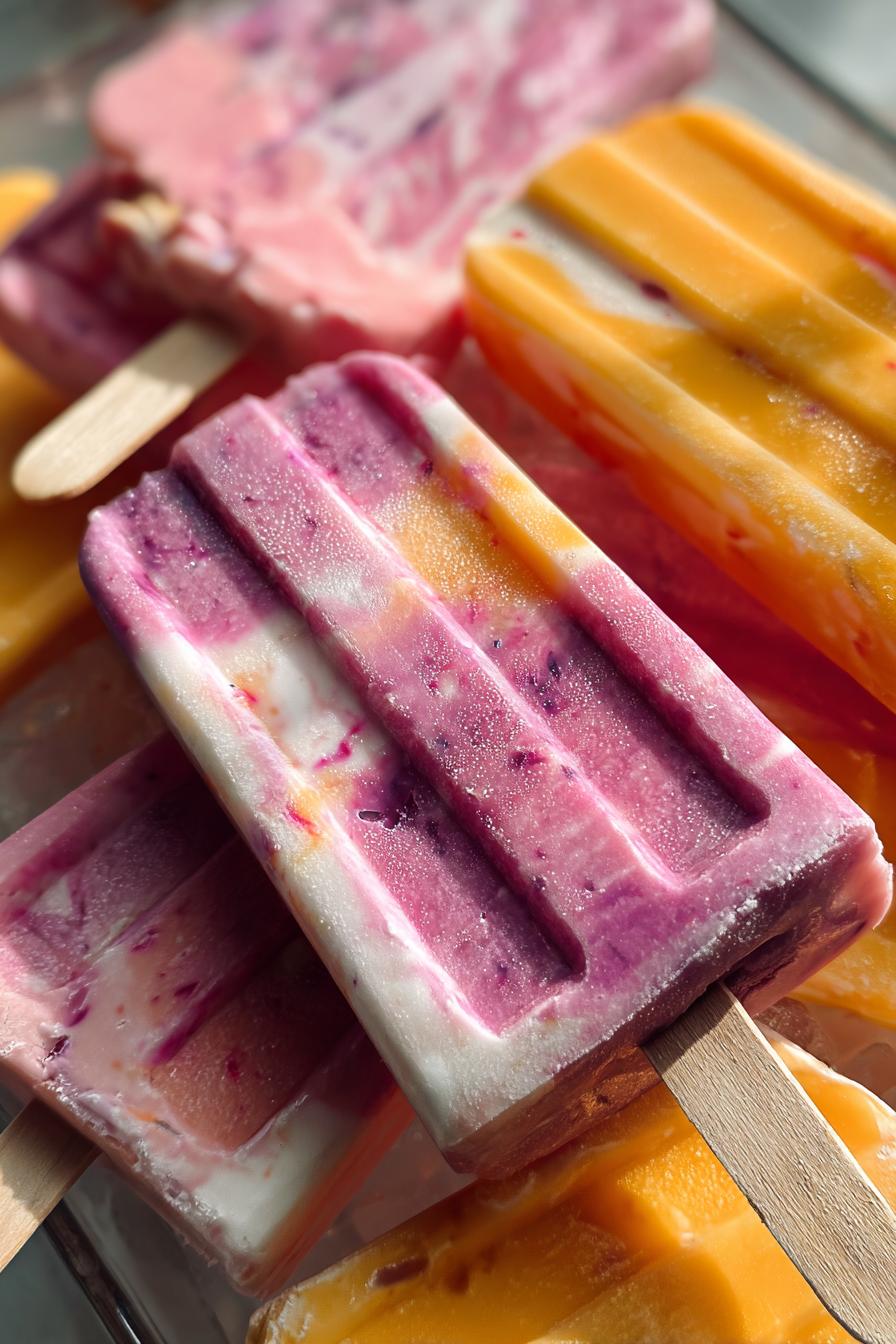
Summer is here, and with it comes the craving for something cool and refreshing. That’s where these delightful yogurt ice cream popsicles come in! As a busy mom, I know how important it is to have quick and easy treats on hand that everyone will love. These popsicles are not only simple to make, but they also pack a nutritious punch. Imagine a sweet, creamy bite filled with vibrant berries, perfect for those hot afternoons. Trust me, once you try these, they’ll become your go-to summer dessert!
Why You’ll Love This Yogurt Ice Cream Popsicles
These yogurt ice cream popsicles are a game-changer for busy days! They’re incredibly easy to whip up, taking just 15 minutes of prep time. Plus, they’re a healthier alternative to store-bought treats, so you can indulge without the guilt. The burst of fresh berries adds a delightful flavor, making them a hit with kids and adults alike. Trust me, once you taste these, you’ll be hooked all summer long!
Ingredients for Yogurt Ice Cream Popsicles
Gathering the right ingredients is the first step to creating these delicious yogurt ice cream popsicles. Here’s what you’ll need:
- Yogurt: The base of our popsicles. I recommend using full-fat yogurt for a creamier texture, but low-fat works too!
- Honey or Maple Syrup: This natural sweetener adds just the right amount of sweetness. You can adjust the quantity based on your taste preferences.
- Mixed Berries: Fresh or frozen, these beauties bring vibrant color and flavor. Think strawberries, blueberries, and raspberries for a delightful mix!
- Vanilla Extract: A splash of this adds depth to the flavor, making each bite even more enjoyable.
- Granola (optional): For those who love a little crunch, granola adds a delightful texture. It’s not necessary, but it’s a fun addition!
Feel free to get creative! You can swap the berries for your favorite fruits, like mango or peaches. The exact measurements for these ingredients are at the bottom of the article, ready for you to print out and take to the kitchen!
How to Make Yogurt Ice Cream Popsicles
Making yogurt ice cream popsicles is a breeze! Follow these simple steps, and you’ll have a delicious treat ready to enjoy in no time. Let’s dive in!
Step 1: Combine the Base
Start by grabbing a mixing bowl. Add your yogurt, honey (or maple syrup), and vanilla extract. Using a whisk or spatula, mix everything together until it’s smooth and creamy. This is the foundation of your popsicles, so make sure it’s well combined. The sweetness of the honey and the richness of the yogurt will create a delightful base!
Step 2: Add the Berries
Next, it’s time to bring in the berries! Gently fold in your mixed berries into the yogurt mixture. Use a spatula to carefully combine them without smashing the berries. You want those beautiful bursts of color and flavor to shine through in each popsicle. The berries will add a refreshing twist that’s perfect for summer!
Step 3: Optional Granola
If you’re feeling adventurous, now’s the time to add granola! Sprinkle it into the mixture and fold it in gently. This adds a delightful crunch to your yogurt ice cream popsicles. It’s not necessary, but it can elevate the texture and make each bite even more enjoyable. Plus, who doesn’t love a little extra crunch?
Step 4: Fill the Molds
Now, grab your popsicle molds. Carefully pour the yogurt mixture into each mold, leaving a little space at the top. This is important because the mixture will expand as it freezes. If you overfill, you might end up with a messy freezer! Insert the sticks into the molds, making sure they’re centered.
Step 5: Freeze
It’s time for the magic to happen! Place the filled molds in the freezer and let them freeze for at least 4-6 hours. To check if they’re ready, gently wiggle a popsicle stick. If it feels solid, you’re good to go! Patience is key here, but trust me, the wait will be worth it!
Step 6: Enjoy!
Once your yogurt ice cream popsicles are frozen solid, it’s time to enjoy them! To remove the popsicles from the molds, run warm water over the outside for a few seconds. This will help loosen them up. Then, gently pull them out and savor the deliciousness. You’ve just created a refreshing treat that’s perfect for those hot summer days!
Tips for Success
- Use full-fat yogurt for creamier popsicles.
- Experiment with different fruits like mango or peaches for variety.
- Don’t skip the granola; it adds a delightful crunch!
- Make sure to leave space in the molds to prevent overflow.
- For easier removal, run warm water over the molds before pulling out the popsicles.
Equipment Needed
- Popsicle Molds: Essential for shaping your treats. If you don’t have molds, use small cups or ice cube trays!
- Mixing Bowl: A medium-sized bowl works best for combining ingredients.
- Whisk or Spatula: For mixing the yogurt and sweeteners smoothly.
- Measuring Cups: Handy for accurate ingredient portions.
Variations
- Fruit Swaps: Try using different fruits like peaches, mangoes, or even kiwi for a tropical twist!
- Dairy-Free Option: Substitute yogurt with coconut yogurt or almond yogurt for a dairy-free treat.
- Chocolate Lovers: Add cocoa powder or chocolate chips to the yogurt mixture for a chocolatey delight.
- Nutty Crunch: Mix in chopped nuts like almonds or walnuts instead of granola for added protein and crunch.
- Herbal Infusion: Add a hint of fresh mint or basil for a refreshing herbal flavor that pairs beautifully with berries.
Serving Suggestions
- Pair your yogurt ice cream popsicles with a refreshing glass of iced tea or lemonade for a perfect summer combo.
- Serve them on a colorful platter, garnished with fresh mint leaves for a pop of color.
- For a fun twist, dip the popsicles in melted chocolate and sprinkle with nuts before freezing!
FAQs about Yogurt Ice Cream Popsicles
Can I use non-dairy yogurt for these popsicles?
Absolutely! You can substitute regular yogurt with coconut yogurt or almond yogurt for a delicious dairy-free option. The flavor will still be delightful!
How long do these yogurt ice cream popsicles last in the freezer?
These popsicles can be stored in the freezer for up to two weeks. Just make sure to keep them in an airtight container to maintain their freshness!
Can I add other ingredients to the yogurt mixture?
Yes! Feel free to get creative. You can mix in ingredients like cocoa powder for a chocolatey twist or even a splash of fruit juice for extra flavor.
What’s the best way to remove the popsicles from the molds?
The easiest way is to run warm water over the outside of the molds for a few seconds. This helps loosen the popsicles, making them easier to pull out!
Are these yogurt ice cream popsicles healthy?
Yes! They’re a healthier alternative to traditional ice cream, packed with protein from yogurt and natural sweetness from honey or maple syrup. Enjoy guilt-free!
Final Thoughts
Creating these yogurt ice cream popsicles has been a delightful journey for me, and I hope it becomes a joyful experience for you too! They’re not just a treat; they’re a way to bring smiles to your family on hot summer days. The vibrant colors and refreshing flavors make every bite a celebration. Plus, knowing you’ve made something healthy and delicious adds to the joy. So, gather your loved ones, whip up a batch, and enjoy the laughter and happiness that comes with sharing these delightful popsicles. Summer just got a whole lot sweeter!
PrintYogurt ice cream popsicles that you’ll crave all summer!

Delicious and refreshing yogurt ice cream popsicles perfect for summer cravings.
- Prep Time: 15 minutes
- Cook Time: 0 minutes
- Total Time: 6 hours 15 minutes
- Yield: 10 popsicles 1x
- Category: Dessert
- Method: Freezing
- Cuisine: American
- Diet: Vegetarian
Ingredients
- 2 cups of yogurt
- 1/2 cup of honey or maple syrup
- 1 cup of mixed berries (strawberries, blueberries, raspberries)
- 1 teaspoon of vanilla extract
- 1/2 cup of granola (optional)
Instructions
- In a mixing bowl, combine yogurt, honey (or maple syrup), and vanilla extract.
- Mix well until smooth and creamy.
- Add the mixed berries and gently fold them into the yogurt mixture.
- If desired, add granola for extra texture.
- Pour the mixture into popsicle molds, leaving a little space at the top.
- Insert sticks and freeze for at least 4-6 hours or until solid.
- To remove popsicles, run warm water over the outside of the molds for a few seconds.
- Enjoy your homemade yogurt ice cream popsicles!
Notes
- Feel free to substitute the berries with your favorite fruits.
- For a creamier texture, use full-fat yogurt.
- These popsicles can be stored in the freezer for up to 2 weeks.
Nutrition
- Serving Size: 1 popsicle
- Calories: 80
- Sugar: 10g
- Sodium: 30mg
- Fat: 2g
- Saturated Fat: 1g
- Unsaturated Fat: 1g
- Trans Fat: 0g
- Carbohydrates: 15g
- Fiber: 1g
- Protein: 3g
- Cholesterol: 5mg