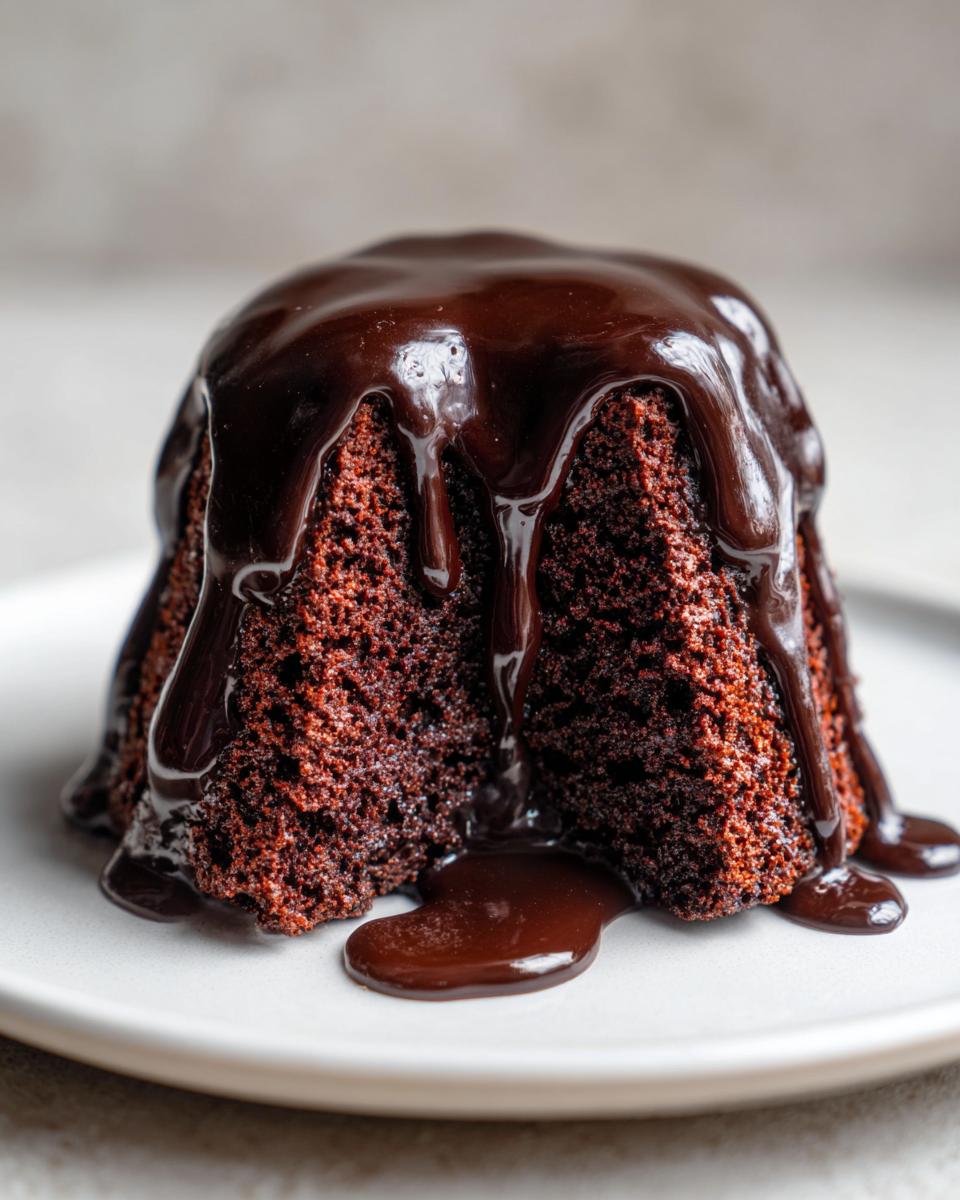
Spooky 2-Ingredient Halloween Skull Cakes That Wow
Halloween just isn’t complete without something spooky and sweet on the table. I still remember the first time I made these Halloween skull cakes – my kitchen looked like a mad scientist’s lab, but the results were pure magic! There’s something so fun about turning a simple chocolate cake into a creepy centerpiece that makes both kids and adults go “Wow!”
What I love most about these skull cakes is how easy they are. You don’t need fancy decorating skills – the mold does all the spooky shaping work for you. Last year, my nephew actually gasped when I brought out the finished cake (mission accomplished!). The rich chocolate flavor pairs perfectly with the eerie shape, and you can go as simple or as elaborate as you want with the decorations.
Whether you’re hosting a Halloween party or just want to surprise your family with something special, these Halloween skull cakes are guaranteed to be a hit. Trust me, they’re way more exciting than your usual sheet cake – and honestly? Just as easy to make!
Halloween Skull Cakes Ingredients
Gathering the right ingredients is half the battle when making these spooky treats! I’ve learned through trial and error that quality matters – especially with chocolate cakes. Here’s everything you’ll need, organized so you can grab items quickly:
Dry Ingredients
- 2 cups all-purpose flour (spooned and leveled – don’t pack it!)
- 1 1/2 cups granulated sugar
- 1/2 cup high-quality cocoa powder (Dutch-processed gives the richest color)
- 1 1/2 teaspoons baking powder
- 1/2 teaspoon baking soda
- 1/2 teaspoon fine sea salt
Wet Ingredients
- 1 cup whole milk (room temperature)
- 1/2 cup vegetable oil (I use canola, but any neutral oil works)
- 2 large eggs (straight from the fridge is fine)
- 2 teaspoons pure vanilla extract
The Secret Weapon
- 1 cup boiling water (yes, boiling! This makes the cake extra moist)
Pro tip: Measure everything before you start mixing – it makes the process so much smoother. And don’t worry about the thin batter – that’s exactly how it should be! The boiling water might seem scary at first, but trust me, it creates the most amazing texture.
How to Make Halloween Skull Cakes
Okay, let’s get spooky! I promise this is easier than it looks. The key is taking it step by step – and not panicking when the batter looks way too thin (it’s supposed to be that way!). Here’s exactly how I make my Halloween skull cakes come to life.
Preparing the Batter
First things first – preheat that oven to 350°F (175°C). While it’s heating up, grab a big bowl and whisk together all your dry ingredients – flour, sugar, cocoa powder, baking powder, baking soda, and salt. Get them really well combined so every bite has perfect chocolatey flavor.
Now for the fun part! In another bowl, whisk together your wet ingredients – milk, oil, eggs, and vanilla. I like to use a hand mixer here for about 30 seconds just to make sure everything’s fully incorporated. Slowly pour this into your dry ingredients while mixing on low speed. Here’s where the magic happens – beat this for exactly 2 minutes. Set a timer! This develops the structure that makes your skull cake hold its shape.
Now the “scary” part – carefully stir in that boiling water. The batter will look ridiculously thin – like chocolate soup! But don’t worry, this is normal. The hot water blooms the cocoa powder and creates that ultra-moist texture we’re after.
Baking and Cooling
Pour that thin batter into your well-greased skull mold. I mean REALLY grease it – every crevice! Nothing worse than a half-skull cake sticking to the pan. Bake for 30-35 minutes. Around 30 minutes, do the toothpick test – it should come out with just a few moist crumbs.
Here’s my golden rule: let it cool in the pan for exactly 10 minutes before trying to remove it. Any sooner and it might break; any later and it might stick. After those 10 minutes, gently turn it out onto a wire rack to cool completely. I know it’s tempting to decorate right away, but warm cake melts frosting – trust me, I’ve learned this the messy way!
Decorating Your Halloween Skull Cakes
This is where you can get creative! My go-to is simple melted chocolate – microwave some chocolate chips with a tiny bit of oil and pipe it into the eye sockets and teeth for an eerie effect. Or go full gore with red icing “blood” dripping from the eyes!
Last year I discovered a genius trick: dust the skull with edible black luster dust for an ancient relic look. Or pipe white royal icing “cracks” for a broken skull effect. The kids went wild when I added gummy worms crawling out of the eye sockets! No matter how you decorate it, this skull cake always steals the show.
Why You’ll Love These Halloween Skull Cakes
Trust me, once you make these skull cakes once, they’ll become your go-to Halloween tradition! Here’s why everyone from my picky niece to my dessert-snob brother-in-law goes crazy for them:
- Instant party centerpiece – These cakes look professionally scary but take minimal effort. Just pop them out of the mold and watch everyone’s reactions! I’ve brought them to five different Halloween parties now, and they’re always the first dessert to disappear.
- Moist-as-can-be chocolate flavor – That boiling water trick makes these the most tender cakes you’ll ever eat. Even after a couple days (if they last that long!), they stay deliciously soft. The rich cocoa flavor pairs perfectly with any frosting or decorations you choose.
- Endless decorating possibilities – Go simple with just a dusting of powdered sugar “dust” or go all out with creepy details. Last year I did one with cracked “bone” icing and another dripping with “blood” – both were huge hits! The skull shape does most of the work for you.
- Actually easy to make – No fancy skills required! The batter comes together in minutes, and the mold makes it look like you spent hours. My 10-year-old nephew helps me make them now – if he can do it, anyone can!
The best part? These cakes taste as good as they look. Unlike some gimmicky desserts that sacrifice flavor for appearance, these deliver on both. Just try not to eat all the decorations before the party starts – I may or may not speak from experience!
Tips for Perfect Halloween Skull Cakes
After making these spooky cakes more times than I can count (and learning from my share of cake disasters!), I’ve picked up some foolproof tricks to guarantee your skull cakes come out perfectly every time. These are the little things that make a big difference!
Greasing your mold like a pro
That skull mold has lots of nooks and crannies that love to grab onto cake. My secret weapon? A pastry brush and melted shortening – it gets into every detail better than spray. Make sure to get into all those creepy eye sockets and teeth! If you’re extra paranoid (like I was after my first skull lost its nose), dust the greased mold with cocoa powder instead of flour – no white spots on your chocolate cake!
The cooling game-changer
I know it’s hard to wait when you’re excited to decorate, but rushing this step leads to heartbreak. Let the cake cool in the pan for exactly 10 minutes – this lets it firm up enough to hold its shape. Then transfer to a wire rack to cool completely. Test it by gently touching the bottom – if it feels at all warm, give it more time. I learned this the hard way when my first attempt at “blood” icing turned into a melty nightmare!
Storage smarts
These cakes stay moist for days if you store them right. Once decorated, I put mine in a cake carrier or cover loosely with plastic wrap (careful not to smush your decorations!). They’ll keep at room temperature for 2-3 days. For longer storage, freeze the undecorated cake wrapped tightly in plastic, then thaw and decorate when needed. Pro tip: Write the date on the wrapper – future you will thank past you come Halloween!
One last piece of advice? Make two cakes! They disappear fast, and you’ll want one just for yourself after seeing everyone else enjoy them. Trust me – my first Halloween, I only made one and spent the whole party sadly watching other people eat “my” cake!
Halloween Skull Cakes Variations
Once you’ve mastered the classic chocolate version, the fun really begins! I love experimenting with different flavors and colors – it’s amazing how one simple skull mold can create so many completely different looks. Here are my favorite twists that always impress at parties:
Vanilla “Bone” Skull Cakes
For a creepy white skull effect, I swap the chocolate batter for my favorite vanilla cake recipe. Just replace the cocoa powder with an equal amount of flour and add an extra teaspoon of vanilla. The pure white interior looks eerily like real bone when you slice into it! I like to decorate these with black icing in the crevices for dramatic contrast.
Blood-Red Velvet Skulls
Take the spook factor up a notch by adding red food coloring to your batter! For a true “bloody” look, I use about 2 tablespoons of red gel coloring in the vanilla version. The vibrant red cake peeking through the skull’s “cracks” is seriously creepy. Bonus points if you drizzle some red syrup over the top right before serving for a fresh “wound” effect!
Marbled Monster Skulls
This is my nephew’s favorite variation – and so easy! Prepare both chocolate and vanilla batters separately. Alternate spoonfuls into the mold, then gently swirl with a knife just once or twice. The result looks like decaying flesh or monster skin when sliced. Last year I added green food coloring to the vanilla portion for an extra monstrous look!
Glow-in-the-Dark Skulls
For the ultimate party trick, mix a little edible glow powder into your icing or dust it over the finished cake. When you turn off the lights, these skulls actually glow! I found this works best with vanilla cakes decorated with white icing. The first time I tried this, my guests actually screamed when the lights went out – total Halloween win!
The best part about these variations? You can mix and match decorations too. Try the vanilla skull with chocolate “rotten teeth” or the red velvet with white “bone” icing. Every time I make these, I discover a new favorite combination. What spooky creation will you come up with?
Serving and Storing Halloween Skull Cakes
Now for the best part – showing off your creepy creation! I’ve learned that presentation makes all the difference with these skull cakes. My favorite trick? Place it on a cake stand surrounded by Halloween candy “bones” (those candy corn pumpkins work great!) and dry ice for a smoky effect. The oohs and ahhs are totally worth the extra 5 minutes of setup!
For drinks, I love pairing these with:
- A bubbling “witch’s brew” (just lime sherbet in ginger ale with gummy worms)
- Black cherry soda served in test tube beakers
- Hot chocolate with marshmallow “ghosts” for the kids
- Spiced rum cider for the grown-ups (the cinnamon plays nicely with the chocolate)
When it comes to storage, here’s what I’ve found works best:
For short-term (2-3 days): Pop a dome over the cake or cover loosely with plastic wrap – just be careful not to smush your decorations! I leave mine at room temperature unless it’s really humid, then into the fridge it goes.
For longer storage: Freeze that undecorated skull! Wrap it tightly in plastic, then foil, and it’ll keep for up to 3 months. Thaw overnight in the fridge when you’re ready to use it. Pro tip: Slice before freezing if you want individual portions ready to decorate – perfect for last-minute school parties!
One year I made a dozen mini skull cakes ahead of time and froze them – best decision ever when my neighbor unexpectedly asked me to bring dessert to her Halloween potluck. Just decorated them frozen (the icing sets so fast!) and they were thawed and perfect by party time.
Halloween Skull Cakes Nutrition Information
Okay, let’s be real – we’re not eating skull cakes for their health benefits! But I know some folks like to keep track, so here’s the nutritional breakdown per slice (based on 10 servings). Just remember – these are estimates, and your exact numbers might vary depending on the specific ingredients and decorations you use.
- Serving Size: 1 slice (about 1/10 of cake)
- Calories: 280
- Total Fat: 12g (Saturated: 3g, Unsaturated: 8g)
- Cholesterol: 35mg
- Sodium: 200mg
- Total Carbohydrates: 40g
- Dietary Fiber: 2g
- Sugars: 25g
- Protein: 4g
Now, here’s my nutritionist sister’s favorite tip: If you’re watching sugar, try reducing the granulated sugar to 1 cup and adding an extra tablespoon of cocoa powder – it still tastes amazing! And for dairy-free, swap the milk for almond milk and use dairy-free chocolate decorations.
But let’s be honest – it’s Halloween! My philosophy? Enjoy your spooky skull cake without guilt (maybe just don’t eat the whole thing yourself… though I won’t judge if you do!). The memories and fun are worth every delicious bite.
Nutritional values are estimates and vary based on ingredients used.
Frequently Asked Questions
Q1. Can I use a different mold if I don’t have a skull-shaped one?
Absolutely! While the skull mold makes it extra spooky, any Bundt pan or even a regular cake pan will work. The baking time might need adjusting – start checking about 5 minutes earlier for shallower pans. I’ve even used muffin tins for “mini skulls” – just reduce the baking time to 15-20 minutes!
Q2. How long do the decorations last on the cake?
It depends what you use! Melted chocolate decorations will stay perfect for days at room temperature. Royal icing holds up well too – my “bone crack” designs last up to a week. If you use fresh whipped cream or buttercream though, refrigerate and eat within 2 days. Pro tip: Add decorations as close to serving as possible for the freshest look.
Q3. Can I make these cakes ahead of time?
You bet! The undecorated cake freezes beautifully for up to 3 months. Just wrap it tightly in plastic wrap and foil. Thaw overnight in the fridge when ready to use. I often bake mine 2-3 days before an event, keep it wrapped at room temperature, then decorate the day of. The flavor actually improves after a day!
Q4. My cake stuck to the mold – help!
Oh no, been there! First, don’t panic. Let the cake cool completely, then gently loosen edges with a thin knife. If pieces are stuck, carefully remove them and “glue” back on with melted chocolate. Next time, grease every nook and cranny with melted shortening using a pastry brush – it works way better than spray. Dusting with cocoa powder after greasing helps too!
Q5. Can kids help decorate these cakes?
Definitely! My nieces and nephews love decorating skull cakes. Set up a “decoration station” with bowls of sprinkles, melted chocolate in piping bags, and pre-made icing. Cover your table with parchment paper for easy cleanup. Little hands might not be precise, but their creepy creations always steal the show! Just supervise closely with hot melted chocolate.
Spooky 2-Ingredient Halloween Skull Cakes That Wow
A spooky and fun dessert perfect for Halloween. These skull-shaped cakes are moist, flavorful, and easy to decorate.
- Prep Time: 15 minutes
- Cook Time: 35 minutes
- Total Time: 50 minutes
- Yield: 1 skull cake (8-10 servings) 1x
- Category: Dessert
- Method: Baking
- Cuisine: American
- Diet: Vegetarian
Ingredients
- 2 cups all-purpose flour
- 1 1/2 cups granulated sugar
- 1/2 cup cocoa powder
- 1 1/2 tsp baking powder
- 1/2 tsp baking soda
- 1/2 tsp salt
- 1 cup milk
- 1/2 cup vegetable oil
- 2 large eggs
- 2 tsp vanilla extract
- 1 cup boiling water
Instructions
- Preheat your oven to 350°F (175°C). Grease a skull-shaped cake mold.
- Mix flour, sugar, cocoa powder, baking powder, baking soda, and salt in a bowl.
- Add milk, oil, eggs, and vanilla. Beat for 2 minutes.
- Stir in boiling water. The batter will be thin.
- Pour into the mold. Bake for 30-35 minutes or until a toothpick comes out clean.
- Cool for 10 minutes, then remove from the mold.
- Decorate with icing or melted chocolate for a spooky effect.
Notes
- Use a non-stick mold for easy release.
- Let the cake cool completely before decorating.
- Store in an airtight container for up to 3 days.
Nutrition
- Serving Size: 1 slice
- Calories: 280
- Sugar: 25g
- Sodium: 200mg
- Fat: 12g
- Saturated Fat: 3g
- Unsaturated Fat: 8g
- Trans Fat: 0g
- Carbohydrates: 40g
- Fiber: 2g
- Protein: 4g
- Cholesterol: 35mg