Irresistible Classic Apple Pie Recipe in 6 Simple Steps
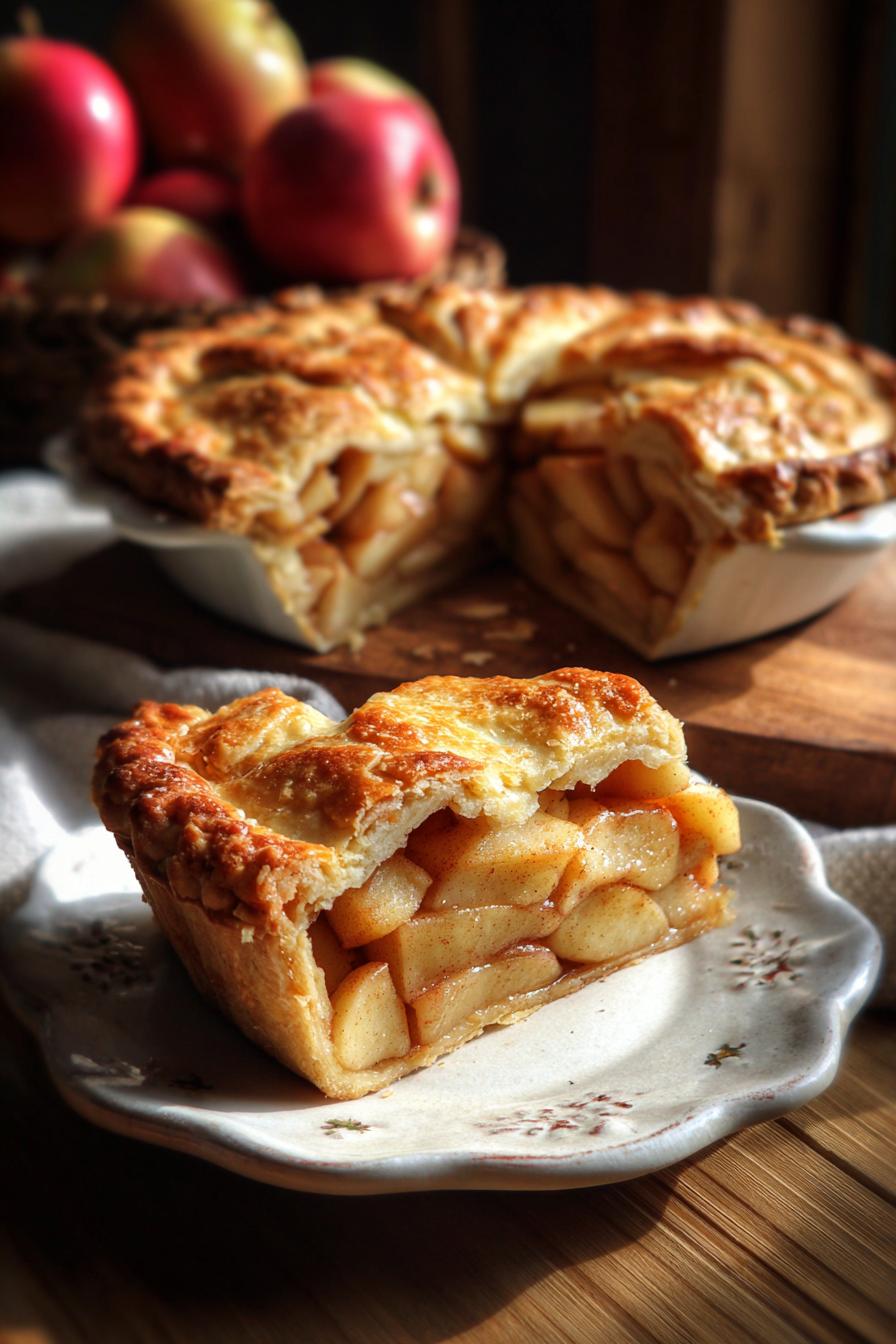
There’s nothing quite like the smell of a classic apple pie baking in the oven—that sweet cinnamon aroma mingling with buttery crust that makes your whole house feel like home. This recipe has been my go-to for years, ever since my aunt handed me her stained recipe card with the words “Don’t mess with perfection” scribbled at the top. She was right. The magic lies in its simplicity: tender apples kissed with warm spices, all wrapped in a flaky crust that shatters just right when you take that first bite. Whether it’s Thanksgiving or just a Tuesday night craving, this pie never fails to bring people together around the table.
Why You’ll Love This Classic Apple Pie Recipe
Trust me, once you try this recipe, you’ll understand why it’s been my family’s favorite for generations. Here’s what makes it so special:
- Flaky, buttery crust that shatters with every forkful – the perfect contrast to the tender apples inside
- Just the right sweetness – not too sugary, letting the natural apple flavor shine through
- Warm spices that make your kitchen smell like heaven (I always add an extra pinch of cinnamon because why not?)
- Easy as pie – seriously, if I can make this with flour all over my shirt, you can too
It’s the kind of recipe that turns first-time bakers into pie champions and makes everyone ask for seconds. The secret? Keeping it simple and letting those beautiful apples do their thing.
Ingredients for Classic Apple Pie
Here’s what you’ll need to make magic happen – and trust me, every single one of these ingredients plays a starring role:
- 6 cups thinly sliced apples (I use a mix of Granny Smith and Honeycrisp – peeled, cored, and cut about 1/4″ thick)
- 3/4 cup granulated sugar (or more if your apples are extra tart – taste one slice to check)
- 1 tablespoon fresh lemon juice (that bright zing keeps the apples looking pretty)
- 1 teaspoon ground cinnamon (my secret is to use the good stuff – Vietnamese if you can find it)
- 1/4 teaspoon each of ground nutmeg and salt (just enough to make the flavors pop without overpowering)
- 2 tablespoons cold unsalted butter (cut into little cubes – this makes those delicious buttery pockets)
- 1 package (14-16oz) double pie crusts (homemade is wonderful, but no shame in the store-bought game!)
See? Nothing fancy – just honest ingredients that know how to play well together. Now let’s turn them into pie!
How to Make Classic Apple Pie
Alright, let’s get baking! I’ve made this pie so many times I could do it in my sleep, but I’ll walk you through each step so your first try comes out perfect. Just follow along and soon you’ll have a golden, bubbly masterpiece that’ll make your whole house smell like happiness.
Preparing the Apple Filling
First things first – preheat that oven to 375°F (190°C). Trust me, you want it nice and hot when the pie goes in.
Grab your big mixing bowl and toss in those beautiful apple slices. Now here’s my little trick: drizzle the lemon juice over them first and give them a quick toss. This keeps them from turning brown and adds the perfect zing to balance all that sweetness. Then mix in the sugar, cinnamon, nutmeg, and salt. I use my hands for this part – get in there and massage those spices into every slice! The apples should look glossy and smell amazing already.
Assembling the Pie
Time for crust action! Unroll one of your pie crusts into a 9-inch pie dish. Don’t stress if it tears a little – just patch it up with your fingers (nobody will see the bottom anyway).
Pour in your spiced apples, mounding them slightly in the center – they’ll settle as they bake. Now take those butter cubes and dot them all over the top. This is what creates those magical little pools of buttery goodness in your finished pie.
Place the second crust over everything and crimp the edges with your fingers or a fork to seal it tight. Don’t forget to cut 4-5 slits in the top! I usually make a little star pattern – it lets steam escape and looks pretty too.
Baking and Cooling
Pop that beauty in the oven for about 50 minutes. You’ll know it’s ready when the crust is deep golden brown and you can see bubbly juices peeking through the vents.
Here’s the hardest part – you’ve got to let it cool for at least 2 hours before slicing. I know, torture! But if you cut it too soon, all that delicious filling will run everywhere. Set it on a wire rack and resist the urge. The wait makes that first perfect slice worth it, I promise.
Tips for the Best Classic Apple Pie
After burning my fair share of pie crusts and learning the hard way, here are my can’t-live-without tips for pie perfection:
- Mix your apples – Granny Smith for tartness, Honeycrisp or Fuji for sweetness. The combo beats any single variety.
- Bake on the bottom rack for the first 30 minutes – it crisps that bottom crust so it doesn’t get soggy.
- Brush the top with egg wash (1 egg + 1 tbsp water) for that gorgeous golden shine everyone loves.
- Listen for the bubble – when you hear thick juices bubbling through the vents, your pie is ready to come out.
And my golden rule? Always make two pies – one to share and one “for quality control” while it’s still warm!
Ingredient Notes and Substitutions
Listen, I’m all about sticking to the classics, but life happens! Here’s how to tweak this pie when you’re in a pinch:
- Out of white sugar? Brown sugar works beautifully – just reduce cinnamon slightly since it’s already molasses-y.
- Vegan? Swap butter for coconut oil and use your favorite plant-based crust (the filling’s already vegan!).
- No lemon juice? A splash of apple cider vinegar does the trick in a pinch.
The only thing I won’t budge on? Using real apples. That jarred pie filling stuff? Not in my kitchen!
Serving Suggestions for Classic Apple Pie
Oh, the joy of slicing into that first warm piece! Here’s how I love to serve my classic apple pie:
- A scoop of vanilla ice cream melting into the flaky crust (try cinnamon ice cream for extra magic)
- Freshly whipped cream with just a whisper of vanilla
- A slice of sharp cheddar on the side if you’re feeling old-school fancy
- All by its glorious self when I’m too impatient to wait for toppings
Pro tip: Warm your pie plates before serving – keeps everything cozy longer!
Storing and Reheating Classic Apple Pie
Here’s the deal – if your pie lasts more than a day (miracles happen!), store it covered at room temp for up to 2 days. After that, pop it in the fridge for up to 5 days. Want that just-baked magic back? Warm slices in a 350°F oven for 10 minutes – the crust crisps right up! Microwave works in a pinch, but expect a softer crust. Pro tip: Freeze whole unbaked pies wrapped tight in foil – they’ll keep for 3 months and bake up fresh when you’re ready.
Classic Apple Pie FAQs
After years of baking this pie (and fielding questions from friends who beg for the recipe), here are the answers to everything you might wonder:
What are the best apples for apple pie?
You want a mix! I swear by 2 parts tart Granny Smith (for structure) and 1 part sweet Honeycrisp or Fuji (for flavor). Avoid Red Delicious – they turn to mush. Pro tip: Taste a slice raw – if it’s bland, your pie will be too!
How do I prevent a soggy bottom crust?
Three tricks: 1) Bake on the oven’s bottom rack first, 2) Sprinkle a thin layer of crushed graham crackers or breadcrumbs on the bottom crust before adding filling, and 3) Make sure your filling isn’t too watery before baking.
Can I make apple pie ahead of time?
Absolutely! Assemble the pie (without baking) and freeze it for up to 3 months. When ready, bake straight from frozen, adding 15-20 extra minutes. Already baked? It keeps at room temp for 2 days – just reheat slices to revive the magic.
Why did my filling bubble over?
You probably overfilled (been there!). Next time, leave 1/2″ space at the rim and place a baking sheet underneath to catch drips. Those caramelized drips are actually my favorite part – just ask my oven!
Nutritional Information
Nutrition varies based on ingredients and brands. Values are estimates. Each slice of this classic apple pie contains about 320 calories, making it a sweet treat to enjoy in moderation.
Share Your Classic Apple Pie Experience
Did you try this recipe? I’d love to hear how it turned out for you! Snap a photo of your golden masterpiece and share it with me – nothing makes me happier than seeing your pie success stories. Leave a comment below with your baking adventures, secret tweaks, or even your “oops” moments (we’ve all had them!). And if a certain someone stole an extra slice? Well, that just means you did it right. Happy baking, friends!
PrintIrresistible Classic Apple Pie Recipe in 6 Simple Steps

A classic apple pie recipe that brings together sweet apples, warm spices, and a flaky crust for a timeless dessert.
- Prep Time: 20 minutes
- Cook Time: 50 minutes
- Total Time: 70 minutes
- Yield: 8 servings 1x
- Category: Dessert
- Method: Baking
- Cuisine: American
- Diet: Vegetarian
Ingredients
- 6 cups thinly sliced apples
- 3/4 cup granulated sugar
- 1 tablespoon lemon juice
- 1 teaspoon ground cinnamon
- 1/4 teaspoon ground nutmeg
- 1/4 teaspoon salt
- 2 tablespoons unsalted butter
- 1 package of double pie crusts
Instructions
- Preheat your oven to 375°F (190°C).
- In a large bowl, mix the sliced apples, sugar, lemon juice, cinnamon, nutmeg, and salt.
- Place one pie crust into a 9-inch pie dish.
- Pour the apple mixture into the crust.
- Dot the filling with small pieces of butter.
- Cover with the second pie crust and seal the edges.
- Cut slits in the top crust for ventilation.
- Bake for 50 minutes or until the crust is golden brown.
- Let the pie cool before serving.
Notes
- Use a mix of sweet and tart apples for the best flavor.
- Brush the top crust with milk or egg wash for a golden finish.
- Serve with vanilla ice cream or whipped cream.
Nutrition
- Serving Size: 1 slice
- Calories: 320
- Sugar: 25g
- Sodium: 150mg
- Fat: 12g
- Saturated Fat: 5g
- Unsaturated Fat: 6g
- Trans Fat: 0g
- Carbohydrates: 52g
- Fiber: 3g
- Protein: 3g
- Cholesterol: 10mg