Artisanal Small-Batch Sourdough Bread for Perfect Flavor!
Introduction to Artisanal Small-Batch Sourdough Bread
There’s something magical about the aroma of freshly baked bread wafting through the house. It’s like a warm hug on a busy day! This artisanal small-batch sourdough bread recipe is not just about baking; it’s about creating a moment of joy in your kitchen. Whether you’re a seasoned pro or a curious beginner, this recipe is perfect for impressing your loved ones or simply treating yourself. With just a few simple ingredients and a little patience, you can craft a loaf that’s bursting with flavor and texture. Let’s dive into this delightful baking adventure together!
Why You’ll Love This Artisanal Small-Batch Sourdough Bread
This artisanal small-batch sourdough bread is a game-changer for busy moms and professionals alike. It’s easy to make, requiring minimal hands-on time while delivering maximum flavor. The crust is perfectly crispy, while the inside is soft and chewy—just like you’d find in a bakery! Plus, the satisfaction of creating something so delicious from scratch is truly rewarding. You’ll find yourself baking this bread again and again!
Ingredients for Artisanal Small-Batch Sourdough Bread
Gathering the right ingredients is the first step in your baking journey. Here’s what you’ll need to create your artisanal small-batch sourdough bread:
- Bread Flour: This is the backbone of your loaf, providing the structure and chewiness. You can experiment with different types of flour for unique flavors.
- Water: Hydration is key! Use filtered water if possible, as it helps the yeast thrive and enhances the flavor.
- Sourdough Starter: This living culture is what gives your bread its signature tang. Make sure it’s active and bubbly for the best results.
- Salt: A crucial ingredient that enhances flavor and strengthens the dough. It also helps control fermentation, so don’t skip it!
For those looking to get creative, consider adding herbs, seeds, or even cheese to your dough for a twist. You can find the exact measurements for these ingredients at the bottom of the article, ready for printing. Happy baking!
How to Make Artisanal Small-Batch Sourdough Bread
Now that you have your ingredients ready, let’s get to the fun part—making your artisanal small-batch sourdough bread! Follow these simple steps, and you’ll be on your way to baking a loaf that will impress everyone.
Step 1: Mix the Dough
Start by combining the bread flour and water in a large bowl. Use your hands or a wooden spoon to mix until no dry flour remains. It should feel a bit sticky, but that’s okay! This is where the magic begins, as the flour absorbs the water and starts to come together.
Step 2: Add Starter and Salt
Next, it’s time to add the sourdough starter and salt. Sprinkle the salt over the dough, then add the starter. Mix everything together until well combined. You want to ensure that the starter is evenly distributed throughout the dough. This is what gives your bread that delightful tangy flavor!
Step 3: Rest the Dough
Once mixed, cover the bowl with a damp cloth and let it rest for 30 minutes. This resting period is crucial. It allows the flour to fully hydrate and the gluten to start developing. Think of it as a little nap for your dough, preparing it for the next steps!
Step 4: Stretch and Fold
After the rest, it’s time for some gentle exercise! Every 30 minutes for the next 2-3 hours, perform a series of stretch and folds. To do this, wet your hands to prevent sticking, grab one side of the dough, stretch it up, and fold it over itself. Rotate the bowl and repeat until you’ve stretched and folded all sides. This technique helps build strength in the dough.
Step 5: Shape the Dough
Once your dough has risen and feels airy, it’s time to shape it. Lightly flour your work surface and gently turn the dough out. Shape it into a round loaf by tucking the edges into the center. This creates surface tension, which is key for a beautiful rise. Place the shaped dough into a floured proofing basket, seam side up.
Step 6: Proof the Dough
Now, let’s give your dough some time to rise! You can let it proof at room temperature for 2-4 hours or pop it in the fridge overnight for a slow fermentation. The longer it proofs, the more flavor it develops. Just remember, patience is a virtue in sourdough baking!
Step 7: Preheat the Oven
About 30 minutes before you’re ready to bake, preheat your oven to 450°F (232°C). Place a Dutch oven inside to heat up as well. This step is essential for creating that crispy crust we all love. The hot Dutch oven acts like a mini steam oven, helping your bread rise beautifully.
Step 8: Bake the Bread
When the oven is hot, carefully transfer your dough to the Dutch oven. You can do this by flipping the proofing basket over and letting the dough slide in. Cover it with the lid and bake for 30 minutes. Then, remove the lid and bake for an additional 15-20 minutes until it’s golden brown and crusty. Your kitchen will smell heavenly!
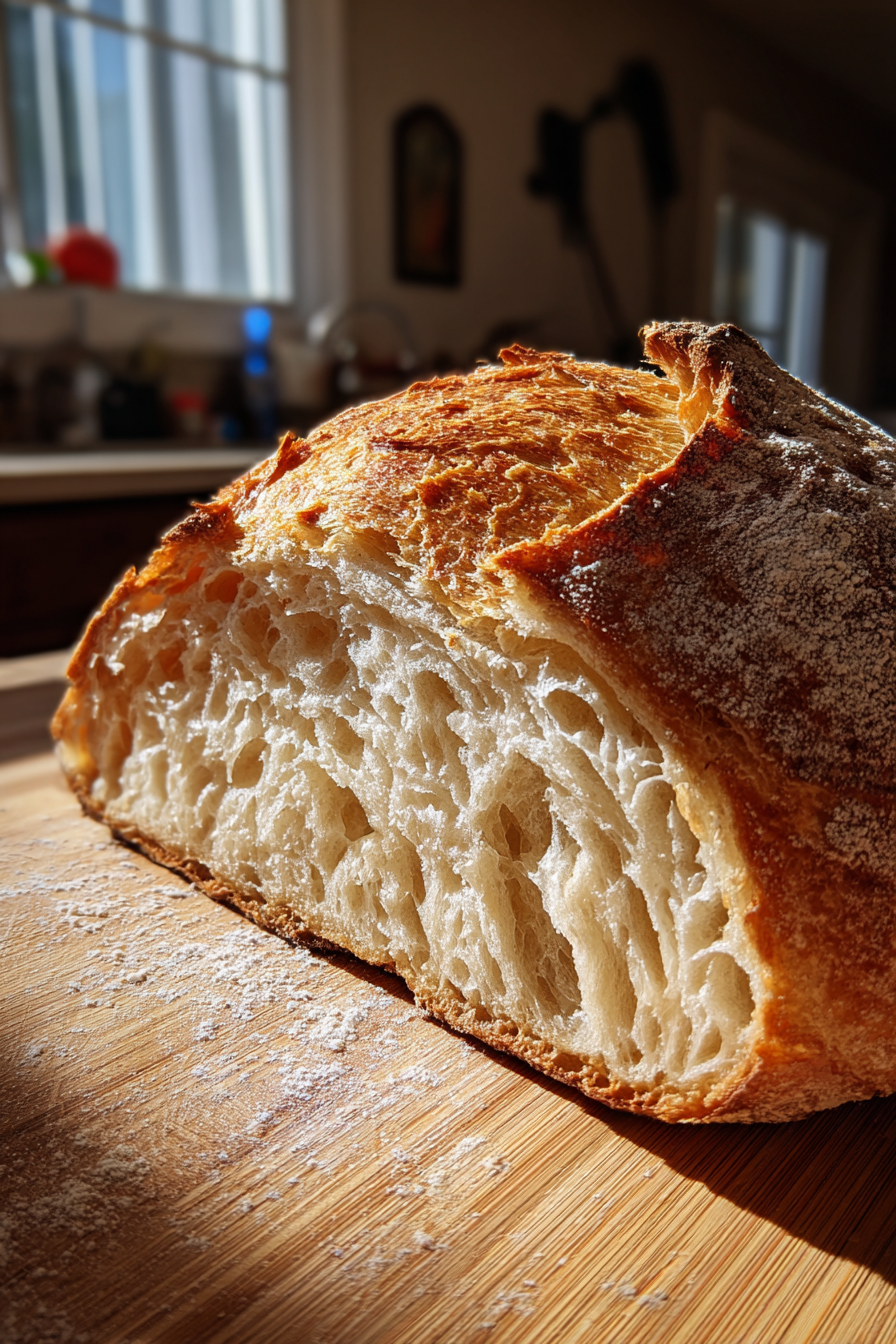
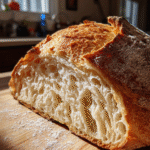
Step 9: Cool and Slice
Once baked, remove the bread from the oven and let it cool on a wire rack. This is a crucial step! Letting it cool allows the crumb to set properly. I know it’s tempting to slice right away, but trust me, the wait is worth it. Once cooled, slice and enjoy your homemade artisanal small-batch sourdough bread!
Tips for Success
- Use a kitchen scale for precise measurements; it makes a world of difference!
- Keep your sourdough starter active and bubbly for the best flavor.
- Don’t rush the resting and proofing times; they’re essential for flavor development.
- Experiment with different flours to discover unique tastes and textures.
- Always preheat your Dutch oven for that perfect crust.
Equipment Needed
- Mixing Bowl: A large bowl for combining ingredients. A sturdy plastic or glass bowl works well.
- Kitchen Scale: For accurate measurements. A measuring cup can be used, but a scale is more precise.
- Wooden Spoon or Dough Scraper: For mixing and handling the dough. Your hands work too!
- Proofing Basket: A banneton is ideal, but a bowl lined with a floured kitchen towel will do.
- Dutch Oven: Essential for baking. If you don’t have one, a heavy pot with a lid can work.
Variations
- Herb-Infused: Add dried herbs like rosemary or thyme to the dough for a fragrant twist.
- Seeded Sourdough: Incorporate sunflower seeds, sesame seeds, or poppy seeds into the dough for added texture and flavor.
- Cheesy Delight: Mix in shredded cheese, such as cheddar or parmesan, for a savory loaf that’s perfect for sandwiches.
- Whole Wheat Option: Substitute half of the bread flour with whole wheat flour for a nuttier flavor and extra fiber.
- Sweet Sourdough: Add a tablespoon of honey or maple syrup and some dried fruits like cranberries or raisins for a sweet twist.
Serving Suggestions
- With Butter: Spread a generous pat of butter on warm slices for a simple yet delightful treat.
- Pair with Soups: Serve alongside a hearty soup or stew for a comforting meal.
- Cheese Board: Create a beautiful cheese board with your favorite cheeses, fruits, and nuts.
- Toast Toppings: Top with avocado, poached eggs, or your favorite spreads for a delicious breakfast.
- Presentation: Serve the loaf on a wooden cutting board for a rustic touch.
FAQs about Artisanal Small-Batch Sourdough Bread
What is the best way to store my sourdough bread?
To keep your artisanal small-batch sourdough bread fresh, store it in a paper bag at room temperature. Avoid plastic, as it traps moisture and can make the crust soggy. If you want to keep it longer, slice the bread and freeze it in an airtight container. Just toast slices directly from the freezer for a quick treat!
How do I know if my sourdough starter is active?
Your sourdough starter should be bubbly and have doubled in size within 4-6 hours after feeding. A good test is to drop a spoonful in a glass of water; if it floats, it’s ready to use! This ensures your bread will rise beautifully and have that signature tangy flavor.
Can I use all-purpose flour instead of bread flour?
Yes, you can use all-purpose flour, but the texture may be slightly different. Bread flour has a higher protein content, which gives your artisanal small-batch sourdough bread that chewy texture we all love. If you’re in a pinch, all-purpose flour will still yield a delicious loaf!
Why is my sourdough bread dense?
A dense loaf can result from an inactive starter, not enough gluten development, or insufficient proofing time. Make sure your starter is bubbly and active, and don’t rush the resting and proofing stages. Patience is key to achieving that light, airy crumb!
Can I add ingredients like nuts or dried fruits to my sourdough?
Absolutely! Adding nuts, seeds, or dried fruits can elevate your artisanal small-batch sourdough bread to new heights. Just fold them in gently during the shaping step to ensure they’re evenly distributed without deflating the dough.
Final Thoughts
Baking artisanal small-batch sourdough bread is more than just a culinary task; it’s a delightful journey filled with anticipation and joy. The process allows you to connect with your ingredients and create something truly special. Each loaf tells a story, from the first mix to the final slice. The satisfaction of pulling a golden-brown loaf from the oven is unmatched. Whether you share it with family or savor it alone, this bread brings warmth and comfort to your home. So, roll up your sleeves, embrace the process, and enjoy every delicious bite!
PrintArtisanal Small-Batch Sourdough Bread for Perfect Flavor!
A guide to making artisanal small-batch sourdough bread that delivers perfect flavor and texture.
- Prep Time: 30 minutes
- Cook Time: 45 minutes
- Total Time: 3-4 hours (plus overnight proofing if desired)
- Yield: 1 loaf 1x
- Category: Baking
- Method: Baking
- Cuisine: Artisanal
- Diet: Vegetarian
Ingredients
- 500g bread flour
- 350ml water
- 100g sourdough starter
- 10g salt
Instructions
- In a large bowl, mix the bread flour and water until no dry flour remains.
- Add the sourdough starter and salt, and mix until well combined.
- Cover the bowl with a damp cloth and let it rest for 30 minutes.
- Perform stretch and folds every 30 minutes for the next 2-3 hours.
- Shape the dough into a round loaf and place it in a floured proofing basket.
- Cover and let it rise for 2-4 hours at room temperature or overnight in the fridge.
- Preheat the oven to 450°F (232°C) with a Dutch oven inside.
- Carefully transfer the dough to the hot Dutch oven, cover, and bake for 30 minutes.
- Remove the lid and bake for an additional 15-20 minutes until golden brown.
- Let the bread cool on a wire rack before slicing.
Notes
- Use a kitchen scale for accurate measurements.
- Experiment with different flours for unique flavors.
- Ensure your sourdough starter is active before using.
Nutrition
- Serving Size: 1 slice
- Calories: 150
- Sugar: 0.5g
- Sodium: 200mg
- Fat: 1g
- Saturated Fat: 0g
- Unsaturated Fat: 0g
- Trans Fat: 0g
- Carbohydrates: 30g
- Fiber: 2g
- Protein: 5g
- Cholesterol: 0mg