Crispy Bat Wing Chicken Bites That Will Haunt Your Taste
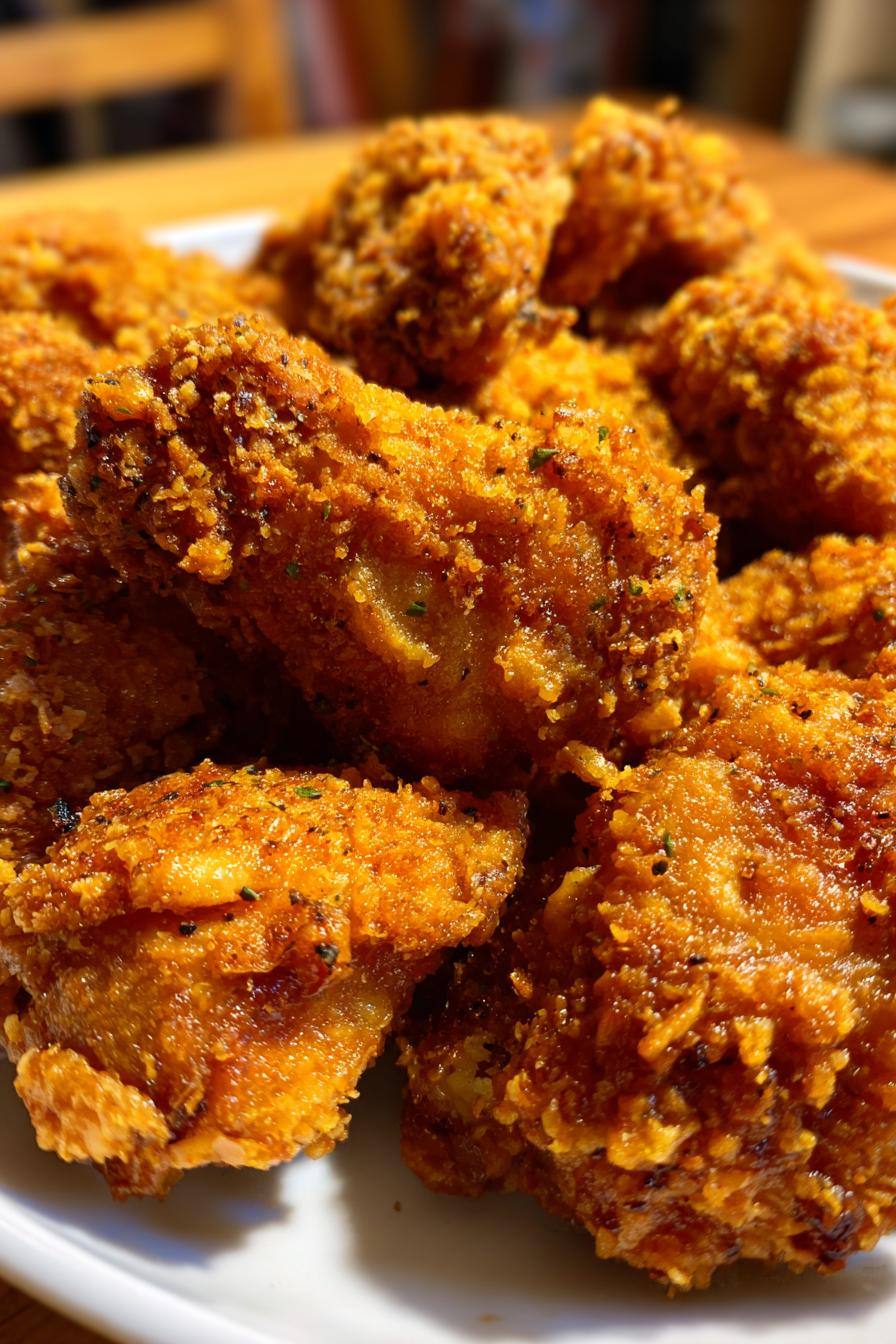
Nothing screams Halloween like creepy, delicious snacks—and my Bat Wing Chicken Bites are always the star of the spooky spread! I first made these crispy little guys for a costume party years ago, and now my friends won’t let me show up without them. The secret? That perfect golden crunch hiding tender, juicy chicken inside—just scary enough to impress but so tasty, they disappear fast. I love how the paprika gives them that deep, eerie color, while the garlic powder adds a punch of flavor. Whether you’re hosting a haunted house gathering or just craving something fun, these bites are a must-try. Trust me, even the pickiest little monsters will come back for seconds (and thirds)!
Ingredients for Bat Wing Chicken Bites
The magic of these crispy, spooky bites starts with simple ingredients—but don’t let that fool you! Every piece matters for that perfect crunch-to-chicken ratio. Here’s exactly what you’ll need:
- 1 lb chicken breast (cut into 1-inch bite-sized pieces—uniformity is key for even cooking!)
- 1 cup breadcrumbs (packed lightly—I like Italian-style for extra flavor, but plain works too)
- ½ cup all-purpose flour (this is your first coating layer—it helps the egg stick)
- 2 large eggs, beaten until smooth (no streaks of white left!)
- 1 tsp garlic powder (trust me, this adds that savory punch)
- 1 tsp paprika (gives our “bat wings” that eerie reddish-brown color)
- ½ tsp salt (adjust to taste, but don’t skip—it brings all the flavors together)
- ½ tsp black pepper (freshly cracked is my go-to)
- ½ cup neutral oil for frying (vegetable or canola works best—they handle high heat like champs)
Pro tip: Measure your breadcrumbs by gently packing them into the cup—no loose piles! And if you’re feeling fancy, toss in a pinch of cayenne pepper for a sneaky spicy kick. Just don’t tell the kids!
How to Make Bat Wing Chicken Bites
Ready to turn ordinary chicken into crispy, spooky bat wings? It’s easier than you think—just follow these simple steps, and you’ll have a platter of golden, crunchy bites in no time. The key is taking it one step at a time, and I promise, the result is worth every minute!
Step 1: Prep the Coating Mixture
First, grab a large bowl and toss in your breadcrumbs, garlic powder, paprika, salt, and black pepper. Now, here’s my little trick—use your fingers to mix everything together! It helps break up any clumps and makes sure every single breadcrumb gets coated with those delicious spices. You’ll know it’s ready when the mixture looks evenly speckled with color. Set this aside—we’ll come back to it in a hot minute (literally!).
Step 2: Coat the Chicken
Okay, here’s where the magic happens! Set up your assembly line: flour first, then beaten eggs, then that gorgeous seasoned breadcrumb mix. Take each chicken piece and dunk it in flour (shake off the excess—we don’t want clumps!), dip it in the egg (let the excess drip off), then roll it in the breadcrumbs, pressing gently so they stick. I like to use one hand for dry ingredients and one for wet to avoid “club fingers” (you know, when everything gets glued together!). Lay each coated piece on a plate—don’t let them touch yet, or they’ll stick together!
Step 3: Fry to Crispy Perfection
Heat your oil in a deep skillet over medium heat—you’ll know it’s ready when a breadcrumb sizzles immediately when dropped in. Carefully add your Bat Wing Chicken Bites in a single layer (no crowding, or they’ll steam instead of crisp up!). Fry for about 4-5 minutes per side until they’re that perfect deep golden brown. You’ll hear them singing when they’re ready—a happy little sizzle! Use tongs to transfer them to a paper towel-lined plate to drain. And here’s my secret: let them rest for just a minute before serving. That quick pause makes the crust extra crispy!
Watch-out tip: If your oil starts smoking, it’s too hot! Turn it down a notch to avoid burnt “bat wings.” And always keep an eye on them—they can go from golden to gone in seconds!
Tips for Perfect Bat Wing Chicken Bites
Want to take your Bat Wing Chicken Bites from good to “can’t-stop-eating-them” great? Here are my tried-and-true tricks that I’ve learned after making these for countless Halloween parties and midnight snack attacks!
Double coat for extra crunch
If you love that super-crispy texture (and who doesn’t?), try the double-dip method! After the first coating, give each piece a quick second dip in the egg and breadcrumbs. The extra layer creates this amazing crunch that holds up even with your favorite thick dipping sauces. Just make sure to let them rest for 5 minutes before frying—this helps the coating set so it doesn’t fall off in the oil.
Test your oil temperature
Getting the oil just right makes all the difference. Too cold, and your bites will be greasy. Too hot, and they’ll burn before cooking through. I keep a wooden spoon handy—when the oil shimmers, dip the end in. If bubbles form around it immediately, you’re golden (just like your chicken will be!). No thermometer needed—just good old-fashioned kitchen intuition.
Baking option for a lighter version
Want to skip the frying? No problem! Arrange your coated chicken bites on a parchment-lined baking sheet, give them a light spray with cooking oil, and pop them in a 400°F oven for about 20 minutes, flipping halfway. They won’t get quite as dark as fried ones, but they’ll still have that satisfying crunch. Perfect for when you’re making a big batch for little goblins!
The resting rule
I know it’s tempting to dive right in, but let your Bat Wing Chicken Bites rest for 2-3 minutes after cooking. This lets the crust firm up and prevents all that delicious seasoning from falling off when you bite in. Trust me—waiting those few extra minutes makes all the difference between good and “Oh my gosh, what’s in these?!”
Bonus tip: If you’re making these ahead, keep them crispy by placing them on a wire rack instead of a plate. No one likes a soggy bat wing!
Serving Suggestions for Bat Wing Chicken Bites
Once you’ve got your crispy Bat Wing Chicken Bites ready, it’s time to make them the centerpiece of your spooky spread! Presentation is everything when it comes to Halloween, and these little guys are just begging to be the star of the show. Here’s how I like to serve them up for maximum “wow” factor.
Dipping sauces that steal the show
Every good bite needs a dip, and these are no exception! My go-to is classic ranch—its cool, creamy tang balances the crispy, savory chicken perfectly. But if you’re feeling adventurous, try BBQ sauce for a smoky kick or even a spicy sriracha mayo for those who like it hot. Honey mustard is another crowd-pleaser, especially if you’ve got kids at the party. I love setting up a little “dip station” with small bowls and labels—it’s fun and lets everyone mix and match!
Plating ideas that scream Halloween
Why serve your Bat Wing Chicken Bites on a boring plate when you can make it spook-tacular? I like arranging them on a black platter with a drizzle of red sauce (think ketchup or sriracha) for a creepy “bloody” effect. Add some carved bell peppers as “pumpkins” or use a bed of kale for a haunted forest vibe. For extra drama, place them around a carved jack-o’-lantern or a bowl of dry ice (careful with that one—adults only!).
Fun pairings for a complete spread
These bites are perfect on their own, but why stop there? Pair them with other Halloween-themed snacks like “eyeball” deviled eggs or “witch finger” breadsticks. I also love adding a bowl of orange and black tortilla chips or some mini “mummy” hot dogs. And don’t forget the drinks—serve them with a pitcher of “witches’ brew” (green punch) or spooky-themed cocktails for the grown-ups. The more creative, the better—your guests will be talking about your spread long after the party’s over!
Pro tip: If you’re serving these at a kids’ party, let them “build their own bat wings” by setting out the bites and dips with fun Halloween-themed toothpicks or skewers. It’s a great way to keep little hands busy and make the food even more interactive!
Bat Wing Chicken Bites Variations
Who says you have to stick to the script? One of my favorite things about this recipe is how easily you can mix it up! Whether you’re out of an ingredient or just feeling creative, here are some fun twists I’ve tried (and loved) over the years.
Panko for extra crunch
Ran out of regular breadcrumbs? Panko is my secret weapon when I want that crazy crispy texture. The flakes are bigger and lighter, so they create this amazing shattery crust that makes every bite feel extra special. Just be gentle when pressing them onto the chicken—you want to keep those lovely airy pockets intact!
Air-fryer magic
If you’re avoiding oil but still want that golden crunch, your air fryer is about to become your best friend. Spray the basket lightly with oil, arrange the bites in a single layer (no touching!), and cook at 380°F for 10-12 minutes, flipping halfway. They won’t get quite as dark as the fried version, but that satisfying crunch? Still totally there. My kids can’t even tell the difference!
Spice it up (or down)
The basic seasoning blend is perfect as-is, but don’t be afraid to play! Swap paprika for smoked paprika if you love that deep, woodsy flavor. Add a pinch of cayenne for heat, or mix in some grated parmesan with the breadcrumbs for a cheesy twist. For little ones, I sometimes skip the pepper altogether and add a teaspoon of honey powder instead—sweet “bat wings” disappear even faster!
Remember: However you tweak it, the key is keeping that three-step coating process—flour, egg, crumbs. That’s what gives these bites their signature bat-wing texture, no matter what flavors you choose!
Storing and Reheating Bat Wing Chicken Bites
Let’s face it—these Bat Wing Chicken Bites are so good, they rarely last long enough to store! But if you’re lucky enough to have leftovers (or you’re planning ahead for your next spooky gathering), here’s how to keep them crispy and delicious.
Storing for freshness
Once your bites have cooled completely, pop them into an airtight container. I like lining the container with a paper towel to soak up any extra oil—it helps keep them from getting soggy. They’ll stay fresh in the fridge for up to 3 days, but honestly, they’re best eaten within 24 hours. Trust me, you’ll want to sneak back into the kitchen for “just one more” anyway!
Reheating for that just-fried crunch
Here’s the secret to bringing back that crispy magic: skip the microwave! Instead, spread your bites out on a baking sheet and warm them in a 375°F oven for about 5-7 minutes. If they’re looking a little pale, give them a quick spray with cooking oil before reheating—it’ll bring back that golden glow. For extra crispiness, use a wire rack on the baking sheet so air can circulate around the bites while they reheat.
Pro tip: If you’re reheating a big batch, don’t crowd the baking sheet! Give each bite some breathing room to ensure they crisp up evenly. And keep an eye on them—they can go from perfectly reheated to overdone in a flash!
So go ahead, make a big batch of these Bat Wing Chicken Bites—they’re just as good the next day (if they last that long)!. Now, let’s get those leftovers reheated and back on the spooky snack table!
Bat Wing Chicken Bites Nutrition Info
Okay, let’s talk numbers—because even spooky snacks have a little math behind them! Here’s the nutritional breakdown for my Bat Wing Chicken Bites. Keep in mind, these are estimates based on the ingredients I use, so your exact values might vary slightly depending on brands or tweaks you make. But hey, it’s all about balance, right? A little indulgence is part of the fun!
- Calories: 250 per serving
- Fat: 12g (3g saturated, 7g unsaturated)
- Protein: 20g
- Carbohydrates: 15g
- Fiber: 1g
- Sugar: 1g
- Sodium: 300mg
- Cholesterol: 80mg
Quick note: If you’re baking instead of frying, you’ll save a bit on fat and calories—but I’ll let you decide if that’s worth skipping the crispy goodness of the fried version. And remember, these are just guidelines—so enjoy your Bat Wing Chicken Bites guilt-free (especially when you’re sharing them with your favorite little monsters!).
FAQs About Bat Wing Chicken Bites
After making these for years (and fielding tons of questions from friends!), I’ve rounded up the most common things people ask about my Bat Wing Chicken Bites. Whether you’re a first-timer or a seasoned spooky snack pro, here’s everything you need to know to make them perfect every time!
Can I bake these instead of frying?
Absolutely! While frying gives that unbeatable golden crunch, baking works great too. Just arrange your coated bites on a parchment-lined sheet, spray lightly with oil, and bake at 400°F for about 20 minutes (flip halfway!). They won’t get quite as dark, but they’ll still be deliciously crispy—perfect for when you’re feeding a crowd of little vampires!
What are the best dipping sauces?
Oh, where do I start? My go-to is always cool, creamy ranch—it’s like these bites were made for it! But if you want to mix it up, try BBQ sauce for smoky sweetness, honey mustard for tang, or sriracha mayo if you like heat. For Halloween parties, I’ll sometimes dye ranch dressing black with food coloring for a “bat blood” effect—the kids go wild for it!
Can I make these ahead of time?
You sure can! Here’s my make-ahead magic: coat the chicken bites and arrange them on a baking sheet, then freeze for 1 hour before transferring to a freezer bag. They’ll keep for up to a month! When you’re ready, just fry (or bake) straight from frozen—add an extra minute or two to the cooking time. No thawing needed!
Why are my bites turning out greasy?
If your bat wings are coming out greasy, your oil might not be hot enough. Wait until a breadcrumb sizzles immediately when dropped in—that’s your cue! Also, don’t overcrowd the pan; too many bites at once lowers the oil temp fast. And always let them drain on a wire rack instead of paper towels—it keeps the crispiness intact!
Can I use chicken thighs instead of breasts?
You bet! Thighs actually stay super juicy inside that crispy coating. Just trim off excess fat and cut into even pieces (they might need an extra minute of cooking). The flavor’s richer, which I love—but if you’re serving kids, stick with breasts for that milder taste they prefer.
Remember: However you tweak them, these Bat Wing Chicken Bites are all about having fun in the kitchen. So grab your apron, turn up the Halloween tunes, and get ready for your new favorite spooky snack!
Ready to Whip Up Some Spooky Magic?
There you have it—everything you need to create the crispiest, most delicious Bat Wing Chicken Bites that’ll steal the show at your next Halloween bash (or Tuesday night dinner… no judgment here!). Whether you’re frying, baking, or air-frying, these little guys are guaranteed crowd-pleasers. I can’t wait for you to experience that first crunchy bite followed by tender, juicy chicken—it’s pure spooky perfection! So grab your apron, cue up your favorite Halloween playlist, and let’s get cooking. And when you do? Snap a pic of your creepy creations and tag me—I live for seeing your bat-wing masterpieces!
PrintCrispy Bat Wing Chicken Bites That Will Haunt Your Taste

Crispy and flavorful chicken bites shaped like bat wings, perfect for Halloween or any spooky-themed party.
- Prep Time: 15 minutes
- Cook Time: 10 minutes
- Total Time: 25 minutes
- Yield: 4 servings 1x
- Category: Appetizer
- Method: Frying
- Cuisine: American
- Diet: Low Lactose
Ingredients
- 1 lb chicken breast, cut into bite-sized pieces
- 1 cup breadcrumbs
- 1/2 cup all-purpose flour
- 2 eggs, beaten
- 1 tsp garlic powder
- 1 tsp paprika
- 1/2 tsp salt
- 1/2 tsp black pepper
- 1/2 cup oil for frying
Instructions
- In a bowl, mix breadcrumbs, garlic powder, paprika, salt, and black pepper.
- Dip each chicken piece in flour, then in beaten eggs, and finally coat with the breadcrumb mixture.
- Heat oil in a pan over medium heat.
- Fry the chicken pieces until golden brown and crispy, about 4-5 minutes per side.
- Drain on paper towels and serve immediately.
Notes
- For extra crispiness, double coat the chicken pieces.
- Serve with your favorite dipping sauce.
- These can be baked at 400°F for 20 minutes if you prefer a healthier option.
Nutrition
- Serving Size: 1 serving
- Calories: 250
- Sugar: 1g
- Sodium: 300mg
- Fat: 12g
- Saturated Fat: 3g
- Unsaturated Fat: 7g
- Trans Fat: 0g
- Carbohydrates: 15g
- Fiber: 1g
- Protein: 20g
- Cholesterol: 80mg