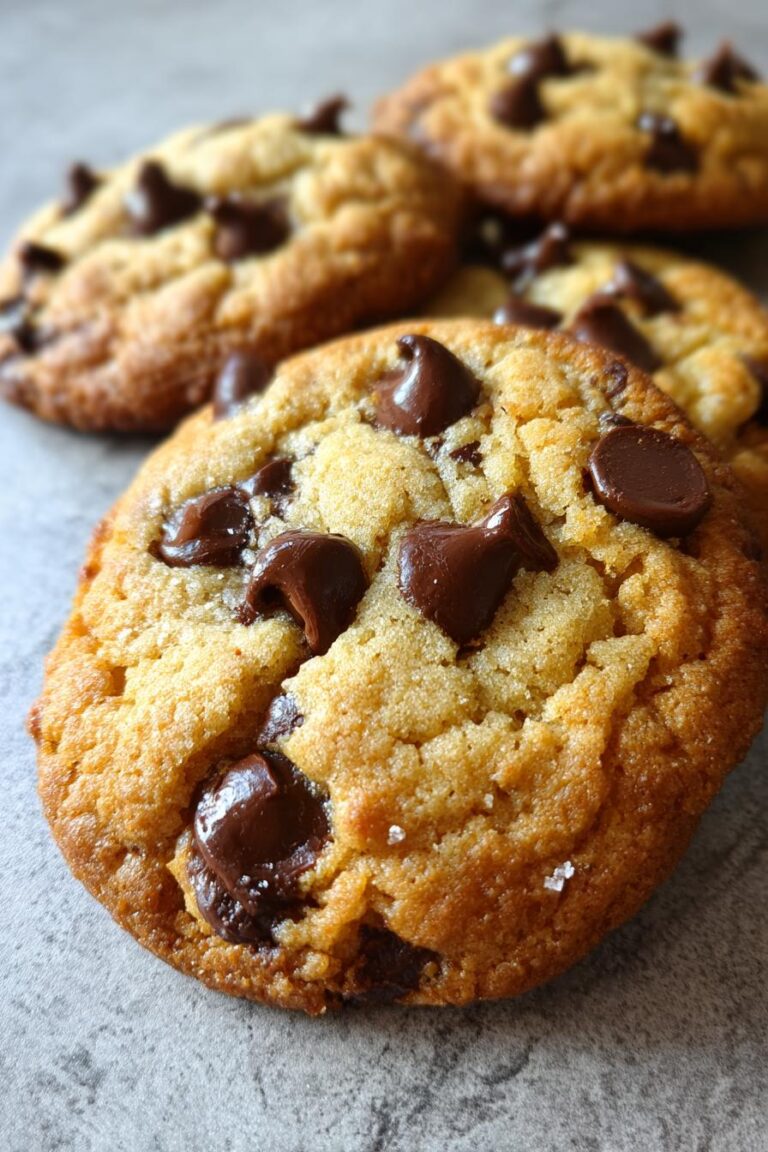
5 Secrets for Perfect Canadian Maple Butter Cookies
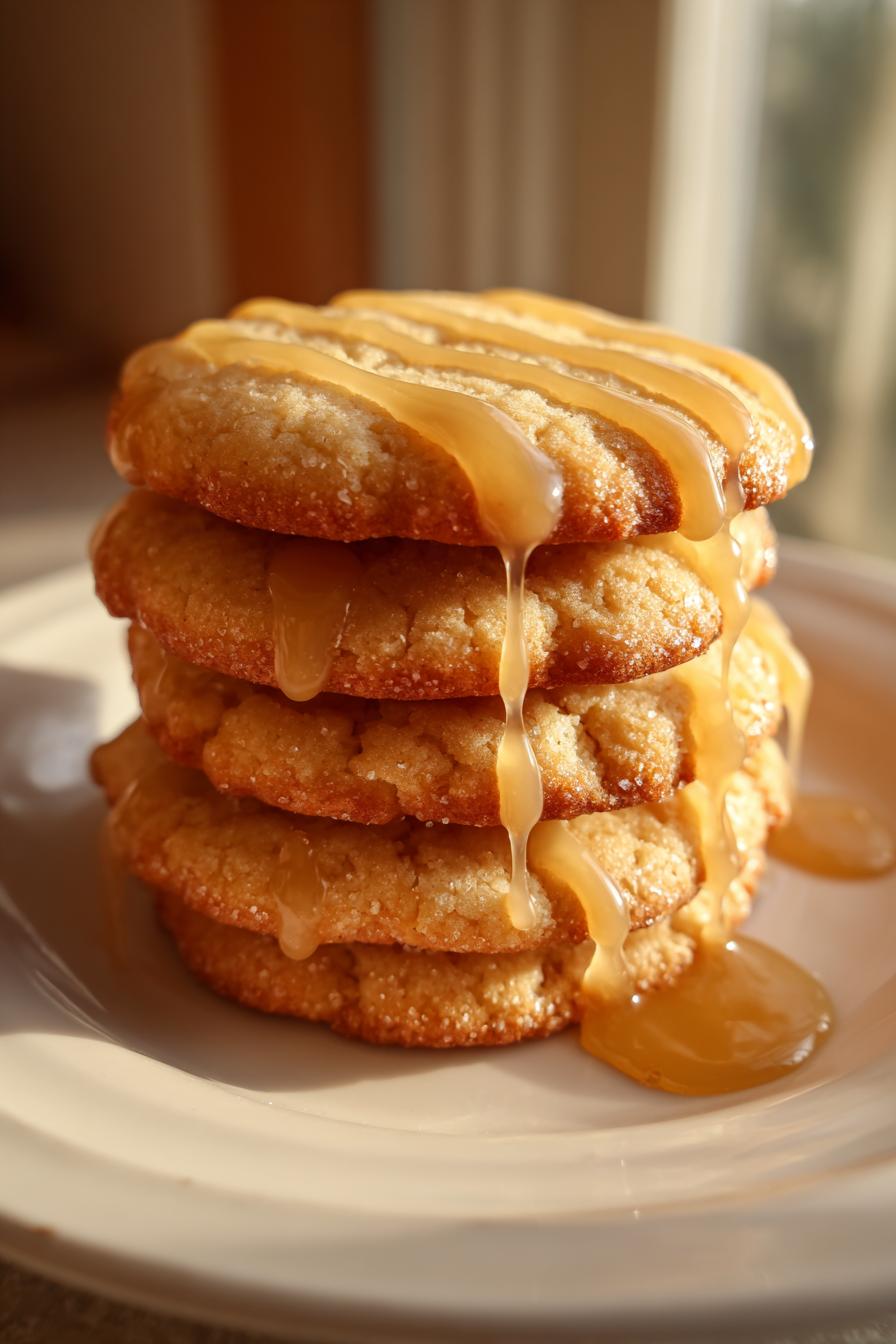
There’s something magical about biting into a buttery, melt-in-your-mouth cookie, especially when it’s kissed with the warm, caramel-like sweetness of pure maple syrup. These Canadian Maple Butter Cookies are my go-to treat for lazy Sunday afternoons with a cup of tea or as a little “I love you” surprise for my kids after school. The secret? Real maple syrup—none of that imitation stuff—and good old-fashioned butter, creamed just right so every bite is tender and rich. This recipe has been my happy accident since I first tweaked it on a snowy afternoon, and now it’s the one friends beg me to bring to every gathering. Trust me, your kitchen will smell like a cozy Canadian bakery in no time.
Why You’ll Love These Canadian Maple Butter Cookies
These little maple-kissed wonders have stolen hearts (and taste buds) in my kitchen, and I know they’ll do the same in yours. Here’s why:
- Weekend warrior approved: You’re just 30 minutes away from warm cookies – the dough comes together faster than your oven preheats!
- That maple magic: Pure Canadian syrup gives them this cozy, caramel depth that makes store-bought cookies taste bland in comparison.
- Tea’s best friend: The buttery crumb just dissolves on your tongue – perfect for dunking or nibbling alongside your afternoon Earl Grey.
- Stays fresh for days: Tuck them in an airtight container, and they’ll still taste like you just pulled them from the oven come Wednesday.
- Memories in every bite: That maple-butter aroma? It’s childhood snow days and holiday mornings all rolled into one irresistible cookie.
Ingredients for Canadian Maple Butter Cookies
Gather these simple ingredients—each one plays a special role in creating that perfect melt-in-your-mouth texture and rich maple flavor. (Pro tip: Measure everything before you start mixing—it makes the process so much smoother!)
- 1 cup (2 sticks) unsalted butter, softened – Leave it on the counter for 30 minutes until slightly cool but indents easily when pressed
- ½ cup granulated sugar – The perfect amount to sweeten without overpowering the maple
- ¼ cup pure maple syrup – Grade A amber for the best flavor (absolutely no pancake syrup substitutes!)
- 2 cups all-purpose flour – Spoon and level it—don’t pack the measuring cup
- ¼ teaspoon salt – Just enough to balance the sweetness
- 1 teaspoon vanilla extract – The secret background note that makes the maple sing
How to Make Canadian Maple Butter Cookies
Okay, let’s turn these simple ingredients into golden, maple-scented perfection! Follow these steps—I’ve included all my little tricks to avoid common cookie disasters (we’ve all been there).
Step 1: Prep the Dough
First things first—preheat your oven to 350°F (175°C). Don’t skip this! A properly heated oven is key to even baking. Now, grab your softened butter and sugar. Cream them together in a large bowl with a hand mixer (or stand mixer) for 2-3 minutes until it’s light, fluffy, and almost whipped. This isn’t just mixing—it’s creating tiny air pockets that’ll give your cookies that dreamy tender crumb. Next, drizzle in the maple syrup and vanilla, mixing just until combined. The batter should look like liquid gold and smell like a sugar shack in springtime. Now, gently fold in the flour and salt with a spatula—stop the moment no dry streaks remain. Overmixing = tough cookies, and we want melt-in-your-mouth magic!
Step 2: Shape and Bake
Time to get hands-on! Scoop out tablespoon-sized portions of dough and roll them into smooth balls between your palms. Arrange them on a parchment-lined baking sheet about 2 inches apart—they’ll spread just enough to become perfect little rounds. Now, the signature touch: gently press each ball with a fork to flatten slightly, creating those cute crisscross marks. Bake for 12-15 minutes until the edges are barely golden but the centers still look soft. They’ll firm up as they cool—trust me, pulling them out a smidge early is better than overbaked hockey pucks!
Step 3: Cooling and Storage
Resist the urge to immediately scarf them down! Let the cookies rest on the baking sheet for 5 minutes (this helps them set without crumbling), then transfer to a wire rack. They’ll crisp slightly as they cool but stay tender inside. Once completely cool, store them in an airtight container at room temperature. They’ll stay fresh for up to a week—though in my house, they never last that long! For longer storage, freeze the baked cookies in a zip-top bag for up to 3 months. Just thaw and enjoy whenever a maple craving hits.
Tips for Perfect Canadian Maple Butter Cookies
After baking countless batches (some winners, some hockey pucks), I’ve learned these foolproof tricks for maple butter cookie perfection every single time:
- Butter ballet: Your butter should be cool but yield like soft clay when pressed—about 65°F. Too cold and it won’t cream properly; too warm and your cookies will spread into pancakes.
- The parchment promise: Skip the greased pan—parchment paper prevents sticking AND makes cleanup a breeze. (Bonus: You can reuse the sheet for multiple batches!)
- Golden rule: Pull cookies when edges just kiss that light gold color—centers will set as they cool. Overbaking for even one minute steals their tender magic.
- Syrup sleuthing: If your maple syrup is extra thick, warm it slightly before mixing so it incorporates evenly without overworking the dough.
- Flour finesse: When measuring, fluff the flour first, then spoon it gently into your cup. No packing or tapping—that extra flour means dry cookies.
Ingredient Substitutions and Notes
Okay, let’s talk swaps—because sometimes you’re halfway through baking and realize you’re out of something! First, the non-negotiable: pure maple syrup. The fake stuff just won’t give you that deep, caramelized flavor. But if you’re in a pinch with butter, salted works—just skip the added salt in the recipe. No vanilla? A tiny splash of bourbon adds warmth (trust me). And if you only have maple extract, use half a teaspoon—it’s potent! For gluten-free friends, a 1:1 GF flour blend works beautifully here. Just remember: the dough might be stickier, so chill it for 20 minutes before shaping. Happy improvising!
Serving Suggestions for Canadian Maple Butter Cookies
These buttery maple gems shine in so many delicious ways! I love serving them warm with a scoop of vanilla ice cream—the contrast of cold cream and crumbly cookie is pure magic. For breakfast (yes, I said it!), dunk them in strong coffee or chai tea. Come holiday season, stack them in pretty tins with wax paper between layers—they make the sweetest homemade gifts. My kids adore them crumbled over yogurt for an afternoon snack. Honestly? Some days I just sneak one straight from the cookie jar when no one’s looking!
Nutritional Information for Canadian Maple Butter Cookies
Here’s the skinny on these sweet treats – per cookie: roughly 120 calories, 7g fat (4g saturated), 13g carbs, and 1g protein. Remember, nutrition can vary slightly depending on your exact ingredients and brands used!
Frequently Asked Questions About Canadian Maple Butter Cookies
Over the years, I’ve gotten so many great questions about these cookies – here are the answers to the ones that pop up most often!
Can I freeze the cookie dough for later?
Absolutely! Roll the dough into balls, freeze them in a single layer on a baking sheet, then transfer to a zip-top bag. They’ll keep for 3 months – just add 1-2 extra minutes when baking from frozen. My freezer always has a stash for last-minute cravings!
How long do these maple butter cookies stay fresh?
Stored properly in an airtight container, they’ll stay delicious for about a week. The maple flavor actually gets richer after a day or two! If they last that long, that is – in my house they usually vanish within 48 hours.
Can I use maple extract instead of syrup?
I don’t recommend it for the full maple flavor, but in a pinch, use ½ teaspoon extract plus 2 tablespoons milk or water to replace the syrup. The texture will be slightly different, but still tasty!
Why did my cookies spread too much?
This usually means your butter was too warm. Next time, chill the shaped dough for 15 minutes before baking. Also make sure your oven is fully preheated – that initial heat shock helps them hold their shape.
Can I make these without a mixer?
Definitely! Just use a sturdy wooden spoon and some elbow grease to cream the butter and sugar – it’ll take about 5 minutes of vigorous mixing. Grandma never used electric mixers, and her cookies were legendary!
Share Your Canadian Maple Butter Cookies
I’d love to hear how your cookies turned out! Snap a photo, leave a comment, or tag me—nothing makes me happier than seeing your maple-kissed creations. Happy baking!
Print5 Secrets for Perfect Canadian Maple Butter Cookies
These Canadian Maple Butter Cookies are a delightful treat with a rich buttery flavor and a hint of maple. Perfect for tea time or as a sweet snack.
- Prep Time: 15 minutes
- Cook Time: 15 minutes
- Total Time: 30 minutes
- Yield: 24 cookies 1x
- Category: Dessert
- Method: Baking
- Cuisine: Canadian
- Diet: Vegetarian
Ingredients
- 1 cup unsalted butter, softened
- 1/2 cup granulated sugar
- 1/4 cup pure maple syrup
- 2 cups all-purpose flour
- 1/4 teaspoon salt
- 1 teaspoon vanilla extract
Instructions
- Preheat your oven to 350°F (175°C) and line a baking sheet with parchment paper.
- In a mixing bowl, cream together the butter and sugar until light and fluffy.
- Add the maple syrup and vanilla extract, mixing well.
- Gradually stir in the flour and salt until a soft dough forms.
- Roll the dough into small balls and place them on the prepared baking sheet.
- Flatten each ball slightly with a fork.
- Bake for 12-15 minutes or until the edges are lightly golden.
- Let the cookies cool on the baking sheet for 5 minutes before transferring to a wire rack.
Notes
- Use pure maple syrup for the best flavor.
- Store in an airtight container for up to a week.
- For a crispier texture, bake for an extra 1-2 minutes.
Nutrition
- Serving Size: 1 cookie
- Calories: 120
- Sugar: 6g
- Sodium: 25mg
- Fat: 7g
- Saturated Fat: 4g
- Unsaturated Fat: 3g
- Trans Fat: 0g
- Carbohydrates: 13g
- Fiber: 0g
- Protein: 1g
- Cholesterol: 20mg