Irresistible Caramelized Apples Recipe Ready in 20 Minutes
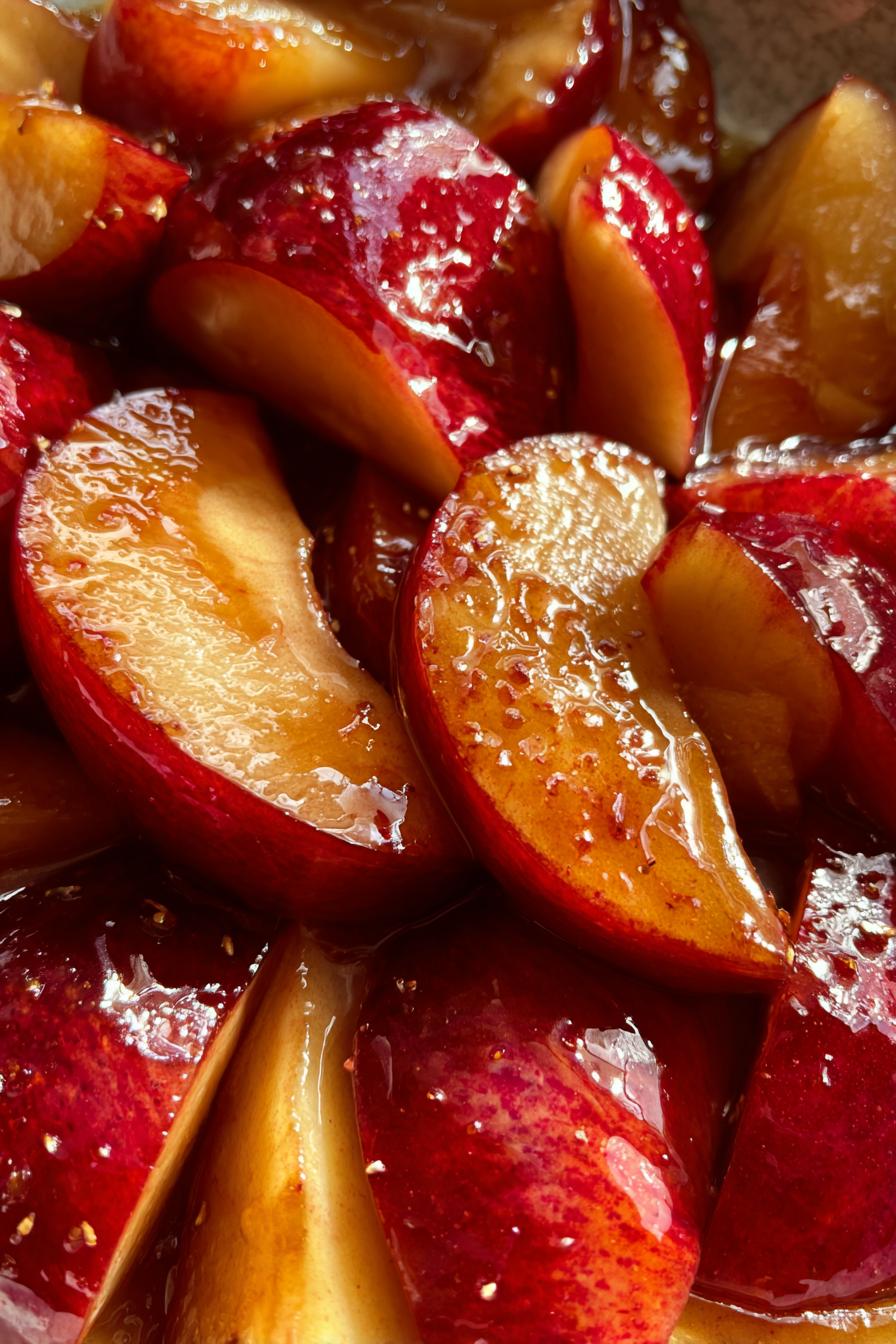
Oh, caramelized apples – just saying those words makes my mouth water! I can’t tell you how many times I’ve whipped up a batch of these sweet, spiced beauties to top off pancakes for Sunday brunch or to serve with a scoop of vanilla ice cream for an easy dessert. My grandma started making these when I was little, and now the smell of apples caramelizing in butter and brown sugar takes me right back to her cozy kitchen. The best part? In just 20 minutes, you can transform simple apples into something magical that works on everything from oatmeal to cheesecake. Trust me, once you try this recipe, you’ll be making it all year round!
Why You’ll Love These Caramelized Apples
Let me count the ways these golden, sticky-sweet apples will steal your heart:
- They’re the ultimate multitasker – perfect on ice cream, swirled into oatmeal, or piled high on Sunday morning pancakes (my personal favorite!)
- From peeling to perfect in under 20 minutes – faster than waiting for takeout!
- Just 6 simple ingredients you probably have in your kitchen right now
Honestly, I make these at least once a week – they’re that easy and versatile. The smell alone will have your family hovering around the kitchen!
The Simple Ingredients That Make Magic
Here’s the beautiful part – you only need six humble ingredients to create these caramelized wonders. But listen close, because each one plays a special role:
- 4 medium apples – peeled, cored, and sliced about 1/4″ thick (this thickness keeps them from turning to mush!)
- 2 tbsp unsalted butter – the rich base that makes everything better
- 1/4 cup packed brown sugar – packed tight, this gives us that deep caramel flavor
- 1 tsp ground cinnamon – warm and cozy spice that sings with apples
- 1/4 tsp ground nutmeg – just enough to add mysterious depth
- 1 tbsp fresh lemon juice – the bright finish that keeps things balanced
See? Nothing fancy, just pantry staples working together like best friends. Now grab those apples – we’re about to make some magic!
Equipment You’ll Need
You really don’t need much to make these caramelized apples – just a few trusty tools you probably already have:
- A medium skillet (nonstick works great!)
- A wooden spoon (perfect for stirring without scratching your pan)
- A peeler and sharp knife (for prepping those apples in a flash)
That’s it! No fancy gadgets required – just simple equipment for seriously delicious results.
How to Make Caramelized Apples
Alright, let’s get cooking! I’ve made this recipe more times than I can count, and I’ll walk you through each step so your caramelized apples turn out perfectly sweet, tender, and full of flavor.
Step 1: Melt the Butter
First things first – grab your trusty skillet and set it over medium heat (not high – we’re not in a hurry here!). Add those 2 tablespoons of butter and let it melt slowly, swirling the pan occasionally. You’ll know it’s ready when the butter stops foaming and develops a lovely nutty aroma – usually about 1-2 minutes. Pro tip: If your butter starts browning too fast, just nudge the heat down a bit.
Step 2: Cook the Apples
Now for the fun part! Toss in your sliced apples and let them cook undisturbed for about 2 minutes – this gives them a chance to develop some golden color. Then sprinkle over the brown sugar, cinnamon, and nutmeg (I like to mix my spices with the sugar first to distribute them evenly). Stir gently – you want every slice coated in that sweet, spiced mixture. Keep cooking for 5-7 minutes, stirring occasionally, until the apples are tender but still hold their shape. When they’re done, they should have a gorgeous caramel glaze clinging to them!
Step 3: Finish with Lemon Juice
Here’s my secret weapon – right before taking the apples off the heat, drizzle in that tablespoon of lemon juice. It might seem odd to add acid to something sweet, but trust me, this bright pop keeps the caramel from becoming too cloying. Stir it through for just about 30 seconds – long enough to blend the flavors but not so long that the apples get mushy. And voila! You’ve just made restaurant-worthy caramelized apples in your own kitchen.
Tips for Perfect Caramelized Apples
After making countless batches of these caramelized apples (some more successful than others!), I’ve learned a few tricks that guarantee perfect results every time:
- Pick firm apples – Granny Smith or Honeycrisp hold their shape beautifully. Soft varieties turn to mush faster than you can say “apple pie!”
- Taste before adding sugar – Some apples are sweeter than others. I always nibble a slice first and adjust the sugar accordingly.
- Give them space – Overcrowding the pan steams instead of caramelizes. Cook in batches if needed – it’s worth the extra few minutes!
Remember, patience is key – let that caramel develop slowly for the best flavor.
Serving Suggestions for Caramelized Apples
Oh, where do I even begin with serving ideas? These caramelized apples are like the little black dress of desserts – they go with everything! My absolute favorite is heaping them warm over vanilla ice cream (the way the cold meets the hot apples? Pure magic). But don’t stop there – try them:
- Swirled into morning oatmeal with a drizzle of maple syrup
- Piled high on fluffy pancakes or delicate crepes
- As a topping for cheesecake or pound cake
- Mixed into yogurt with granola for a fancy parfait
Honestly, I’ve even eaten them straight from the pan with a spoon – no judgment here!
Storing and Reheating Caramelized Apples
Got leftovers? Lucky you! Pop your caramelized apples into an airtight container and store them in the fridge for up to 3 days. When you’re ready to enjoy them again, reheat gently in a skillet over low heat, stirring occasionally until warmed through. Easy peasy!
Nutritional Information
Here’s a quick look at what you’re getting in each serving (but remember – these are estimates and will vary based on your specific ingredients):
- Calories: 150
- Sugar: 20g
- Fiber: 3g
Honestly, I don’t stress about numbers with this recipe – those apples pack vitamins, and everything’s better with real butter and spices, right? Just enjoy every delicious bite!
FAQs About Caramelized Apples
Over the years, I’ve gotten so many great questions about these caramelized apples – here are the ones that pop up most often with my tried-and-true answers:
Can I use white sugar instead of brown?
Yes, but you’ll miss out on that deep, molasses-y flavor brown sugar brings to the party. White sugar works in a pinch though – just add an extra pinch of cinnamon to make up for it!
Help! My apples always turn to mush. What am I doing wrong?
Two things: First, pick firm apples like Granny Smith – they’re practically indestructible. Second, don’t stir too much while cooking! Let them get a little golden before gently turning. And whatever you do, don’t walk away – 30 seconds too long can mean the difference between perfect and applesauce.
Can I freeze leftover caramelized apples?
Honestly? I wouldn’t. The texture changes completely when thawed – they go from tender to rubbery. But they keep beautifully in the fridge for 3 days, and they reheat like a dream on the stovetop.
Now that you’re a caramelized apple expert, I want to hear about your creations! Tag me when you make them – I love seeing how you serve these sweet, spiced beauties.
PrintIrresistible Caramelized Apples Recipe Ready in 20 Minutes

Caramelized apples are a sweet and versatile treat perfect for desserts or toppings.
- Prep Time: 10 minutes
- Cook Time: 10 minutes
- Total Time: 20 minutes
- Yield: 4 servings 1x
- Category: Dessert
- Method: Stovetop
- Cuisine: American
- Diet: Vegetarian
Ingredients
- 4 medium apples, peeled and sliced
- 2 tablespoons butter
- 1/4 cup brown sugar
- 1 teaspoon cinnamon
- 1/4 teaspoon nutmeg
- 1 tablespoon lemon juice
Instructions
- Melt butter in a skillet over medium heat.
- Add apple slices and cook for 3 minutes.
- Sprinkle brown sugar, cinnamon, and nutmeg over apples.
- Stir gently and cook for 5-7 minutes until apples soften.
- Add lemon juice and cook for 1 more minute.
- Remove from heat and serve warm.
Notes
- Use firm apples like Granny Smith or Honeycrisp.
- Adjust sugar based on apple sweetness.
- Store leftovers in an airtight container for up to 3 days.
Nutrition
- Serving Size: 1/4 recipe
- Calories: 150
- Sugar: 20g
- Sodium: 10mg
- Fat: 6g
- Saturated Fat: 4g
- Unsaturated Fat: 2g
- Trans Fat: 0g
- Carbohydrates: 28g
- Fiber: 3g
- Protein: 0g
- Cholesterol: 15mg