Cheesy Garlic Pull-Apart Rolls: 12 Irresistible Bite
There’s something magical about pulling apart warm, buttery rolls dripping with melted cheese and garlic—it’s like edible happiness. My cheesy garlic pull-apart rolls have become the star of every family gathering, disappearing faster than I can bake them. I’ll never forget the first time I made them for game night—my cousin ate three before anyone else got a chance! The secret? Soft, fluffy dough tangled with gooey mozzarella, a punch of fresh garlic, and just enough Parmesan to make it irresistible. Trust me, once you try these, you’ll be making them on repeat. They’re that good.
Why You’ll Love These Cheesy Garlic Pull-Apart Rolls
Oh, where do I even start? These rolls are basically a hug in bread form—warm, gooey, and impossible to resist. Here’s why they’ll become your new obsession:
- Effortless magic: No fancy skills needed—just mix, knead, and let the dough do its thing while you relax (or sneak a taste of the garlic butter).
- Shareable joy: The pull-apart design means no awkward slicing—just tear, giggle, and watch them disappear at parties.
- Garlic-cheese heaven: Fresh garlic and melty mozzarella create pockets of savory goodness in every fluffy bite.
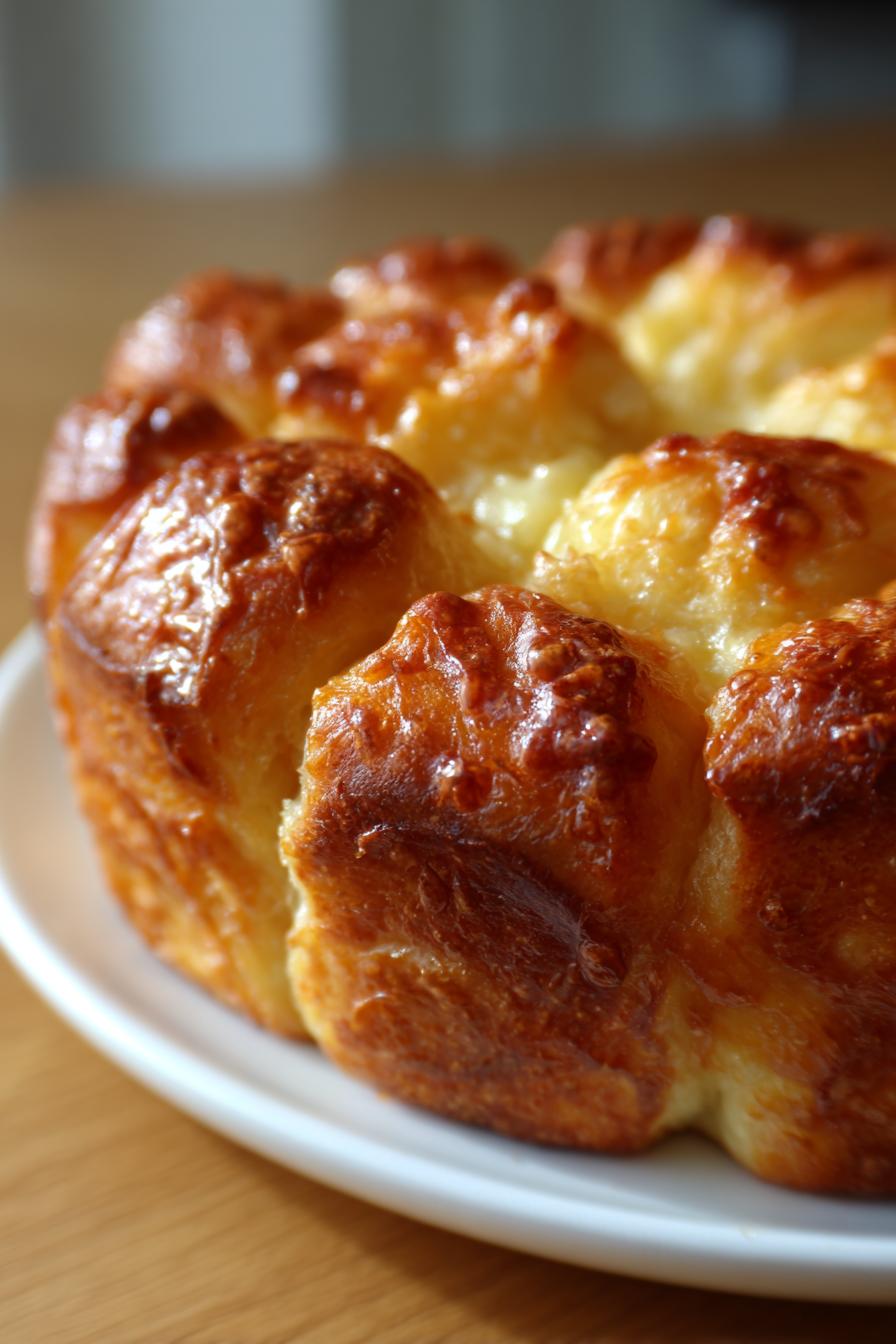
- Cloud-like texture: That first pull reveals strands so soft, you’ll swear they’re made of dreams (and butter. Lots of butter).
Seriously, these rolls turn any meal into a celebration. My kids call them “cheese clouds”—and fight over the last one every time!
Ingredients for Cheesy Garlic Pull-Apart Rolls
Grab these simple ingredients—most are probably in your kitchen already! The magic happens when they all come together:
- 2 cups all-purpose flour (spooned & leveled)
- 1 tbsp sugar – just enough to help the yeast work its magic
- 1 packet (2 1/4 tsp) active dry yeast – your dough’s best friend
- 3/4 cup warm milk (110°F) – test it on your wrist like baby formula!
- 1/4 cup melted butter – plus extra for brushing
- 1 egg – at room temperature for a happy dough
- 4 cloves garlic, minced – fresh is non-negotiable here
- 1/4 cup grated Parmesan cheese – the salty, nutty backbone
- 1 cup shredded mozzarella cheese – because melty strings are mandatory
- 2 tbsp chopped parsley – for that pretty green confetti finish
1 tsp salt – balances all that rich cheesiness
See? Nothing weird—just pantry staples ready to transform into something extraordinary.
How to Make Cheesy Garlic Pull-Apart Rolls
Okay, let’s get our hands doughy! This process is easier than you think—just follow these steps, and soon your kitchen will smell like a garlicky, cheesy dream. The key is patience (mostly for waiting while the dough rises—I know, torture!).
Preparing the Dough
First, whisk together your flour, sugar, salt, and yeast in a big bowl—make sure they’re friends before the wet ingredients crash the party. Now, pour in that warm milk (not hot! Think baby-bottle temperature), melted butter, and crack in the egg. Stir until it looks shaggy, then dump it onto a floured surface. Knead for about 5 minutes until it’s smooth and slightly tacky—like a soft baby’s cheek. If it sticks to your hands, add a sprinkle more flour, but don’t go overboard! Pop it back in the bowl, cover with a towel, and let it rise in a warm spot for 1 hour. It should double in size—mine always looks like a happy little dough pillow.
Shaping and Layering the Rolls
Punch down that puffy dough (so satisfying!) and divide it into 12 equal pieces—I use a bench scraper, but a knife works too. Roll each into a smooth ball between your palms. Now, the fun part: mix your minced garlic with 2 more tablespoons of melted butter (trust me, extra garlic butter is never a mistake). Brush each ball generously—this is where the flavor magic happens! Arrange half the balls in a greased 9-inch round pan, sprinkle with half the mozzarella and Parmesan, then repeat with the remaining balls and cheese. Cover and let rise again for 30 minutes—they’ll get cozy and puff up together.
Baking the Cheesy Garlic Pull-Apart Rolls
Preheat your oven to 375°F while the rolls do their final rise. When they’re nicely puffed, slide them into the oven and bake for 20-25 minutes. You’ll know they’re done when the tops are golden and the cheese is bubbling like a little lava pit. If you tap the top, it should sound hollow—music to a baker’s ears! Let them cool just enough so you don’t burn your fingers, then sprinkle with parsley and serve warm. Warning: The cheese pulls are dangerously photogenic!
Tips for Perfect Cheesy Garlic Pull-Apart Rolls
Listen, I’ve made enough of these rolls to know the little tricks that take them from good to “can I have the recipe?” status. First, always use fresh garlic—that pre-minced stuff just doesn’t pack the same punch. Let your dough rise somewhere cozy, like near a sunny window or on top of the preheating oven (just don’t let it get too hot!). And whatever you do, serve them warm—that’s when the cheese is at its gooiest, most irresistible best. Oh, and one last thing: make extra. Trust me on this.
Variations for Cheesy Garlic Pull-Apart Rolls
Once you’ve mastered the basic recipe (and eaten half the pan yourself—no judgment!), try these fun twists! Swap mozzarella for sharp cheddar or smoky Gouda—my neighbor adds crumbled bacon between the layers, and wow. Fresh rosemary or thyme in the garlic butter makes it fancy, while a sprinkle of red pepper flakes adds heat. My kids love a “pizza roll” version with marinara for dipping. The possibilities are endless!
Serving Suggestions for Cheesy Garlic Pull-Apart Rolls
These rolls are social butterflies—they make everything better! Serve them piping hot with a big bowl of tomato soup for the ultimate comfort meal, or let them star as the appetizer at your next party (just watch them vanish!). They’re also incredible alongside a crisp Caesar salad or piled high on a brunch spread. My favorite move? Tear them apart tableside and watch everyone’s eyes light up—it’s edible entertainment!
Storing and Reheating Cheesy Garlic Pull-Apart Rolls
If by some miracle you have leftovers (seriously, who are you?), these rolls store beautifully! Let them cool completely, then tuck them into an airtight container—they’ll stay fresh at room temp for 2 days. To revive that just-baked magic, pop them in a 350°F oven for 5-8 minutes until the cheese gets melty again. The microwave works in a pinch, but the oven brings back that glorious crispiness. Pro tip: Freeze unbaked dough balls with garlic butter between layers—just thaw, let rise, and bake fresh whenever the craving hits!
Nutritional Information for Cheesy Garlic Pull-Apart Rolls
Let’s be real—you’re not eating these rolls for their health benefits, but here’s the scoop! Each glorious roll clocks in at about 180 calories, with 8g of fat (that’s the good, buttery kind!), 20g carbs, and 6g protein. Of course, these numbers dance around depending on your cheese generosity—I won’t judge if you go heavy on the mozzarella! The parsley totally counts as a vegetable, right?
Frequently Asked Questions About Cheesy Garlic Pull-Apart Rolls
I get asked about these rolls all the time—here are the questions that pop up most often (and my honest answers after making dozens of batches)!
Can I use instant yeast instead of active dry yeast?
Absolutely! Instant yeast works just fine—skip the proofing step and mix it right in with your dry ingredients. You might notice a slightly faster rise, but the results are equally delicious.
How long do these stay fresh?
They’re best devoured warm (obviously!), but will keep in an airtight container for 2 days. The garlic flavor actually deepens overnight! Just reheat in the oven to revive that fresh-baked magic.
Can I freeze the dough?
Yes! After the first rise, shape the garlic-buttered balls and layer them with cheese in a freezer-safe pan. When ready to bake, let thaw and rise for 1 hour before popping in the oven. Game changer for impromptu gatherings!
Why didn’t my cheese get stringy?
Two culprits: low-moisture mozzarella (look for “whole milk” varieties) or overbaking. Pull them out when the cheese is just bubbling—that’s prime stretchiness time!
Can I make these dairy-free?
I’ve had success with plant-based butter and cheeses, though the texture changes slightly. The garlic-Parmesan flavor still shines through beautifully!
Share Your Cheesy Garlic Pull-Apart Rolls Experience
Did you make these rolls? I’d love to hear your stories! Tag me on Instagram with your cheesiest pull-apart shots or leave a comment below—did they disappear as fast as mine always do?
PrintCheesy Garlic Pull-Apart Rolls: 12 Irresistible Bite

Soft, fluffy rolls loaded with garlic butter and cheese, perfect for pulling apart and sharing.
- Prep Time: 1 hour 30 mins
- Cook Time: 25 mins
- Total Time: 1 hour 55 mins
- Yield: 12 rolls 1x
- Category: Bread
- Method: Baking
- Cuisine: American
- Diet: Vegetarian
Ingredients
- 2 cups all-purpose flour
- 1 tbsp sugar
- 1 tsp salt
- 1 packet (2 1/4 tsp) active dry yeast
- 3/4 cup warm milk
- 1/4 cup melted butter
- 1 egg
- 4 cloves garlic, minced
- 1/4 cup grated Parmesan cheese
- 1 cup shredded mozzarella cheese
- 2 tbsp chopped parsley
Instructions
- Mix flour, sugar, salt, and yeast in a bowl.
- Add warm milk, melted butter, and egg. Knead into a dough.
- Let the dough rise for 1 hour or until doubled in size.
- Punch down the dough and roll it into small balls.
- Mix minced garlic with melted butter and brush onto each ball.
- Layer the balls in a baking dish, sprinkling cheese between layers.
- Cover and let rise for 30 minutes.
- Bake at 375°F for 20-25 minutes until golden.
- Sprinkle parsley and serve warm.
Notes
- Use fresh garlic for the best flavor.
- Let the dough rise in a warm place.
- Serve immediately for maximum cheesiness.
Nutrition
- Serving Size: 1 roll
- Calories: 180
- Sugar: 2g
- Sodium: 220mg
- Fat: 8g
- Saturated Fat: 4g
- Unsaturated Fat: 3g
- Trans Fat: 0g
- Carbohydrates: 20g
- Fiber: 1g
- Protein: 6g
- Cholesterol: 30mg