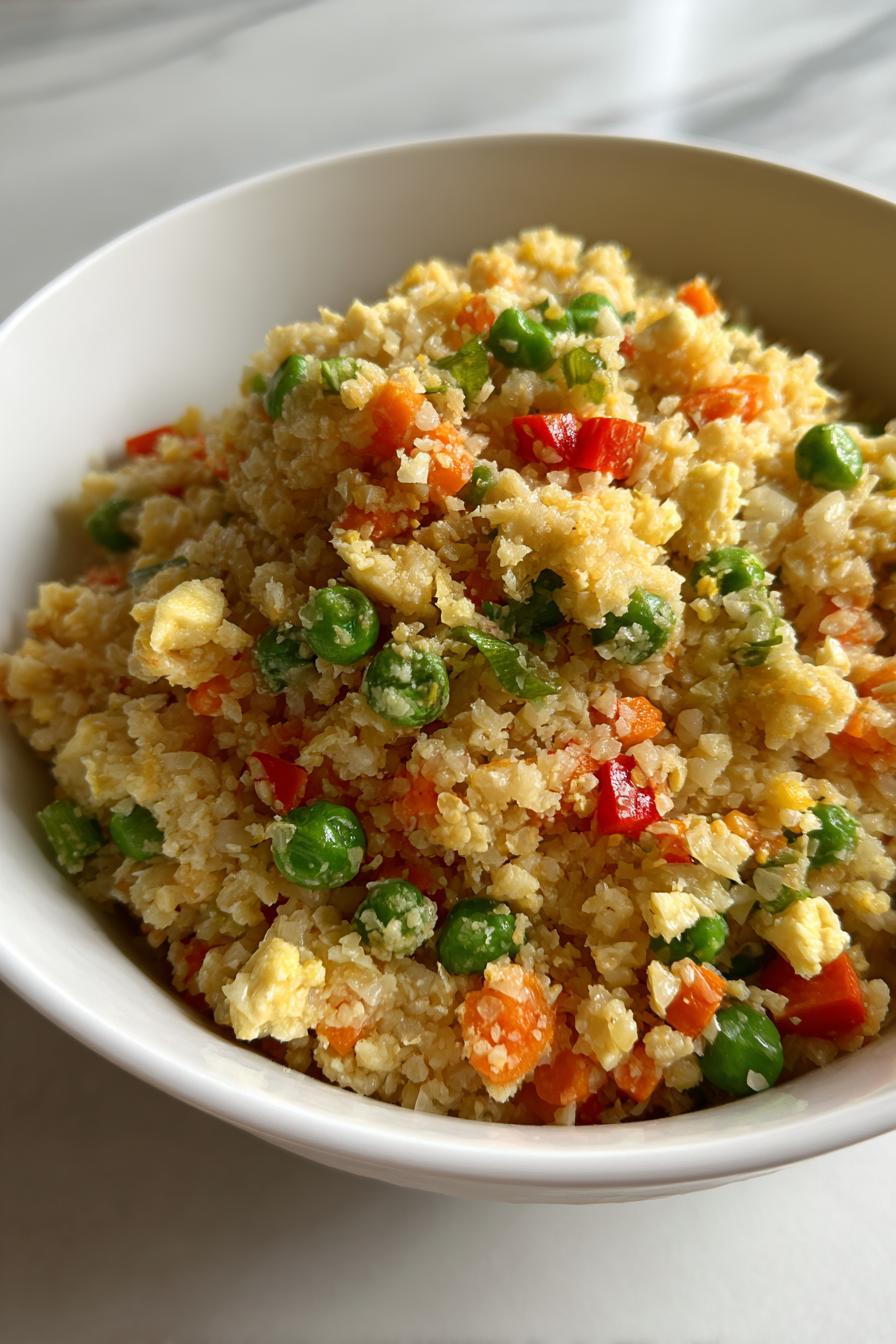
30-Minute Cauliflower Fried Rice That Tastes Like Takeout
I’ll never forget the first time I made cauliflower fried rice – it was one of those “aha!” moments in the kitchen. My husband and I were trying to cut back on carbs, but we were craving our favorite takeout fried rice. That’s when I got the idea to try swapping in riced cauliflower, and wow, did it change our weeknight dinner game! This isn’t just some sad diet food – when done right, cauliflower fried rice is packed with flavor and texture that’ll make you forget it’s actually good for you.
What I love most about this recipe is how quick and versatile it is. In about 30 minutes flat, you’ve got a satisfying meal that’s naturally low-carb, gluten-free (if you use tamari), and loaded with veggies. After testing dozens of versions, I’ve perfected the technique to get that authentic fried rice texture without any mushy cauliflower. The secret? High heat, quick cooking, and not overloading the pan. Trust me, even your pickiest eaters won’t suspect they’re eating something healthy when they take that first bite!
My kids now request this weekly, and I don’t mind one bit because it’s packed with nutrients and so easy to customize. Whether you’re meal prepping for the week or need a last-minute dinner solution, this cauliflower fried rice has become my go-to for good reason.
Why You’ll Love This Cauliflower Fried Rice
This isn’t just another healthy recipe – it’s a game-changer that’ll make you forget you’re eating cauliflower! Here’s why it’s become my family’s favorite:
- Crazy quick: Ready in under 30 minutes – faster than takeout!
- Guilt-free comfort food: All the satisfaction of fried rice with a fraction of the carbs
- Endlessly customizable: Swap veggies, add your favorite protein, or spice it up however you like
- Meal prep superstar: Tastes just as good reheated the next day
- Kid-approved: My picky eaters gobble it up without realizing it’s packed with veggies
The best part? You probably have most ingredients in your fridge right now. One bite and you’ll be hooked!
Ingredients for Your Cauliflower Fried Rice
Here’s everything you’ll need to make the most delicious cauliflower fried rice you’ve ever tasted. I’m particular about my ingredients because each one plays a special role in creating that perfect balance of flavors and textures we love in fried rice.
- 1 medium head cauliflower, riced (about 4-5 cups) – Look for a firm, fresh head without brown spots. The rice should be small, uniform pieces – not too fine or it’ll turn mushy.
- 2 tbsp vegetable oil – I use avocado oil for its high smoke point, but any neutral oil works.
- 2 cloves garlic, minced – Fresh is best! The finer you mince it, the more flavor it’ll distribute.
- 1 small onion, diced – Yellow or white onion gives that classic fried rice taste.
- 1 carrot, diced – Cut them small so they cook quickly.
- 1/2 cup frozen peas – No need to thaw – they’ll cook perfectly as you stir-fry.
- 2 large eggs, beaten (optional) – For protein and that authentic fried rice texture.
- 2 tbsp soy sauce – Or tamari for gluten-free – this is where the magic happens!
- 1 tsp sesame oil – Just a drizzle at the end makes all the difference.
- Salt and pepper to taste – Go easy at first – you can always add more.
- 2 green onions, thinly sliced (optional) – For that fresh pop of color and flavor.
See? Nothing fancy, just good, fresh ingredients that come together to create something truly special. Now let’s get cooking!
How to Make Cauliflower Fried Rice
Now for the fun part – let’s turn those simple ingredients into something magical! I’ve made this recipe so many times I could do it in my sleep, but I’ll walk you through each step carefully. The key is working quickly and keeping that pan hot – just like they do in restaurant kitchens.
Preparing the Cauliflower Rice
First things first – let’s rice that cauliflower! You’ve got two great options here. My favorite method is pulsing florets in a food processor until they look like grains of rice (about 10-12 pulses). No processor? No problem! Just grab a box grater and use the medium holes. Whatever method you choose, don’t skip this important step: wrap the riced cauliflower in a clean kitchen towel and squeeze out as much moisture as you can. This keeps your fried rice from getting soggy – trust me, it makes all the difference!
Cooking Your Cauliflower Fried Rice
Heat your largest skillet or wok over medium-high heat – we want it nice and hot! Add the oil, then toss in the garlic, onion, and carrot. Stir-fry for about 3 minutes until they start softening and smelling amazing. Now add those frozen peas (still frozen is fine!) and cook another minute.
Here’s my favorite trick: push all the veggies to one side of the pan. Pour the beaten eggs into the empty space and let them set for 20 seconds before scrambling. Once they’re just cooked, mix everything together – this gives you perfect fluffy egg bits throughout.
Now the star of the show! Add your riced cauliflower and stir to combine. Let it cook undisturbed for a minute to get some nice browning (that’s where the flavor is!), then stir again. Drizzle over the soy sauce and sesame oil, tossing everything to coat evenly. Cook for just 2-3 more minutes – we want the cauliflower tender but still with a slight crunch, not mushy!
Finally, season with salt and pepper to taste, sprinkle with green onions if you’re using them, and serve immediately. That’s it – restaurant-quality fried rice made healthy and quick in your own kitchen!
Expert Tips for Perfect Cauliflower Fried Rice
After making this recipe more times than I can count, I’ve picked up some tricks that take cauliflower fried rice from good to “wow!” Here are my can’t-miss tips:
- Squeeze it dry: That extra moisture in riced cauliflower is the enemy of good texture! After processing, wrap it in a clean kitchen towel and wring out as much liquid as you can. Your rice will stay fluffy instead of soggy.
- Heat is key: Crank that burner up to medium-high and let your pan get properly hot before adding ingredients. We’re going for quick, high-heat cooking just like in restaurant kitchens – it gives that perfect slightly charred flavor.
- Don’t crowd the pan: If you’re doubling the recipe, cook in batches. Overloading the pan steams the cauliflower instead of frying it, and nobody wants mushy “rice”!
- Taste before seasoning: Soy sauce adds plenty of salt, so always taste before adding extra. I like to finish with an extra drizzle of sesame oil right at the end for an aromatic punch.
Follow these simple tips, and I promise your cauliflower fried rice will turn out perfect every single time!
Customizing Your Cauliflower Fried Rice
One of my favorite things about this recipe is how easily you can make it your own! I’ve experimented with dozens of variations depending on what’s in my fridge or what my family’s craving that night. Here are some of our favorite twists:
- Protein power: Toss in cooked chicken, shrimp, or tofu during the last few minutes of cooking. Leftover rotisserie chicken works perfectly!
- Veggie swaps: Not a pea fan? Try diced bell peppers or snap peas instead. Sometimes I’ll throw in mushrooms or zucchini for extra veggie goodness.
- Spice it up: A dash of sriracha or crushed red pepper flakes gives it a nice kick. My husband loves when I add a spoonful of chili garlic paste.
- Gluten-free option: Simply swap the soy sauce for tamari – it tastes just as amazing.
- Breakfast version: Add some crispy bacon and top with a fried egg for the ultimate brunch dish.
The beauty of cauliflower fried rice is that it’s endlessly adaptable. Don’t be afraid to get creative with your favorite flavors – I’m always discovering new combinations that keep this recipe exciting week after week!
Serving and Storing Cauliflower Fried Rice
Nothing beats digging into this cauliflower fried rice piping hot right from the pan – that’s when all the flavors are at their best! I love serving it in big bowls with extra green onions sprinkled on top for color. Sometimes I’ll add a fried egg or some sriracha drizzle for extra oomph.
Got leftovers? No problem! Let the rice cool completely, then pop it into an airtight container in the fridge. It’ll keep beautifully for up to 3 days. When you’re ready to enjoy it again, reheat in a hot skillet with a tiny bit of oil – this brings back that perfect texture way better than microwaving. A splash of water or extra soy sauce helps refresh the flavors too. My kids actually fight over who gets to take the leftovers for lunch the next day!
Cauliflower Fried Rice Nutritional Information
Here’s the best part – you can enjoy this delicious cauliflower fried rice knowing it’s actually good for you! One generous serving (about 1 cup) comes in at just 150 calories, with 8g of healthy fats, 15g carbs (5g of that being fiber!), and 6g protein. That fiber keeps you full for hours, while the protein from the eggs helps balance everything out.
Now, these numbers can vary a bit depending on your exact ingredients and portion sizes – like if you add extra protein or go heavier on the oil. But compared to traditional fried rice? It’s a total nutrition win without sacrificing any flavor!
Your Cauliflower Fried Rice Questions Answered
I get so many questions about this recipe – seems like everyone wants to make their cauliflower fried rice perfect! Here are answers to the most common things people ask me:
Can I use store-bought riced cauliflower?
Absolutely! I use it all the time when I’m in a hurry. Just be sure to squeeze out excess moisture between paper towels before cooking. The texture might be slightly finer than homemade, but it still works great.
Is this recipe gluten-free?
Yes, if you use tamari instead of regular soy sauce! The rest of the ingredients are naturally gluten-free. I’ve served this to friends with celiac disease who couldn’t believe how good it tasted.
How do I prevent soggy cauliflower rice?
Two words: squeeze dry! Whether you’re using homemade or store-bought, removing that extra moisture makes all the difference. Also, don’t overcook it – the cauliflower should still have a slight crunch.
What other proteins work well?
Oh, the possibilities! Shrimp cooks up super fast – just add it with the veggies. Leftover rotisserie chicken or diced ham are my quick picks. For vegetarians, crispy tofu or edamame add great texture.
Can I meal prep this?
You bet! Cooked cauliflower fried rice keeps beautifully for 3 days in the fridge. Reheat it in a skillet with a splash of water or oil to bring back that fresh-cooked texture.
Rate This Cauliflower Fried Rice Recipe
Did you make this cauliflower fried rice? I’d love to hear how it turned out for you! Drop a star rating below and tell me about your experience in the comments. Did you add any special twists? How did your family like it? Your feedback helps me create even better recipes for everyone!
Print30-Minute Cauliflower Fried Rice That Tastes Like Takeout
A healthy, low-carb alternative to traditional fried rice made with cauliflower, vegetables, and your choice of protein.
- Prep Time: 15 minutes
- Cook Time: 15 minutes
- Total Time: 30 minutes
- Yield: 4 servings 1x
- Category: Main Dish
- Method: Stir-Frying
- Cuisine: Asian-Inspired
- Diet: Low Calorie
Ingredients
- 1 medium head of cauliflower, grated or riced
- 2 tablespoons vegetable oil
- 2 cloves garlic, minced
- 1 small onion, diced
- 1 carrot, diced
- 1/2 cup frozen peas
- 2 eggs, beaten (optional)
- 2 tablespoons soy sauce
- 1 teaspoon sesame oil
- Salt and pepper to taste
- Green onions for garnish (optional)
Instructions
- Grate the cauliflower or pulse in a food processor until it resembles rice.
- Heat oil in a large pan over medium heat.
- Add garlic, onion, and carrot. Cook for 3-4 minutes.
- Add peas and cook for another 2 minutes.
- Push vegetables to one side of the pan. Pour beaten eggs into the empty space and scramble.
- Add riced cauliflower and stir everything together.
- Pour soy sauce and sesame oil over the mixture. Stir to combine.
- Cook for 5-7 minutes, stirring occasionally.
- Season with salt and pepper. Garnish with green onions if desired.
- Serve hot.
Notes
- For extra protein, add cooked chicken, shrimp, or tofu.
- Use tamari instead of soy sauce for a gluten-free option.
- Store leftovers in an airtight container for up to 3 days.
Nutrition
- Serving Size: 1 cup
- Calories: 150
- Sugar: 5g
- Sodium: 450mg
- Fat: 8g
- Saturated Fat: 1g
- Unsaturated Fat: 6g
- Trans Fat: 0g
- Carbohydrates: 15g
- Fiber: 5g
- Protein: 6g
- Cholesterol: 95mg