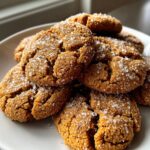
5-Ingredient Magic Gluten-Free Brown Butter Cookies
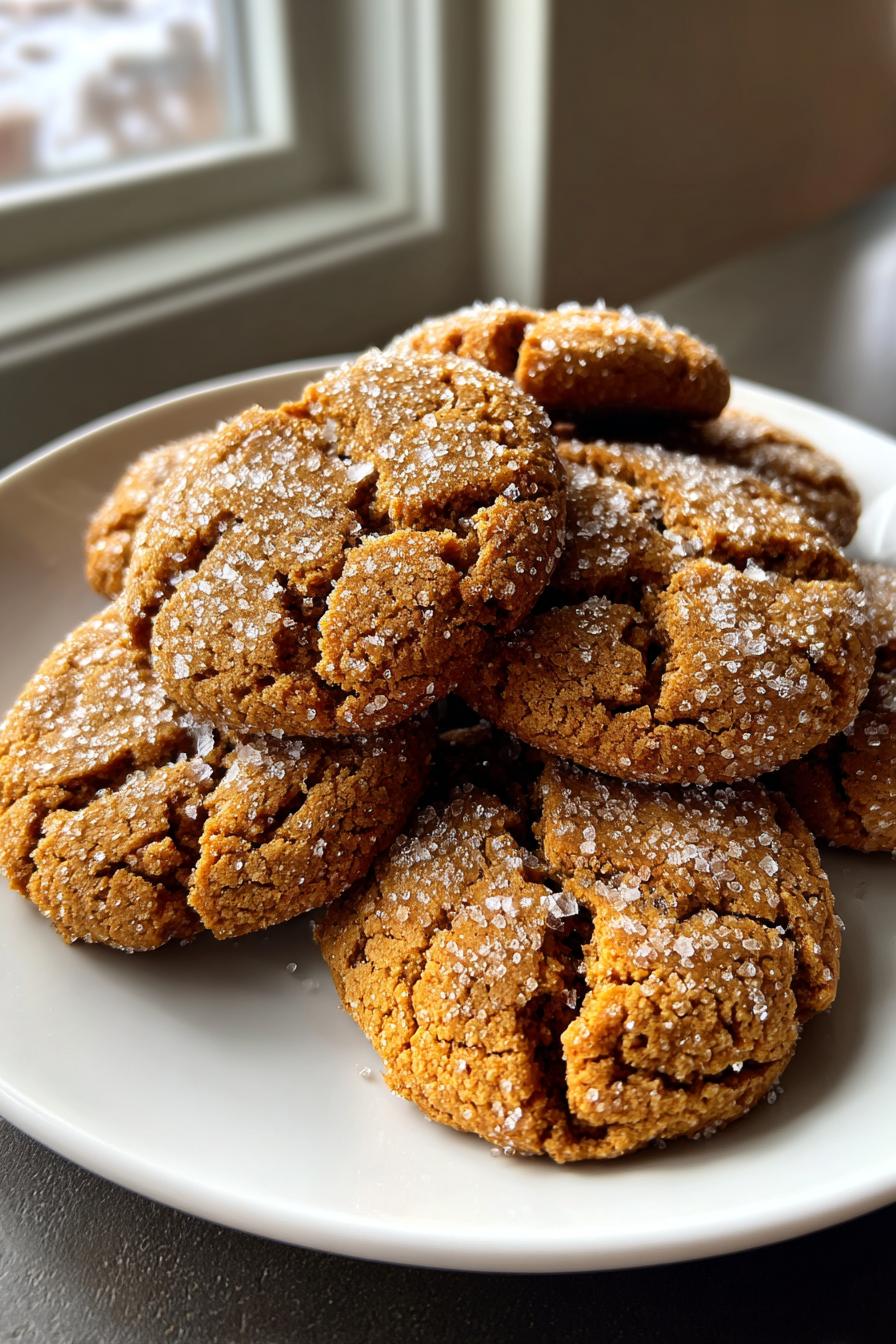
Oh my gosh, you guys—these gluten-free brown butter cookies are my latest obsession! That rich, nutty flavor from the browned butter makes them taste like they came straight from a fancy bakery. And the best part? They’re completely gluten-free but so delicious no one will even guess. I’ve been baking gluten-free treats for years (my sister has celiac), and these cookies? They’re the ones that disappear fastest at family gatherings. Trust me, once you try that first warm, gooey bite, you’ll be hooked just like I am!
Why You’ll Love These Gluten-Free Brown Butter Cookies
Listen, I know what you’re thinking—gluten-free cookies can be dry or taste like cardboard. Not these babies! Here’s why these will become your new go-to cookie recipe:
- That irresistible brown butter magic: When you brown the butter, it transforms into this golden, nutty wonder that makes every bite taste like a toasted caramel dream. My kitchen smells heavenly every time I make these!
- So easy even my kids can help: No fancy techniques here—just simple mixing and scooping. The dough comes together in one bowl (less cleanup—hallelujah!).
- Gluten-free but no one will know: The texture is perfect—chewy centers with crispy edges. I’ve served these to gluten-loving friends who had no idea they were gluten-free until I told them!
- Customizable for any craving: Feeling fancy? Add flaky sea salt on top. Need chocolate? Pile in those chips. The base recipe is your canvas!
- They freeze like a dream: The dough balls keep beautifully in the freezer, so you’re always just 12 minutes away from warm cookies. (This is dangerous knowledge—you’ve been warned!)
Honestly? I make a double batch every time now because these disappear faster than I can say “brown butter bliss.” And that’s coming from someone who’s baked approximately 3,247 batches of cookies in her lifetime.
Ingredients for Gluten-Free Brown Butter Cookies
Okay, let’s talk ingredients – and I promise, nothing too crazy here! The magic happens when simple, quality ingredients come together just right. Here’s what you’ll need to make these heavenly cookies:
- 1 cup (227g) unsalted butter – This is our star player! We’ll brown it to bring out that incredible nutty flavor. Pro tip: Use the real deal – no margarine substitutes here.
- 1 cup (200g) granulated sugar – For that perfect crisp edge we all love in cookies.
- 3/4 cup (150g) packed brown sugar – The molasses in brown sugar gives our cookies that chewy center. Pack it tight in your measuring cup!
- 2 large eggs – Room temperature works best here – they’ll incorporate into the dough more smoothly.
- 1 tsp vanilla extract – Pure vanilla makes all the difference. My grandma would roll her eyes at imitation!
- 2 1/2 cups (300g) gluten-free flour blend – Important! Make sure your blend contains xanthan gum – it’s the secret to keeping our cookies from crumbling.
- 1 tsp baking soda – Not powder! This helps our cookies spread just right.
- 1/2 tsp salt – Trust me, this balances all the sweetness beautifully.
- 1 cup (175g) chocolate chips – Semi-sweet are my favorite, but dark chocolate works great too if you’re feeling fancy!
See? Nothing too complicated – just good ingredients handled with care. Now let me tell you, I’ve tried every gluten-free flour under the sun, and my absolute favorite for these cookies is…
Equipment You’ll Need
Don’t worry – you don’t need any fancy gadgets to make these cookies! I’ve made them in tiny apartments with minimal equipment and they still turn out perfect every time. Here’s what you’ll want to grab from your kitchen:
- Medium saucepan – For browning that glorious butter. A light-colored pan works best so you can see the color change.
- Mixing bowls – One large one for the main dough, maybe a medium one for dry ingredients if you’re fancy like that.
- Whisk and rubber spatula – My trusty tools for getting every last bit of dough (and flavor!) into my cookies.
- Baking sheets
- Parchment paper – My secret weapon for perfect cookies that never stick. (Okay fine, you can use silicone mats too – but I’m team parchment all the way.)
- Cookie scoop – Not required, but oh-so-helpful for uniform cookies. I use a #40 scoop (about 1.5 tablespoons).
- Wire rack – For cooling those precious cookies properly. (Though let’s be real – I always “test” one straight from the pan!)
– Standard half-sheet pans are perfect. No need for anything special!
See? Nothing out of the ordinary. The best part is you probably have most of these items already. Now let’s get to the fun part – making that incredible brown butter!
How to Make Gluten-Free Brown Butter Cookies
Alright, let’s dive into making these incredible cookies! I’ll walk you through each step just like I do with my kids when we bake together on lazy Sunday afternoons. Promise it’s easier than it looks – and oh so worth it when you take that first bite!
Browning the Butter
First things first – that magical brown butter! This step makes all the difference in flavor, and once you get the hang of it, you’ll want to brown butter for everything. Here’s exactly how I do it:
Slice your cold butter into tablespoons and toss it in a medium saucepan over medium heat. Now, here’s where patience comes in. Stir frequently with a wooden spoon (or whisk if you’re fancy) as the butter melts, then starts to bubble and foam.
Watch closely – first you’ll see the milk solids turn from yellow to light tan, then to a beautiful golden-brown. The moment you smell that irresistible nutty aroma (like toffee and toasted nuts had a baby), take it off the heat immediately. It’ll keep cooking from residual heat, so better early than burnt! Pour it into a heatproof bowl to stop the cooking – including all those tasty browned bits at the bottom.
Let it cool for about 15 minutes – you want it still liquid but not piping hot when you add it to your other ingredients. Trust me, I’ve learned the hard way that adding it too hot makes for some interestingly textured cookies!
Mixing the Dough
Okay, now the fun part – making that glorious dough! Here’s my tried-and-true method:
In a large bowl, whisk together your cooled brown butter and both sugars until fully combined. Don’t overmix here – we’re not trying to cream it like traditional cookies, just get everything nicely incorporated.
Add eggs one at a time, mixing well after each, then splash in that vanilla. Your mixture might look a bit separated – that’s totally normal! The dry ingredients will bring it all together beautifully.
In another bowl, whisk together your gluten-free flour blend (remember – with xanthan gum!), baking soda, and salt. Gradually add this to your wet ingredients, mixing just until no dry streaks remain. Overmixing is the enemy of tender cookies!
Now the best part – fold in those chocolate chips! I like to reserve a handful to press into the tops of the scooped dough for picture-perfect cookies. The dough will be soft but scoopable. If it seems too sticky, pop it in the fridge for 10 minutes – but no longer or the cookies won’t spread properly.
Baking the Cookies
Almost cookie time! Here’s how to bake them to perfection:
Preheat your oven to 350°F (175°C) and line your baking sheets with parchment paper. Use a cookie scoop or tablespoon to portion dough, spacing them at least 2 inches apart – these babies spread!
Bake for 10-12 minutes. You’ll know they’re done when the edges are golden but the centers still look slightly underdone. They’ll firm up as they cool – I promise! For crispier cookies, leave them in an extra minute or two.
Let them cool on the baking sheet for 5 minutes – this is crucial for setting the texture. Then transfer to a wire rack. Though if you’re like me, you’ll “taste test” one straight from the pan – chef’s privilege!
Tips for Perfect Gluten-Free Brown Butter Cookies
After making approximately a zillion batches of these cookies (okay, maybe just dozens—but still!), I’ve picked up some priceless tricks to make them absolutely perfect every time. Here are my hard-earned secrets:
The golden rule: Don’t overmix!
This is so important I should probably write it in skywriting! Once you add the flour mixture, mix just until combined—no more. Overworking gluten-free dough makes cookies tough instead of tender. I stop when I still see a few dry streaks, then finish blending as I fold in the chocolate chips.
Butter temperature matters
That browned butter needs to be cooled but still liquid—about 15 minutes off the heat is perfect. Too hot and it’ll cook the eggs; too cool and it won’t incorporate properly. Stick your finger in—it should feel warm but not hot. My trick? I set a timer and use those 15 minutes to prep my other ingredients.
The scoop-and-smack method
Want picture-perfect cookies? After scooping the dough onto your baking sheet, give each ball a gentle smack with the back of a spoon to slightly flatten the tops. This helps them bake evenly and gives you that ideal combo of crispy edges and chewy centers.
Baking time is flexible
These cookies are wonderfully adaptable:
- Like them soft and chewy? Pull them out at 10 minutes when the edges are just golden.
- Prefer crispy? Go for 12-13 minutes until deep golden brown all over.
- For even baking, rotate your pans halfway through—ovens have hot spots!
The freezer is your friend
Got extra dough? Scoop it onto a parchment-lined tray, freeze until solid, then transfer to a zip-top bag. Frozen dough balls bake up perfectly—just add 1-2 minutes to the baking time. My freezer always has a stash for emergency cookie cravings!
Let them rest (if you can!)
I know it’s hard to resist, but letting the cookies cool completely on the rack makes the texture even better. The centers firm up and the flavors develop. That said, I won’t judge if you eat half the batch warm—I certainly do!
Variations for Gluten-Free Brown Butter Cookies
One of my favorite things about these cookies is how versatile they are! Once you’ve mastered the base recipe, the sky’s the limit for customizing them to your taste. Here are some of my go-to variations that always get rave reviews:
Dark Chocolate Delight
Swap out the semi-sweet chocolate chips for dark chocolate chunks. The slightly bitter chocolate pairs beautifully with the rich brown butter. I like using a 70% cocoa bar chopped into rough chunks—it gives the cookies these glorious pools of melted chocolate that are pure heaven.
Nutty Goodness
For extra crunch and flavor, fold in a cup of chopped toasted nuts. Pecans are my personal favorite—their buttery flavor complements the brown butter perfectly. Walnuts or almonds work great too! Just toast them lightly in a dry pan first to bring out their nuttiness.
Sea Salt Sensation
For that sweet-and-salty combo everyone loves, sprinkle a pinch of flaky sea salt on top of each cookie right after they come out of the oven. It’s such a simple trick, but it takes these cookies to a whole new level. I keep Maldon sea salt just for this purpose!
Double Chocolate Dream
Feeling extra indulgent? Replace 1/4 cup of the gluten-free flour blend with unsweetened cocoa powder. The result? A rich, chocolatey cookie with that same incredible brown butter flavor. Use white chocolate chips for a fun contrast!
Spiced Version
Add warmth and depth with a teaspoon of cinnamon and a pinch of nutmeg to the dry ingredients. It’s like a cozy hug in cookie form—perfect for fall baking or holiday cookie exchanges.
Mix-Ins Galore
Get creative with your add-ins! Here are some combos I’ve tried and loved:
- Dried cherries + dark chocolate chips (a personal obsession!)
- Toasted coconut + white chocolate chips
- Pretzel pieces + milk chocolate chips (sweet and salty perfection)
- Mini marshmallows + semi-sweet chips (like a s’mores cookie!)
Honestly, you can’t go wrong with these cookies. The base recipe is so forgiving, and the brown butter flavor works with just about anything. My advice? Play around and make them your own. I’d love to hear what creative combos you come up with—maybe you’ll inspire my next batch!
Storing and Reheating Gluten-Free Brown Butter Cookies
Okay, confession time – these cookies rarely last long enough in my house to need storing! But when they do (or when I miraculously manage to save some), here’s exactly how I keep them tasting fresh and delicious:
The Best Way to Store Them
Once completely cooled (if you can resist eating them all warm!), pop your cookies in an airtight container with a piece of bread. Sounds weird, right? But that bread trick keeps them soft for days by absorbing excess moisture. Layer them between parchment paper so they don’t stick together.
At room temperature, they’ll stay perfect for about 5 days – though in my experience, they never make it past day 2! If your kitchen runs warm, you might want to store them in the fridge, but let them come to room temp before eating for the best texture.
Freezing Like a Pro
Here’s my favorite trick – freeze the baked cookies! They thaw beautifully and taste almost fresh-baked. Just place cooled cookies in a single layer in a freezer bag with all the air squeezed out. They’ll keep for up to 3 months this way.
When a cookie craving hits, pull out however many you want and let them thaw at room temp for about 30 minutes. Or, if you’re impatient like me, microwave one for 10-15 seconds – it’ll taste like it just came out of the oven!
Freezing the Dough
I always keep frozen dough balls ready for impromptu baking sessions. Scoop the dough onto a parchment-lined tray, freeze until solid (about 1 hour), then transfer to a freezer bag. They’ll keep for 2-3 months this way.
When you’re ready to bake, no need to thaw! Just add 1-2 minutes to the baking time. Fresh cookies whenever you want them – it’s like having your own personal cookie shop at home!
Reviving Stale Cookies
If by some miracle your cookies last long enough to go stale (hasn’t happened to me yet!), here’s how to bring them back to life: Place them on a baking sheet and pop them in a 300°F oven for 3-5 minutes. They’ll crisp up beautifully! Or for a softer cookie, microwave one for 10 seconds with a damp paper towel.
Honestly, these cookies are so good fresh that I rarely have leftovers to store. But it’s nice to know the options when I want to save some for later – or hide them from my cookie-monster kids!
Nutritional Information
Okay, let’s talk nutrition – because I know some of you (not me, obviously!) like to keep track of these things. Here’s the breakdown per cookie based on my standard recipe. But remember – these are estimates and will vary depending on your specific ingredients!
Per Serving (1 cookie):
- Calories: 150
- Total Fat: 8g
- Saturated Fat: 5g
- Cholesterol: 25mg
- Sodium: 85mg
- Total Carbohydrates: 20g
- Dietary Fiber: 1g
- Sugars: 12g
- Protein: 2g
A few important notes: These values can change depending on the brands you use – especially things like chocolate chips and gluten-free flour blend. I calculate mine using generic supermarket brands, but if you’re using fancy organic chocolate or premium gluten-free flour, your numbers might be different.
Also – let’s be real – who eats just one cookie? I certainly don’t! So if you’re like me and go for two (or three…), just double (or triple!) these numbers accordingly. No judgment here!
While these cookies aren’t exactly health food (they’re cookies, after all!), they’re naturally gluten-free and can easily be made dairy-free with plant-based butter substitutes if needed. The brown butter gives them such rich flavor that a little goes a long way!
Common Questions About Gluten-Free Brown Butter Cookies
I get so many questions about these cookies whenever I make them for friends – and I love sharing all my hard-earned baking knowledge! Here are the most common things people ask me:
What’s the best gluten-free flour blend for these cookies?
After testing probably every brand out there, my absolute favorite is Bob’s Red Mill 1-to-1 Baking Flour (the blue bag!). It already has xanthan gum mixed in, which gives our cookies the perfect texture without any grittiness. Cup4Cup works great too – just avoid almond flour blends for this recipe, as they make the cookies too dense.
Can I use regular butter instead of browning it?
You can, but oh my gosh, you’ll miss out on that incredible nutty flavor that makes these cookies special! If you’re really pressed for time, melt the butter (don’t brown it) and add 1/2 teaspoon of butter extract to mimic some of that depth. But trust me – taking those extra 5 minutes to brown the butter is 1000% worth it!
Why did my cookies spread too much?
Ah, the great cookie spread mystery! Usually it’s one of three things:
- The butter was too warm when you mixed the dough – let it cool longer next time
- Your baking soda might be old (it loses potency over time)
- The dough needed a quick 10-minute chill before baking
If they spread too much, don’t worry – they’ll still taste amazing! Just scoop them smaller next time.
Can I make these dairy-free?
Absolutely! I’ve had great success with Miyoko’s cultured vegan butter or Earth Balance sticks. Brown them just like regular butter – they’ll get that same gorgeous golden color and nutty aroma. The cookies might spread a tiny bit more, but the flavor is still incredible.
How do I know when the butter is properly browned?
Look for three signs:
- The butter stops foaming and quiets down
- The milk solids turn a deep golden brown (like caramel)
- It smells intensely nutty and delicious
Pro tip: Take it off the heat when it’s slightly lighter than you think – it keeps cooking in the hot pan! Burnt butter is bitter, so err on the side of caution.
Got more questions? Drop them in the comments – I love helping fellow bakers perfect these cookies! After all my trial and error, I’m happy to share every trick I’ve learned.
Print5-Ingredient Magic Gluten-Free Brown Butter Cookies
Delicious gluten-free cookies made with brown butter for a rich, nutty flavor.
- Prep Time: 15 minutes
- Cook Time: 12 minutes
- Total Time: 27 minutes
- Yield: 24 cookies 1x
- Category: Dessert
- Method: Baking
- Cuisine: American
- Diet: Gluten Free
Ingredients
- 1 cup (227g) unsalted butter
- 1 cup (200g) granulated sugar
- 3/4 cup (150g) brown sugar
- 2 large eggs
- 1 tsp vanilla extract
- 2 1/2 cups (300g) gluten-free flour blend
- 1 tsp baking soda
- 1/2 tsp salt
- 1 cup (175g) chocolate chips
Instructions
- Brown the butter in a saucepan over medium heat, stirring until golden-brown. Let cool.
- Preheat oven to 350°F (175°C). Line baking sheets with parchment paper.
- In a bowl, mix browned butter, granulated sugar, and brown sugar.
- Add eggs and vanilla extract. Mix well.
- Stir in gluten-free flour, baking soda, and salt.
- Fold in chocolate chips.
- Scoop dough onto baking sheets, spacing 2 inches apart.
- Bake for 10-12 minutes until edges are golden.
- Cool on baking sheets for 5 minutes before transferring to wire racks.
Notes
- Use a gluten-free flour blend with xanthan gum.
- Store cookies in an airtight container for up to 5 days.
- For crispier cookies, bake an extra 1-2 minutes.
Nutrition
- Serving Size: 1 cookie
- Calories: 150
- Sugar: 12g
- Sodium: 85mg
- Fat: 8g
- Saturated Fat: 5g
- Unsaturated Fat: 2g
- Trans Fat: 0g
- Carbohydrates: 20g
- Fiber: 1g
- Protein: 2g
- Cholesterol: 25mg