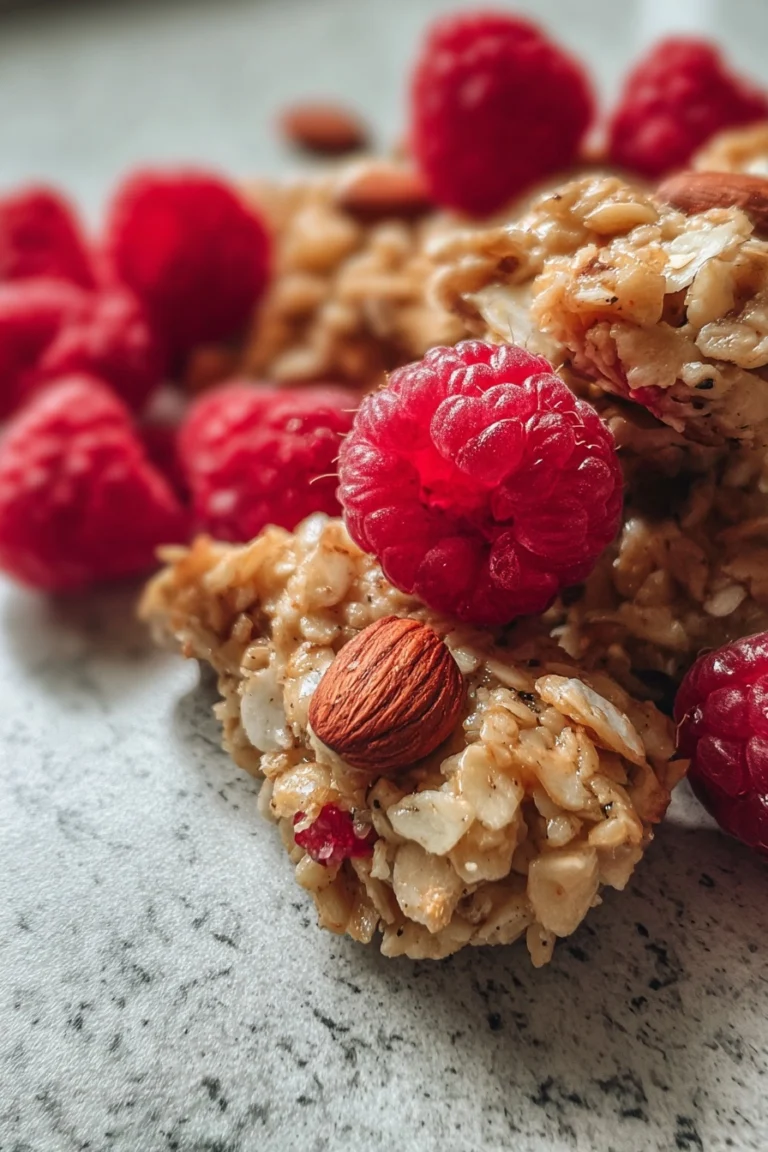
Irresistible 5-Minute Gluten-Free Granola Bars You’ll Crave
You know those mornings when you’re rushing out the door and need something healthy to grab? That’s exactly why I started making these gluten-free granola bars—they’re my go-to snack for busy days, hiking trips, or just when I need a little energy boost. Packed with oats, nuts, and honey, they’re chewy, sweet, and totally customizable. Plus, they’re no-bake, meaning you can whip them up in minutes without turning on the oven. My kids love them (especially the chocolate chips), and I love that they’re actually good for us. Trust me, once you try homemade, you’ll never go back to store-bought!
Why You’ll Love These Gluten-Free Granola Bars
Okay, let me count the ways these bars will become your new obsession:
- Crazy easy – Just mix, press, and chill. No baking, no fuss!
- Pantry superhero – Uses simple ingredients you probably already have
- Breakfast savior – Grab-and-go energy that actually keeps you full
- Kid-approved (but shhh… it’s healthy!)
- Endlessly customizable – Swap nuts, fruits, or chocolate to your heart’s content
Seriously, I make a batch every Sunday, and they disappear by Wednesday. Every. Single. Time.
Ingredients for Gluten-Free Granola Bars
Here’s what you’ll need to make these irresistible bars—I promise it’s nothing fancy! Just simple, wholesome ingredients that come together like magic:
- 2 cups gluten-free rolled oats (not quick oats—they hold their texture better)
- 1/2 cup almond butter (creamy or crunchy, whatever you’ve got)
- 1/3 cup honey (pack it in there good—this is our “glue”!)
- 1/4 cup chopped almonds (I like mine roughly chopped for extra crunch)
- 1/4 cup dried cranberries (or raisins if that’s your jam)
- 1/4 cup dark chocolate chips (because… duh)
- 1 tsp vanilla extract (the real stuff makes all the difference)
- Pinch of salt (trust me, it makes the sweet pop)
See? Nothing weird or hard-to-find. And if you’re missing something, no sweat—I’ll share my favorite swaps later!
How to Make Gluten-Free Granola Bars
Alright, let’s get to the fun part—making these beauties! I promise it’s so easy you’ll wonder why you ever bought granola bars. Just follow these simple steps, and you’ll have perfect bars every time.
Mixing the Dry Ingredients
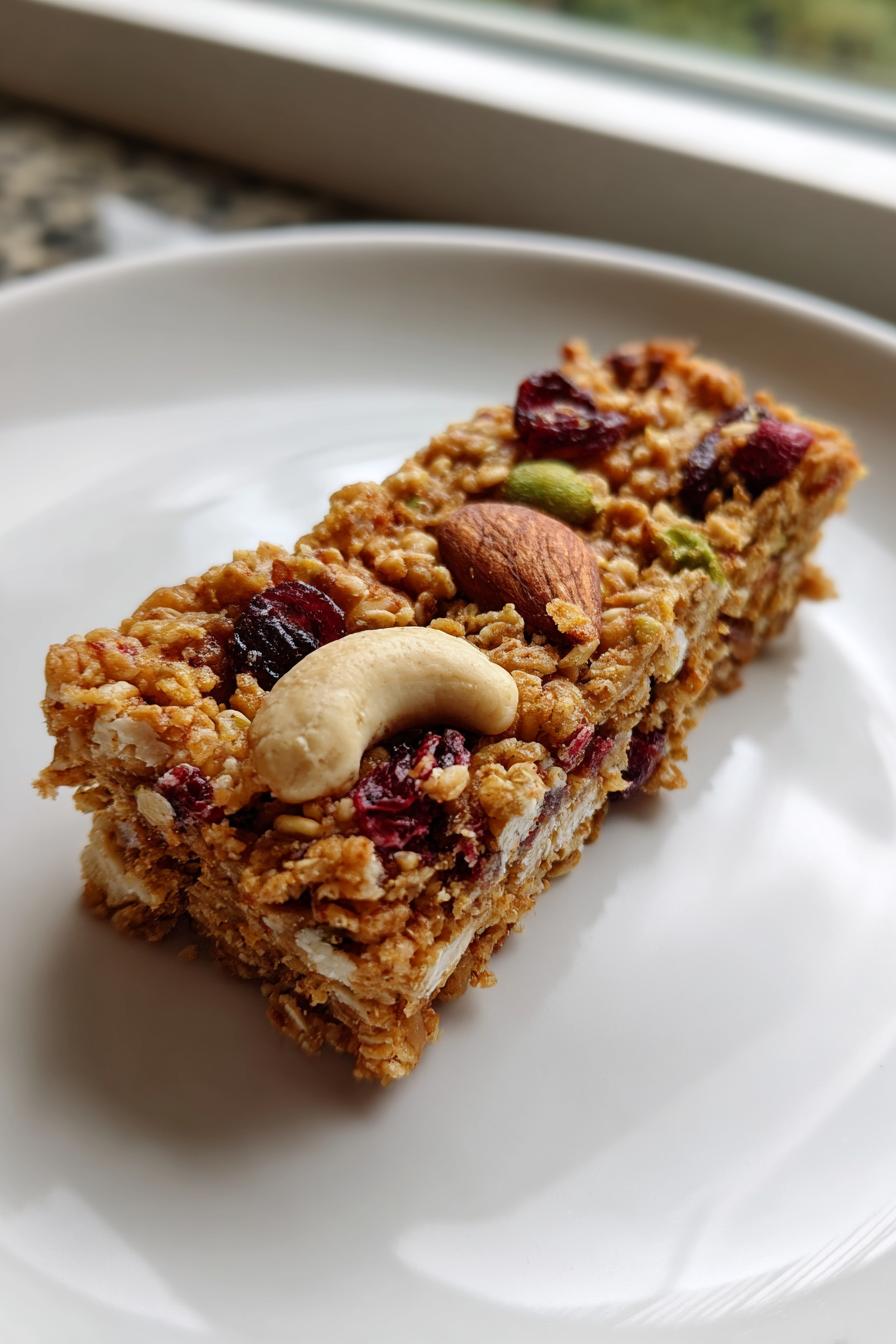
First, grab a big mixing bowl—I like to use my favorite wooden one because it makes me feel like a real baker. Toss in your oats, chopped almonds, cranberries, and chocolate chips. Give it all a good stir with a wooden spoon until everything’s evenly mixed. You’ll love how the colors look together—those bright cranberries peeking through the oats with little chocolate surprises. The texture should be nice and varied, with some crunch from the nuts and chew from the dried fruit.
Preparing the Wet Mixture
Now for the “glue” that holds everything together! In a small saucepan over low heat, warm up your almond butter and honey. Stir constantly until it becomes smooth and pourable—this only takes about 2 minutes. Don’t walk away though—burnt honey is no joke! Remove from heat and stir in the vanilla and that all-important pinch of salt. Oh, the smell at this point is heavenly—like sweet, nutty perfection.
Combining and Setting
Pour that gorgeous warm mixture over your dry ingredients and mix like crazy until every oat and nut is coated. It’ll seem sticky at first, but keep going—that’s how you know it’s working! Line your 8×8 pan with parchment paper (trust me, this makes life so much easier), then dump in your mixture. Here’s my pro tip: wet your hands slightly and press down HARD—I mean really pack it in there. The firmer you press, the better your bars will hold together later. Pop it in the fridge for at least 2 hours (I know, the wait is torture!), then slice into bars. Voila—homemade gluten-free granola bars that’ll make you feel like a kitchen rockstar!
Tips for Perfect Gluten-Free Granola Bars
After making these bars more times than I can count, here are my foolproof secrets for granola bar greatness:
- Parchment is your BFF – Line that pan well or you’ll be scraping bits off with a spatula (learned that the hard way!)
- Press like you mean it – Seriously, put some muscle into compacting the mixture—loose packing = crumbly bars
- Room temp almond butter – If yours is super thick, microwave it for 10 seconds before measuring
- Chill time matters – I know it’s tempting, but don’t cut them early—that 2-hour wait makes all the difference
Follow these, and you’ll get bars that hold together perfectly every single time!
Variations for Gluten-Free Granola Bars
One of my favorite things about this recipe? You can tweak it endlessly based on what’s in your pantry or what you’re craving that day! Here are some of my go-to swaps:
- Nut butter swap – Peanut butter works great, or try sunflower seed butter for nut-free
- Sweetener switch – Maple syrup gives a lovely flavor, or use agave for a milder taste
- Add-in madness – Pumpkin seeds, coconut flakes, or even a sprinkle of cinnamon take it in new directions
- Chocolate lovers – Swap dark chips for white chocolate or chop up your favorite bar
The possibilities are seriously endless—have fun playing with your food!
Storing and Serving Gluten-Free Granola Bars
Here’s the scoop on keeping these bars fresh and fabulous! I stash mine in an airtight container—they’ll stay perfect at room temp for about 3 days, or up to a week in the fridge (if they last that long!). For longer storage, freeze them individually wrapped—just grab one and go! They’re fantastic straight from the fridge with your morning coffee, packed in lunchboxes, or crumbled over yogurt for instant “fancy” breakfast.
Nutritional Information
Here’s the scoop on what’s in each delicious bar (based on cutting into 8 pieces): about 180 calories, 8g of good fats from nuts, and 4g protein to keep you going. They’ve got 3g fiber too! Of course, numbers might shift slightly if you tweak ingredients—more chocolate? No judgment here!
Frequently Asked Questions
Can I use peanut butter instead of almond butter?
Absolutely! Peanut butter works beautifully—just make sure it’s the natural, stir-able kind. I’ve even used cashew butter when I was feeling fancy. The bars might taste slightly different, but they’ll hold together just as well.
How long do these gluten-free granola bars last?
They’ll stay fresh in an airtight container for about a week at room temp, or up to two weeks in the fridge (though mine never last that long!). For longer storage, freeze them—they thaw perfectly in lunchboxes!
Can I make these vegan?
Easy peasy! Just swap the honey for maple syrup or agave nectar. I’ve done this for my vegan friends, and they couldn’t tell the difference—still sticky-sweet perfection.
Why are my bars crumbly?
Ah, the classic granola bar dilemma! Usually it means you didn’t press them firmly enough into the pan. Next time, really pack that mixture down—I use the bottom of a measuring cup for extra pressure.
Can I add protein powder?
You bet! Add 1-2 tablespoons of your favorite vanilla or chocolate protein powder to the dry ingredients. Just know it might make the bars a tad drier, so add an extra splash of honey if needed.
Share Your Gluten-Free Granola Bars
I’d love to see your creations! Tag me on social media or leave a comment below—tell me what add-ins you used or how your family liked them. Happy snacking!
PrintIrresistible 5-Minute Gluten-Free Granola Bars You’ll Crave
Homemade gluten-free granola bars packed with oats, nuts, and honey for a healthy snack.
- Prep Time: 10 mins
- Cook Time: 0 mins
- Total Time: 2 hrs 10 mins
- Yield: 8 bars 1x
- Category: Snack
- Method: No-Bake
- Cuisine: American
- Diet: Gluten Free
Ingredients
- 2 cups gluten-free rolled oats
- 1/2 cup almond butter
- 1/3 cup honey
- 1/4 cup chopped almonds
- 1/4 cup dried cranberries
- 1/4 cup dark chocolate chips
- 1 tsp vanilla extract
- Pinch of salt
Instructions
- Line an 8×8 baking dish with parchment paper.
- Mix oats, almonds, cranberries, and chocolate chips in a bowl.
- Warm almond butter and honey in a saucepan until smooth.
- Stir in vanilla and salt.
- Pour the wet mixture over the dry ingredients and mix well.
- Press the mixture firmly into the baking dish.
- Chill for 2 hours, then cut into bars.
Notes
- Store in an airtight container for up to a week.
- Substitute maple syrup for honey if vegan.
- Add seeds or other nuts for variation.
Nutrition
- Serving Size: 1 bar
- Calories: 180
- Sugar: 12g
- Sodium: 35mg
- Fat: 8g
- Saturated Fat: 2g
- Unsaturated Fat: 5g
- Trans Fat: 0g
- Carbohydrates: 24g
- Fiber: 3g
- Protein: 4g
- Cholesterol: 0mg