Sad Gluten-Free Muffins? My 30-Minute Recipe Heals All
Let me tell you about my first disastrous attempt at gluten-free baking – hockey puck muffins anyone? After tossing out that sad batch, I swore I’d crack the code for gluten-free muffins that actually taste good and don’t crumble like sandcastles.
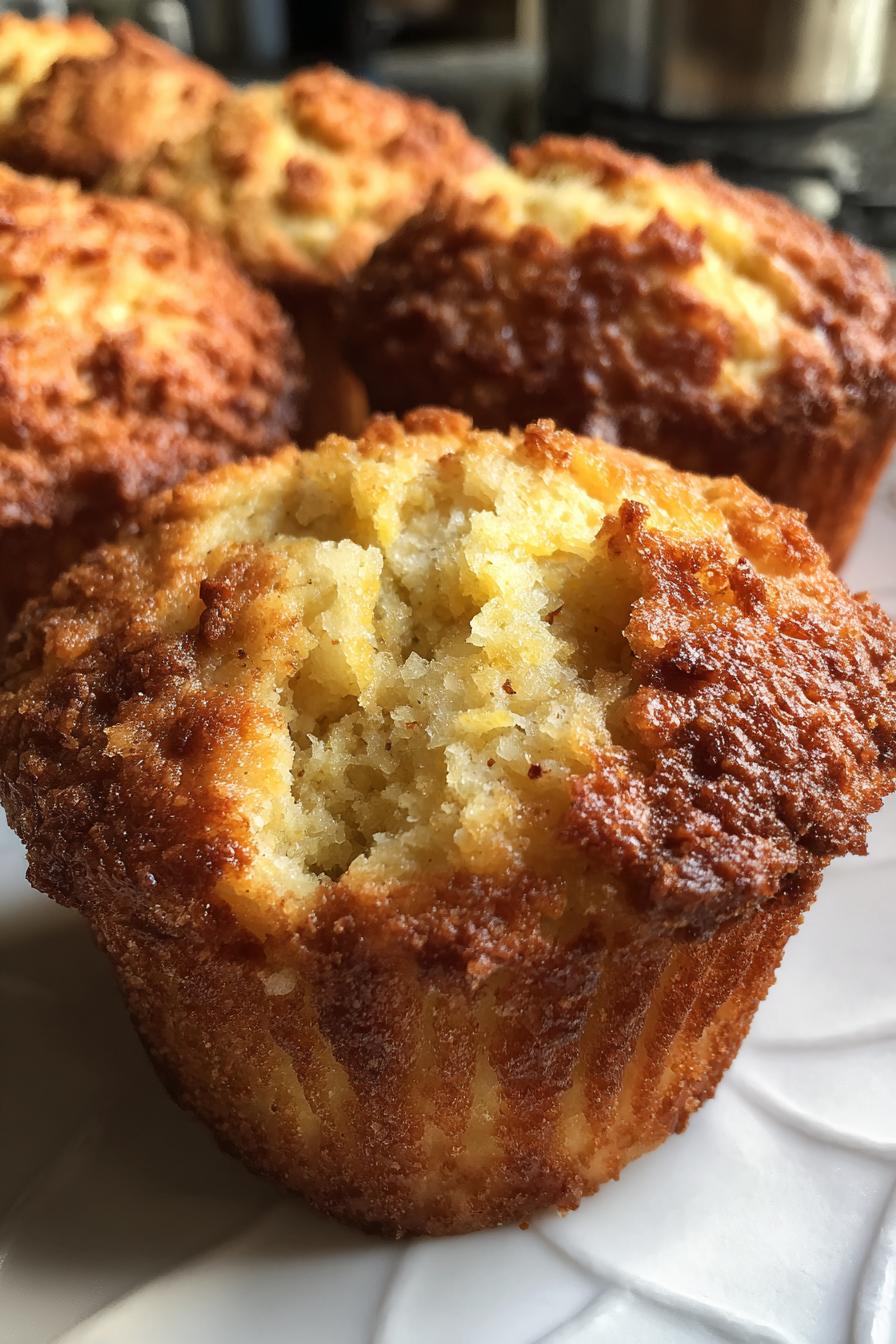
These babies are my weekday lifesaver – moist, fluffy, and ready in 30 minutes flat. What I love most? You probably have all the ingredients sitting in your pantry right now (no fancy flours required!). Whether you’re gluten-free by necessity or just experimenting like I was, this recipe delivers muffins so good, nobody will guess they’re missing wheat. Perfect for rushed mornings when I’m half-asleep but still want something homemade.
Why You’ll Love These Gluten-Free Muffins
These muffins have become my go-to for so many reasons:
- Quick & easy – From bowl to table in 30 minutes (perfect for my chaotic mornings!)
- Pantry staples – No weird ingredients, just simple stuff you already have
- Fluffy texture – No more dense, crumbly gluten-free disasters
- Kid-approved – My picky nephew gobbles them up before I can say “gluten-free”
Trust me, once you try this recipe, you’ll understand why I make a double batch every Sunday!
Ingredients for Gluten-Free Muffins
Here’s what you’ll need to make these foolproof muffins – I promise it’s nothing fancy! The secret is using the right gluten-free flour blend (more on that in a sec). I’ve made these enough times to know these measurements by heart now:
- 2 cups gluten-free flour blend (must contain xanthan gum – this keeps them from crumbling!)
- 1/2 cup sugar (I use regular white, but coconut sugar works too)
- 1 tbsp baking powder (yes, a whole tablespoon – it gives them that perfect rise)
- 1/2 tsp salt (balances the sweetness just right)
- 1 cup milk (dairy or unsweetened almond milk both work great)
- 1/4 cup vegetable oil (or melted coconut oil if you’re feeling fancy)
- 1 large egg (room temperature blends better – just set it out while preheating)
- 1 tsp vanilla extract (the good stuff makes all the difference)
See? Nothing weird or hard-to-find. Now let’s make some magic!
How to Make Gluten-Free Muffins
Okay, let’s get baking! I’ve made these muffins so many times I could probably do it in my sleep (and honestly, some mornings I practically do). Follow these simple steps, and you’ll have perfect gluten-free muffins every single time.
Step 1: Prep Dry Ingredients
First things first – grab your biggest mixing bowl (trust me, you’ll need the space). Whisk together the gluten-free flour blend, sugar, baking powder, and salt until they’re completely combined. I like to give it about 30 seconds of good whisking – this helps distribute the baking powder evenly so your muffins rise beautifully. No lumps allowed!
Step 2: Mix Wet Ingredients
Now for the wet team! In a smaller bowl (or heck, I sometimes use a large measuring cup), whisk together the milk, oil, egg, and vanilla until they’re completely smooth. Pro tip: if your egg is cold from the fridge, just let the mixture sit for a minute to take the chill off before adding to the dry ingredients.
Step 3: Combine and Bake
Here’s where the magic happens – but also where things can go wrong if you’re not careful! Pour the wet ingredients into the dry ingredients and stir gently with a wooden spoon or spatula. The key word here is GENTLY – mix just until the dry ingredients are moistened. A few lumps are totally fine, I promise! Overmixing is the enemy of fluffy muffins.
Scoop the batter into your prepared muffin tin (I use an ice cream scoop for perfect portions) filling each cup about 3/4 full. Pop them in the oven and set your timer for 18 minutes – but start checking at 15. They’re done when the tops spring back when lightly touched and a toothpick comes out clean. Let them cool in the pan for 5 minutes (this is crucial!) before transferring to a wire rack. Try not to eat them all at once!
Tips for Perfect Gluten-Free Muffins
After burning through way too many batches (oops!), I’ve learned these golden rules:
- Hands off that batter! Overmixing makes muffins tough – stir just until combined, lumps and all
- Flour matters – Stick with blends containing xanthan gum (I learned this the hard way)
- The toothpick test lies! Pull muffins when tops spring back lightly – they keep cooking as they cool
Follow these tips, and you’ll avoid all my rookie mistakes!
Variations for Gluten-Free Muffins
One of my favorite things about this recipe is how versatile it is! Want to mix things up? Try folding in a cup of fresh blueberries, dark chocolate chips, or a teaspoon of cinnamon for a cozy twist. My niece loves when I add sprinkles for a fun, colorful treat. The possibilities are endless – get creative!
Storing and Reheating Gluten-Free Muffins
Here’s my tried-and-true method for keeping these muffins fresh (because let’s be real – they rarely last long in my house!). Store cooled muffins in an airtight container at room temperature for up to 3 days – they’re actually even better the next day!
For longer storage, wrap individually in plastic and freeze for up to a month. When the muffin craving hits, just pop one straight from freezer to microwave for 15-20 seconds. Boom – freshly baked taste in seconds!
Nutritional Information
Just a quick heads up – these nutrition estimates can vary depending on your exact ingredients and brands. I always say gluten-free baking is more art than science! The numbers I’ve listed give you a general idea, but your mileage may vary depending on whether you use dairy milk versus almond, different sugar types, or add tasty mix-ins.
FAQs About Gluten-Free Muffins
After making these muffins countless times (and fielding questions from friends), here are the answers to the most common questions I get:
Can I substitute almond flour?
I don’t recommend straight almond flour – it makes muffins too dense. Stick with a gluten-free blend containing xanthan gum for that perfect fluffy texture we all love!
Are these muffins freezer-friendly?
Absolutely! I freeze them all the time. Just wrap cooled muffins individually in plastic, then pop in the freezer. Reheat straight from frozen for 15-20 seconds in the microwave.
Why did my muffins sink in the middle?
Usually means too much liquid or underbaking. Measure carefully and test doneness with the spring-back test – not just the toothpick! Oven temps can vary too.
Can I make these vegan?
Yes! Swap the egg for a flax egg (1 tbsp ground flax + 3 tbsp water) and use plant-based milk. They’ll be slightly denser but still delicious.
Can I use regular flour instead?
Technically yes, but then they wouldn’t be gluten-free! The recipe works with all-purpose flour, but you’ll need to reduce liquid slightly (start with 3/4 cup milk).
PrintSad Gluten-Free Muffins? My 30-Minute Recipe Heals All
Easy gluten-free muffins perfect for breakfast or snacks.
- Prep Time: 10 mins
- Cook Time: 20 mins
- Total Time: 30 mins
- Yield: 12 muffins 1x
- Category: Breakfast
- Method: Baking
- Cuisine: American
- Diet: Gluten Free
Ingredients
- 2 cups gluten-free flour blend
- 1/2 cup sugar
- 1 tbsp baking powder
- 1/2 tsp salt
- 1 cup milk
- 1/4 cup vegetable oil
- 1 egg
- 1 tsp vanilla extract
Instructions
- Preheat oven to 375°F (190°C). Line muffin tin with paper liners.
- Whisk flour, sugar, baking powder, and salt in a bowl.
- In another bowl, mix milk, oil, egg, and vanilla.
- Pour wet ingredients into dry ingredients. Stir until just combined.
- Divide batter evenly into muffin cups.
- Bake for 18-20 minutes until golden.
- Cool for 5 minutes before serving.
Notes
- Use a gluten-free flour blend with xanthan gum.
- Do not overmix batter.
- Store leftovers in airtight container.
Nutrition
- Serving Size: 1 muffin
- Calories: 180
- Sugar: 10g
- Sodium: 220mg
- Fat: 7g
- Saturated Fat: 1g
- Unsaturated Fat: 5g
- Trans Fat: 0g
- Carbohydrates: 25g
- Fiber: 2g
- Protein: 3g
- Cholesterol: 20mg