Fluffy Gluten-Free Pancake Mix – Easy 5-Minute Masterpiece
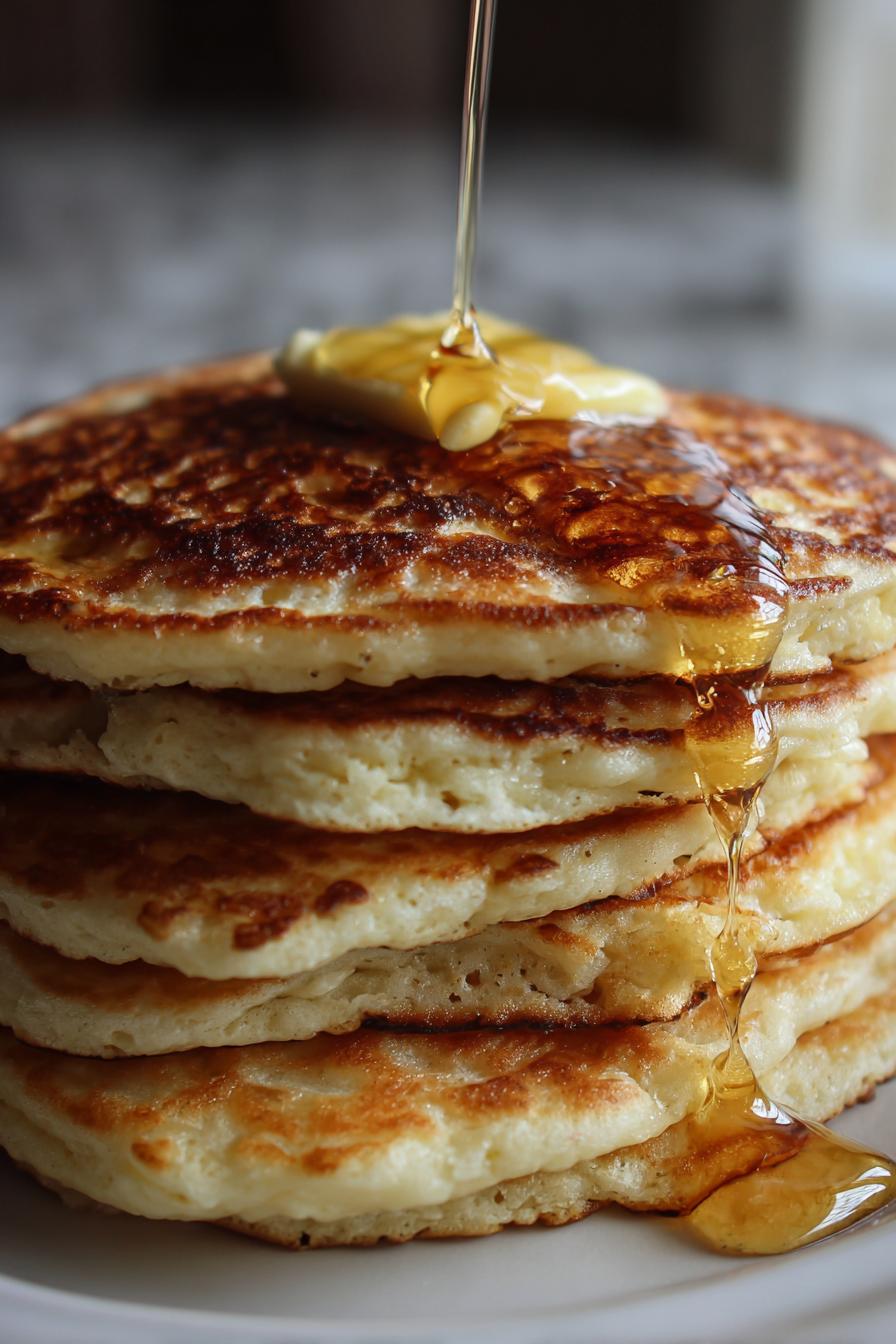
There’s something magical about waking up to a stack of warm, fluffy pancakes—especially when they’re gluten-free and just as delicious as the traditional kind. I’ve been making gluten-free pancakes for years, ever since my sister discovered her gluten intolerance. At first, I was skeptical. Could they really be as good? Oh, they can! This gluten-free pancake mix is my go-to for weekend brunches or even a quick weekday treat. It’s simple, foolproof, and tastes so good, no one will even guess it’s gluten-free. Trust me, once you try this recipe, it’ll become a staple in your kitchen too.
Why You’ll Love This Gluten-Free Pancake Mix
Let me tell you why this gluten-free pancake mix has become my absolute favorite—and why it’ll be yours too. First off, it’s ridiculously easy. I’m talking five minutes of prep, tops. No fancy techniques, no weird ingredients—just simple, wholesome stuff you probably already have in your pantry. Here’s what makes it special:
- Fluffy perfection: The combo of baking powder and soda gives these pancakes that dreamy lift—no gluten needed!
- Quick breakfast magic: From mixing bowl to plate in under 15 minutes. Even my sleepy morning self can handle that.
- Dietary-friendly: Works with dairy-free milk and oil substitutes if needed. Everyone at the table can enjoy them.
- No weird aftertaste: Some gluten-free recipes taste, well, gluten-free. Not these—just pure pancake goodness.
Seriously, these pancakes are so good, my gluten-loving husband steals them off my plate. That’s the real test!
Ingredients for Gluten-Free Pancake Mix
Here’s the beautiful simplicity of this recipe – just a handful of basic ingredients come together to create something truly special. I’ve tested this mix with every gluten-free flour under the sun, and here’s what works best:
- 1 cup gluten-free all-purpose flour (lightly packed – don’t go crazy pressing it down!)
- 1 tbsp sugar (I use regular granulated, but coconut sugar works great too)
- 1 tsp baking powder (make sure it’s fresh – this is your lift magic!)
- 1/2 tsp baking soda (the secret to that perfect golden brown color)
- 1/4 tsp salt (trust me, it makes all the flavors pop)
- 1 cup milk (any kind you like – I often use almond milk)
- 1 large egg (room temperature blends better)
- 1 tbsp melted butter (or neutral oil if you’re dairy-free)
- 1 tsp vanilla extract (the good stuff – it makes a difference)
See? Nothing weird or hard-to-find. Just pantry staples that come together to make the most delicious gluten-free pancakes you’ve ever tasted. The best part? You can tweak this base recipe endlessly once you get comfortable with it!
How to Make Gluten-Free Pancake Mix
Okay, let’s get cooking! I promise this is easier than you think. The secret to perfect gluten-free pancakes? Treating them with love and not overworking the batter. Here’s exactly how I make mine – follow these steps, and you’ll be flipping golden beauties in no time.
Mixing the Dry Ingredients
First things first – grab your biggest mixing bowl. I use this giant yellow one my mom gave me – it’s seen more pancake batter than I can count! Whisk together:
- That glorious gluten-free flour
- Sugar (just enough sweetness)
- Baking powder and soda (our rising superheroes)
- A pinch of salt
Here’s my golden rule: mix until just combined. No vigorous stirring – we’re not making bread here! A few whisks does the trick. Overmixing makes pancakes tough, and nobody wants that.
Combining Wet and Dry Ingredients
Now for the fun part! In another bowl (or heck, I sometimes use a big measuring cup), whisk together:
- Your milk of choice
- The egg (crack it on the counter, not the bowl edge – cleaner break!)
- Melted butter or oil
- That lovely vanilla
Make a well in your dry ingredients and pour the wet mixture in. Here’s where patience pays off – gently fold the batter together. It’s okay if there are a few lumps – they’ll cook out, I promise! The batter should be thick but pourable. Too thick? Add a splash more milk.
Cooking the Pancakes
Heat your pan or griddle over medium heat – not too hot, not too cold. Goldilocks would approve. I test mine by flicking a few water drops – if they dance, we’re ready! Lightly grease the surface (I use butter because… yum).
Pour about 1/4 cup batter per pancake. Watch for those magical little bubbles to form on top – that’s your cue to flip! Don’t rush it. Give them about 2-3 minutes per side until they’re beautifully golden. The first pancake is always the test one – if it’s too dark, lower the heat a smidge.
Pro tip: Keep finished pancakes warm in a 200°F oven while you cook the rest. That way, everyone gets hot cakes at the same time!
Tips for Perfect Gluten-Free Pancakes
After making approximately a zillion batches (okay, maybe hundreds), I’ve learned all the tricks for gluten-free pancake perfection. Listen up – these little nuggets of wisdom will save you from the heartbreak of flat, gummy pancakes!
- Lumpy batter is happy batter: Overmixing is the #1 mistake! Stir until just combined – those little flour pockets will work themselves out on the griddle.
- Adjust as you go: Gluten-free flours vary wildly in absorption. Too thick? Add milk 1 tbsp at a time. Too runny? Sprinkle in a bit more flour.
- Non-stick is your BFF: I swear by my well-seasoned cast iron, but any good non-stick pan works. Medium heat prevents burning before the centers cook through.
- Patience pays off: Wait for those bubbles to form before flipping – I count to 30 after the first ones appear. No premature pancake flipping!
- Rest the batter: Letting it sit 5 minutes gives the flours time to hydrate. Thicker, fluffier pancakes every time.
Follow these tips, and you’ll have pancakes so good, they’ll make gluten-eaters jealous. My sister says mine are better than “real” pancakes – high praise from a former skeptic!
Gluten-Free Pancake Mix Variations
Oh, the possibilities! Once you’ve mastered the basic gluten-free pancake mix, the real fun begins. I love playing around with different flavors and textures – it’s like having a new breakfast every weekend! Here are my favorite ways to jazz up this versatile recipe:
Fruity Twists That’ll Make You Smile
Fresh blueberries are my go-to – just fold in a handful right before cooking. The berries burst with juicy sweetness in every bite. But don’t stop there!
- Banana lovers: Mash one ripe banana into the wet ingredients for naturally sweet pancakes
- Apple cinnamon: Add 1/2 tsp cinnamon and some grated apple to the batter
- Lemon poppyseed: Zest a lemon into the dry mix and add 1 tbsp poppyseeds
Decadent Chocolatey Goodness
Because sometimes you need chocolate for breakfast (okay, most times). My kids go nuts when I make these:
- Chocolate chip: Mini chips distribute better – sprinkle some on each pancake as they cook
- Double chocolate: Add 2 tbsp cocoa powder to the dry ingredients
- Nutella swirl: Dollop Nutella on cooked pancakes and let it melt into gooey perfection
Flour Power – Mixing Up Your Base
Different gluten-free flours can totally transform your pancakes. My experiments have led to some delicious discoveries:
- Almond flour: Replace 1/4 cup AP flour with almond flour for rich, nutty flavor
- Oat flour: Makes heartier pancakes – great with maple syrup
- Coconut flour: Use just 2-3 tbsp and increase liquid – it’s super absorbent!
The best part? You can mix and match these ideas! Blueberry lemon? Chocolate banana? Go wild – that’s how all the best kitchen creations happen. Just remember to adjust liquid if you’re adding dry ingredients, and keep that batter slightly thick for the fluffiest results. Happy experimenting!
Serving Suggestions for Gluten-Free Pancakes
Now comes the best part – dressing up those gorgeous golden pancakes! I treat topping my gluten-free pancakes like an artist with a blank canvas. The possibilities are endless, but let me share my absolute favorite ways to serve them – the ones that make everyone at my breakfast table go “wow!”
Classic Combos That Never Disappoint
Sometimes simple is best. My Sunday morning go-to is:
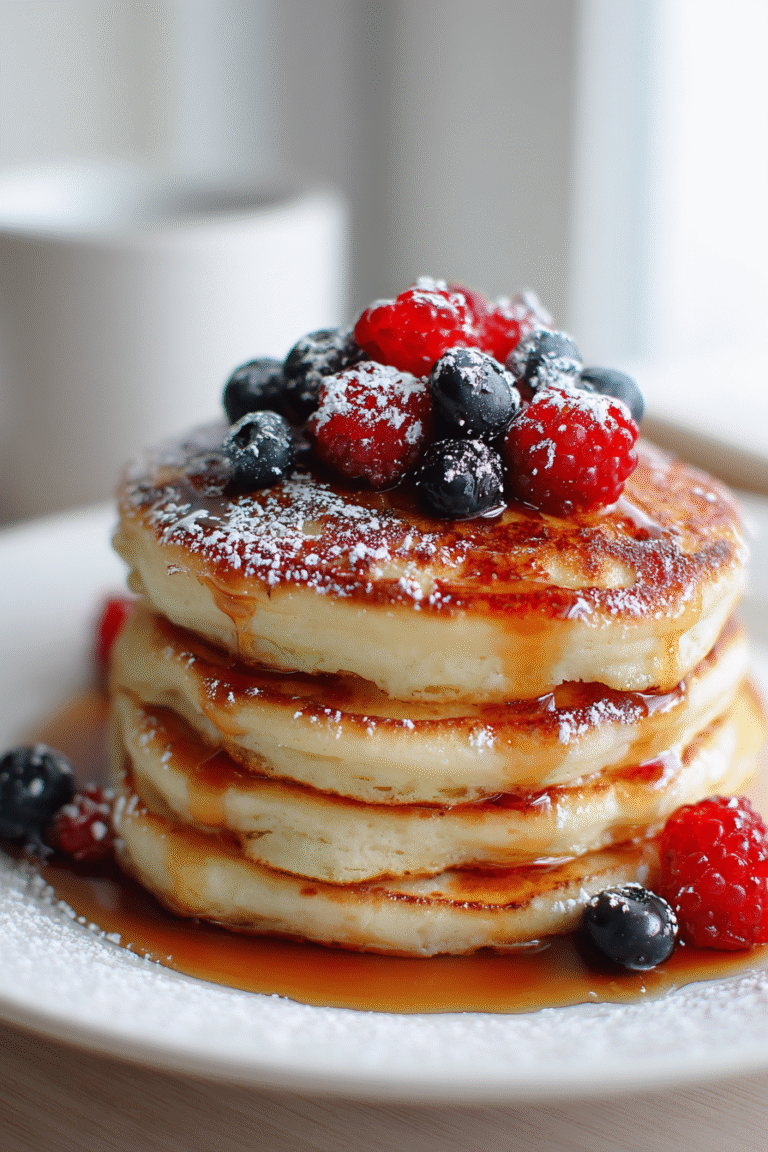
- Real maple syrup (the good stuff – none of that fake pancake syrup!) warmed slightly
- A pat of butter melting into golden pools
- Fresh berries scattered over the top – strawberries, blueberries, whatever’s in season
It’s perfection on a plate. The syrup soaks into the pancakes just enough, the butter adds richness, and the berries give that fresh pop. My husband calls this “breakfast heaven.”
Whipped Cream Wonders
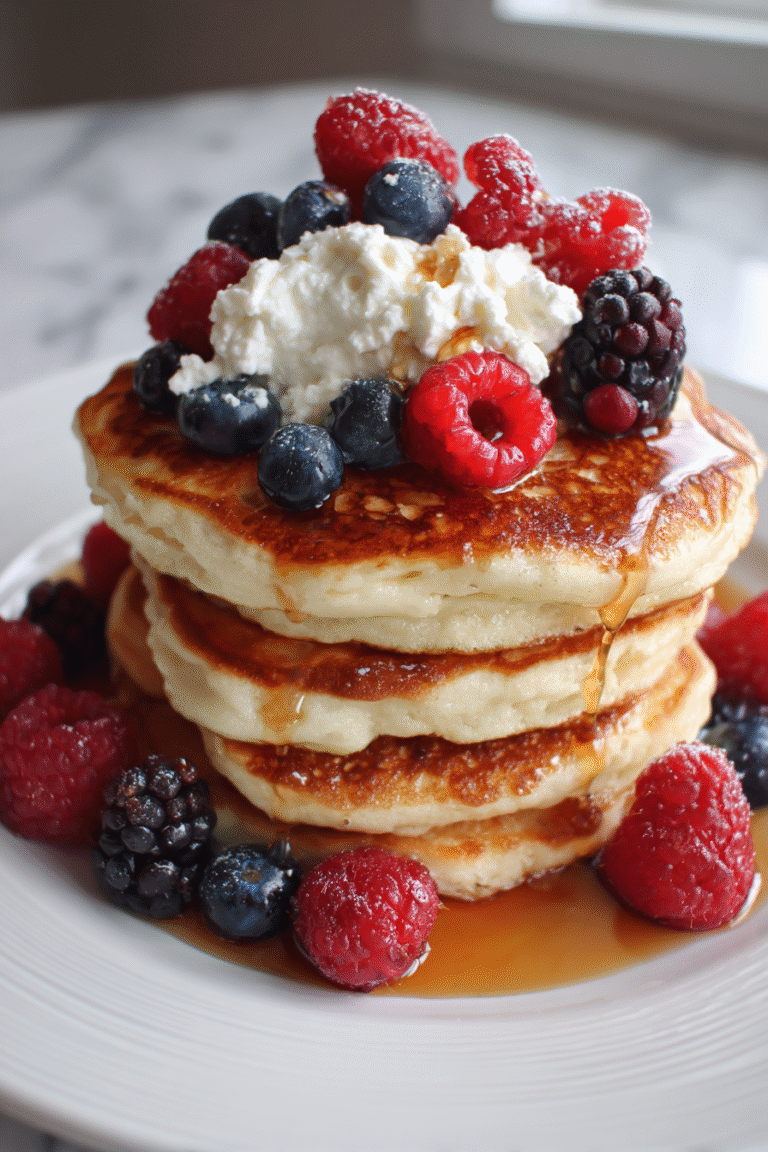
Feeling fancy? Break out the whipped cream! I like to:
- Make my own with heavy cream, a bit of sugar, and vanilla
- Pipe it into pretty swirls (or just dollop it on – no judgment!)
- Top with chocolate shavings or toasted nuts for crunch
This turns ordinary pancakes into a dessert-like treat. My kids beg for “cloud pancakes” on special mornings. Pro tip: Add a sprinkle of cinnamon to the whipped cream for extra warmth.
Savory-Sweet Surprises
Who says pancakes have to be sweet? Some of my favorite unexpected toppings:
- Peanut butter and banana slices with a drizzle of honey
- Ricotta cheese with lemon zest and a touch of jam
- Fried egg on top with crispy bacon – trust me, it works!
The peanut butter-banana combo is my personal favorite – the creaminess against the fluffy pancakes is magic. And that egg-bacon stack? Perfect for when you can’t decide between breakfast and brunch.
Remember, there are no rules here! Let your mood guide you. Some days call for Nutella and strawberries, others for just a simple dusting of powdered sugar. The beauty of these gluten-free pancakes is how they play well with practically any topping you can dream up. So grab your fork and get creative – breakfast is served!
Storing and Reheating Gluten-Free Pancakes
Okay, confession time – I rarely have leftovers because these pancakes disappear so fast! But when I do manage to save some (usually by hiding them), here’s how I keep them tasting fresh and delicious.
Keeping Them Fresh
First rule of pancake club – let them cool completely before storing. I know it’s tempting to stack them hot, but that steam will turn them soggy faster than you can say “maple syrup.” Here’s what works best:
- Airtight container: My trusty glass container with the rubber seal is perfect
- Parchment paper: Between layers prevents sticking (wax paper works too)
- Counter vs fridge: They’ll keep 1 day at room temp, 2 days refrigerated
Pro tip: Write the date on masking tape stuck to the container. Those sneaky pancakes can look fresh even when they’re past their prime!
The Art of Reheating
Cold pancakes straight from the fridge? No thank you! Here’s how I bring them back to life:
- Toaster: My go-to method – quick and gives them a nice crisp edge
- Oven: 350°F for 5-8 minutes on a baking sheet – great for batches
- Skillet: Low heat with a tiny bit of butter revives that fresh-cooked taste
Avoid the microwave unless you’re in a real hurry – it makes them rubbery. If you must microwave, cover with a damp paper towel and do 15-second bursts.
Freezing for Future Pancake Cravings
Yes, you can freeze these beauties! Here’s my method:
- Cool completely (this is crucial!)
- Single layer on parchment-lined baking sheet
- Freeze for 1 hour before transferring to freezer bags
- Separate layers with parchment – they’ll come apart easily
They’ll keep beautifully for about a month. To reheat, pop frozen pancakes straight in the toaster – no thawing needed! My sister keeps a stash in her freezer for emergency breakfasts. Genius.
Now you’re armed with all the knowledge to enjoy gluten-free pancakes anytime – fresh or reheated. Because let’s be real, pancakes shouldn’t be a weekend-only treat!
Gluten-Free Pancake Mix Nutritional Information
Okay, let’s talk numbers – but first, a quick disclaimer! These nutritional values are estimates based on my standard recipe. Your exact counts might vary depending on the specific brands of ingredients you use or any substitutions you make. That said, here’s the breakdown per pancake (based on making 8 pancakes from the recipe):
- Calories: About 90 per pancake
- Fat: 3g (1.5g saturated)
- Carbohydrates: 14g
- Fiber: 1g
- Sugar: 3g
- Protein: 2g
- Sodium: 120mg
A few quick notes from my kitchen experiments:
- Using almond milk instead of dairy milk saves about 10 calories per pancake
- Swapping butter for oil changes the fat profile slightly but keeps calories similar
- Adding chocolate chips or fruit will increase the sugar content (but oh so worth it!)
What I love about this recipe is how balanced it is – you’re getting a decent amount of protein from the egg, and the fiber helps balance out the carbs. It’s not health food, but it’s certainly not an indulgence you need to feel guilty about either. Just right for starting your day with a smile!
FAQs About Gluten-Free Pancake Mix
Over the years, I’ve gotten so many questions about this gluten-free pancake recipe – and I love helping troubleshoot because everyone deserves perfect pancakes! Here are the answers to the ones I hear most often:
Can I Use a Different Flour Blend?
Absolutely! While gluten-free all-purpose flour works best for beginners, I’ve had great success with alternatives. Oat flour makes heartier pancakes – just use 1 1/4 cups since it’s less dense. Almond flour adds richness (replace 1/4 cup of the AP flour). For coconut flour, use only 1/3 cup and add an extra egg – it’s super absorbent! The key is adjusting liquids as needed. The batter should be thick but pourable – add milk a tablespoon at a time if it’s too stiff.
How Do I Keep Pancakes Fluffy?
Oh, this is the million-dollar question! My top three fluffy-pancake secrets: Don’t overmix (lumps are good!), use fresh leaveners (check those expiration dates!), and let the batter rest 5 minutes before cooking. Also, make sure your baking powder and soda are evenly distributed in the dry ingredients – I like to whisk them first before adding the flour. If your pancakes come out flat, your leaveners might be too old – time for a fresh batch!
Can I Freeze These Pancakes?
You bet! These freeze beautifully. Let them cool completely (this is crucial!), then layer between parchment paper in an airtight container or freezer bag. They’ll keep for up to 1 month – though in my house, they rarely last that long! To reheat, pop them straight from freezer to toaster (no thawing needed) or warm in a 350°F oven for about 10 minutes. They taste nearly fresh – perfect for busy mornings!
Got more questions? Drop them in the comments – I’m always happy to help troubleshoot your pancake adventures! Nothing makes me happier than knowing someone out there is enjoying perfect gluten-free pancakes.
Share Your Gluten-Free Pancake Experience
Nothing makes my day more than seeing your gluten-free pancake creations! I’ve poured my heart into perfecting this recipe, and now I want to hear all about your kitchen adventures. Did you try the blueberry version? Maybe you added chocolate chips (my personal weakness)? Whatever twists you put on it, I’m all ears!
Here’s how you can join the pancake party:
- Snap a pic of your golden stacks (bonus points if there’s syrup dripping!) and tag me on Instagram
- Leave a rating below – did they turn out fluffy? Any clever variations we should try?
- Share your tips in the comments – what worked (or didn’t!) in your kitchen
Last week, one reader sent me a photo of heart-shaped pancakes she made for her daughter’s birthday – I nearly cried it was so sweet! Another shared how they added pumpkin spice in fall. These little stories make all my recipe testing worthwhile. So grab your spatula, get flipping, and let’s keep the gluten-free breakfast love going!
PrintFluffy Gluten-Free Pancake Mix – Easy 5-Minute Masterpiece
A simple and delicious gluten-free pancake mix that’s perfect for breakfast or brunch.
- Prep Time: 5 minutes
- Cook Time: 10 minutes
- Total Time: 15 minutes
- Yield: 8 pancakes 1x
- Category: Breakfast
- Method: Stovetop
- Cuisine: American
- Diet: Gluten Free
Ingredients
- 1 cup gluten-free all-purpose flour
- 1 tbsp sugar
- 1 tsp baking powder
- 1/2 tsp baking soda
- 1/4 tsp salt
- 1 cup milk (or dairy-free alternative)
- 1 large egg
- 1 tbsp melted butter (or oil)
- 1 tsp vanilla extract
Instructions
- In a bowl, mix the gluten-free flour, sugar, baking powder, baking soda, and salt.
- In another bowl, whisk the milk, egg, melted butter, and vanilla extract.
- Pour the wet ingredients into the dry ingredients and stir until just combined.
- Heat a non-stick pan over medium heat and lightly grease it.
- Pour 1/4 cup of batter for each pancake and cook until bubbles form on the surface.
- Flip the pancake and cook for another 1-2 minutes until golden brown.
- Serve warm with your favorite toppings.
Notes
- Do not overmix the batter to keep the pancakes fluffy.
- Adjust the liquid if the batter is too thick.
- Store leftovers in an airtight container for up to 2 days.
Nutrition
- Serving Size: 1 pancake
- Calories: 90
- Sugar: 3g
- Sodium: 120mg
- Fat: 3g
- Saturated Fat: 1.5g
- Unsaturated Fat: 1g
- Trans Fat: 0g
- Carbohydrates: 14g
- Fiber: 1g
- Protein: 2g
- Cholesterol: 25mg