Gluten Free Sandwich Bread: Discover Easy Recipes Now!
Introduction to Gluten Free Sandwich Bread
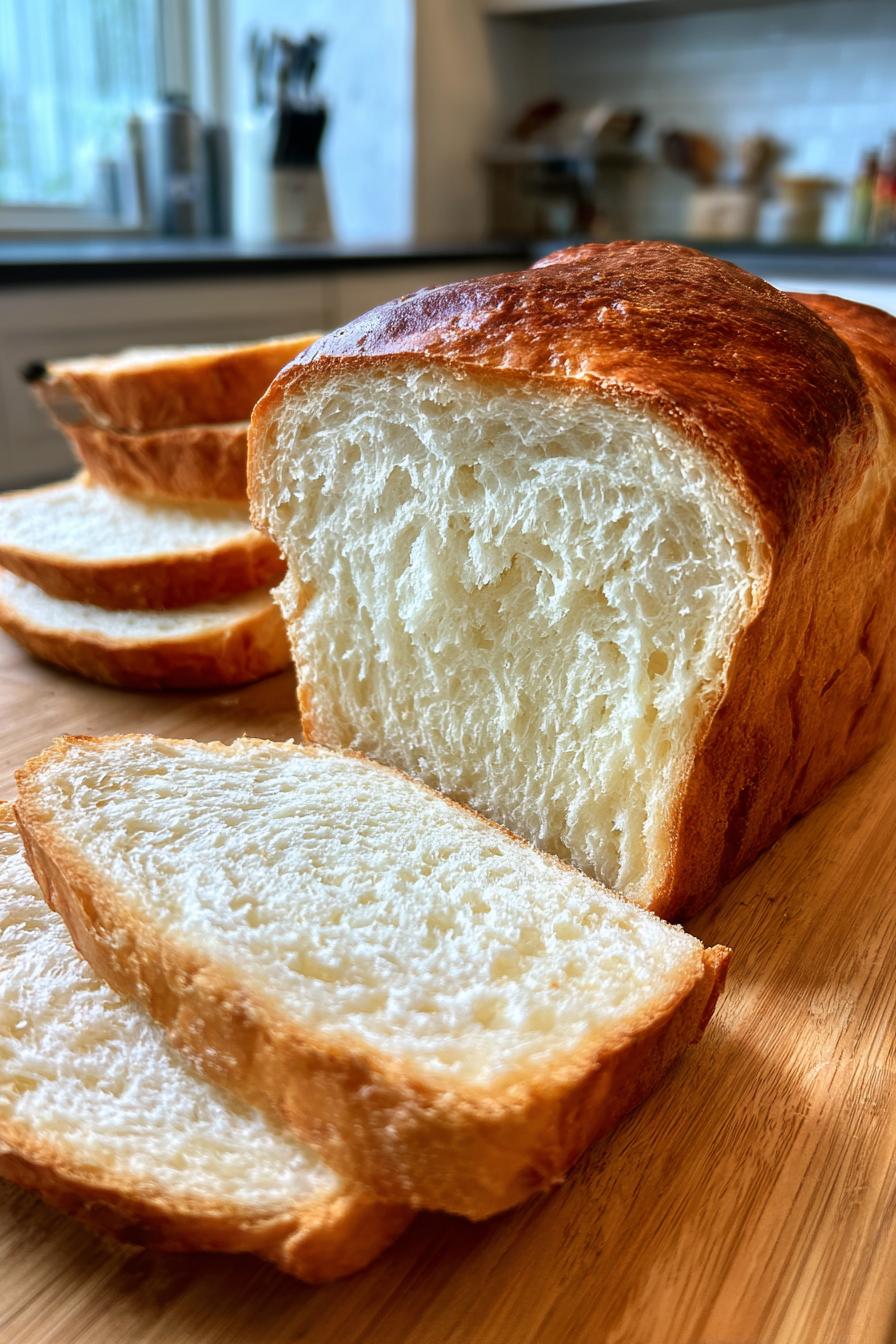
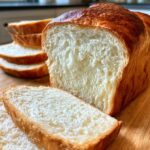
As a busy mom, I know how challenging it can be to whip up meals that everyone loves, especially when dietary restrictions come into play. That’s why I’m excited to share my recipe for gluten free sandwich bread! This delightful bread is not only easy to make, but it also delivers on taste and texture. Whether you’re crafting a quick lunch for the kids or preparing a gourmet sandwich for yourself, this gluten free sandwich bread is the perfect solution. It’s a warm hug in loaf form, ready to elevate your meals and impress your loved ones!
Why You’ll Love This Gluten Free Sandwich Bread
This gluten free sandwich bread is a game changer for busy families. It’s incredibly easy to make, taking just about 50 minutes from start to finish. The taste? Oh, it’s soft, fluffy, and perfect for any sandwich or toast. Plus, it’s versatile enough to suit everyone’s preferences, whether you’re a fan of savory or sweet. You’ll find that this bread quickly becomes a staple in your kitchen!
Ingredients for Gluten Free Sandwich Bread
Gathering the right ingredients is key to making a delicious gluten free sandwich bread. Here’s what you’ll need:
- Gluten-free all-purpose flour: This is the base of your bread. It mimics traditional flour and provides structure.
- Tapioca flour: Adds chewiness and helps bind the ingredients together, giving your bread that delightful texture.
- Almond flour: This nutty flour adds moisture and a subtle flavor, making your bread rich and satisfying.
- Sugar: Just a touch to enhance the flavor and help with browning during baking. You can use honey for a natural alternative!
- Salt: Essential for flavor, it balances the sweetness and enhances the overall taste of the bread.
- Instant yeast: This is your leavening agent, helping the bread rise and become fluffy. No need to activate it beforehand!
- Warm water: Activates the yeast and helps combine the ingredients. Make sure it’s not too hot, or it could kill the yeast.
- Olive oil: Adds moisture and richness to the bread. You can substitute it with melted coconut oil if you prefer.
- Eggs: They provide structure and moisture, making the bread tender. If you’re vegan, you can use flax eggs as a substitute.
For exact measurements, check the bottom of the article where you can find them available for printing. Happy baking!
How to Make Gluten Free Sandwich Bread
Step 1: Preheat the Oven
First things first, preheat your oven to 350°F (175°C). This step is crucial! Preheating ensures that your gluten free sandwich bread bakes evenly. If you skip this, your bread might end up dense and gummy. Trust me, a warm oven is like a cozy blanket for your dough!
Step 2: Mix Dry Ingredients
In a large bowl, combine the gluten-free all-purpose flour, tapioca flour, almond flour, sugar, salt, and instant yeast. Whisk them together until they’re well blended. Proper mixing is key here! It helps distribute the yeast and ensures your bread rises beautifully. Think of it as giving your ingredients a little dance party!
Step 3: Whisk Wet Ingredients
In another bowl, whisk together the warm water, olive oil, and eggs. Make sure the water is warm, not hot, to keep the yeast happy. This mixture is the heart of your bread, bringing moisture and richness. Whisking well helps combine everything smoothly, so your bread has a lovely texture.
Step 4: Combine Wet and Dry Ingredients
Now, it’s time to bring the two mixtures together! Pour the wet ingredients into the dry ingredients and mix until smooth. You want a thick batter, not a runny one. If it feels too thick, don’t panic! Just add a splash of warm water. This is where the magic happens, and your gluten free sandwich bread starts to take shape!
Step 5: Pour into Loaf Pan
Grease your loaf pan with a bit of olive oil or cooking spray. This prevents sticking and makes for easy removal later. Pour the batter into the pan, smoothing the top with a spatula. It should fill about halfway up the sides. Remember, this bread will rise, so give it some room to grow!
Step 6: Let the Batter Rise
Cover the loaf pan with a clean kitchen towel and let the batter rise for about 30 minutes. This step is essential for achieving that fluffy texture. The yeast will work its magic, creating air pockets that make your bread light and airy. Patience is key here, so take a moment to enjoy a cup of tea while you wait!
Step 7: Bake the Bread
Once the batter has risen, pop it into your preheated oven. Bake for 30-35 minutes, or until the top is golden brown. To check for doneness, insert a toothpick into the center. If it comes out clean, your bread is ready! The aroma wafting through your kitchen will be irresistible!
Step 8: Cool and Slice
After baking, let the bread cool in the pan for about 10 minutes. Then, transfer it to a wire rack to cool completely. This step is crucial! Slicing too soon can lead to a gummy texture. Once it’s cool, slice it up and enjoy your homemade gluten free sandwich bread!
Tips for Success
- Measure your flours accurately for the best results. A kitchen scale can be a game changer!
- Let your ingredients come to room temperature before mixing for a smoother batter.
- Don’t rush the rising time; it’s essential for fluffy bread.
- Experiment with add-ins like herbs or seeds for extra flavor.
- Store leftover bread in an airtight container to keep it fresh longer.
Equipment Needed
- Mixing bowls: A large bowl for dry ingredients and a medium bowl for wet ingredients. Any size will do!
- Whisk: For mixing wet ingredients. A fork works in a pinch!
- Loaf pan: A standard 9×5 inch pan is ideal. You can use any similar-sized pan.
- Spatula: For smoothing the batter. A spoon can also work!
- Wire rack: For cooling the bread. A plate can substitute if needed.
Variations of Gluten Free Sandwich Bread
- Herb-Infused Bread: Add dried herbs like rosemary or thyme to the dry ingredients for a fragrant twist.
- Cheesy Delight: Mix in shredded cheese, such as cheddar or mozzarella, for a savory, cheesy bread.
- Sweet Cinnamon Bread: Incorporate cinnamon and a bit more sugar for a delightful breakfast option.
- Nutty Addition: Fold in chopped nuts or seeds like sunflower or pumpkin for added crunch and nutrition.
- Fruit-Studded Bread: Add dried fruits like cranberries or raisins for a sweet surprise in every bite.
Serving Suggestions for Gluten Free Sandwich Bread
- Pair with a fresh garden salad for a light lunch.
- Enjoy with a warm bowl of soup for a comforting dinner.
- Spread with avocado and top with a sprinkle of salt for a quick snack.
- Serve toasted with a dollop of your favorite jam for breakfast.
- Present slices on a wooden board for a rustic touch at gatherings.
FAQs about Gluten Free Sandwich Bread
Can I use different flours in this gluten free sandwich bread recipe?
Absolutely! While the recipe calls for specific flours, you can experiment with other gluten-free options. Just ensure they have similar properties to maintain the bread’s texture. For instance, brown rice flour or coconut flour can be great alternatives!
How do I store gluten free sandwich bread?
To keep your gluten free sandwich bread fresh, store it in an airtight container at room temperature for up to three days. If you want to keep it longer, slice it and freeze it. Just pop a slice in the toaster when you’re ready to enjoy!
Can I make this bread vegan?
Yes! You can easily make this gluten free sandwich bread vegan by substituting the eggs with flax eggs. Just mix one tablespoon of ground flaxseed with three tablespoons of water for each egg. Let it sit for a few minutes until it thickens!
Why is my gluten free bread dense?
A dense texture can happen for a few reasons. Make sure your yeast is fresh and active. Also, ensure you’re measuring your flours accurately. Too much flour can lead to a heavy loaf. Lastly, don’t skip the rising time; it’s crucial for lightness!
Can I add seeds or nuts to the bread?
Definitely! Adding seeds or nuts can enhance the flavor and texture of your gluten free sandwich bread. Just fold them in gently after combining the wet and dry ingredients. Enjoy the added crunch!
Final Thoughts
Making gluten free sandwich bread has been a delightful journey for me, and I hope it becomes a cherished experience for you too. The joy of pulling a warm loaf from the oven, with its golden crust and soft interior, is simply unmatched. This recipe not only caters to dietary needs but also brings families together around the table. Whether you’re crafting a classic PB&J or a gourmet sandwich, this bread is sure to impress. So roll up your sleeves, embrace the process, and enjoy the delicious rewards of your homemade gluten free sandwich bread!
PrintGluten Free Sandwich Bread: Discover Easy Recipes Now!
A simple and delicious recipe for gluten-free sandwich bread that is perfect for sandwiches or toast.
- Prep Time: 15 minutes
- Cook Time: 35 minutes
- Total Time: 50 minutes
- Yield: 1 loaf 1x
- Category: Bread
- Method: Baking
- Cuisine: American
- Diet: Gluten Free
Ingredients
- 2 cups gluten-free all-purpose flour
- 1/4 cup tapioca flour
- 1/4 cup almond flour
- 1 tablespoon sugar
- 1 teaspoon salt
- 1 tablespoon instant yeast
- 1 cup warm water
- 1/4 cup olive oil
- 3 large eggs
Instructions
- Preheat the oven to 350°F (175°C).
- In a large bowl, mix the gluten-free all-purpose flour, tapioca flour, almond flour, sugar, salt, and instant yeast.
- In another bowl, whisk together the warm water, olive oil, and eggs.
- Combine the wet ingredients with the dry ingredients and mix until smooth.
- Pour the batter into a greased loaf pan.
- Let the batter rise for about 30 minutes.
- Bake in the preheated oven for 30-35 minutes or until golden brown.
- Allow to cool before slicing.
Notes
- Store in an airtight container for up to 3 days.
- Can be frozen for longer storage.
- For a sweeter bread, add more sugar or honey.
Nutrition
- Serving Size: 1 slice
- Calories: 120
- Sugar: 1g
- Sodium: 150mg
- Fat: 5g
- Saturated Fat: 1g
- Unsaturated Fat: 4g
- Trans Fat: 0g
- Carbohydrates: 15g
- Fiber: 2g
- Protein: 3g
- Cholesterol: 50mg