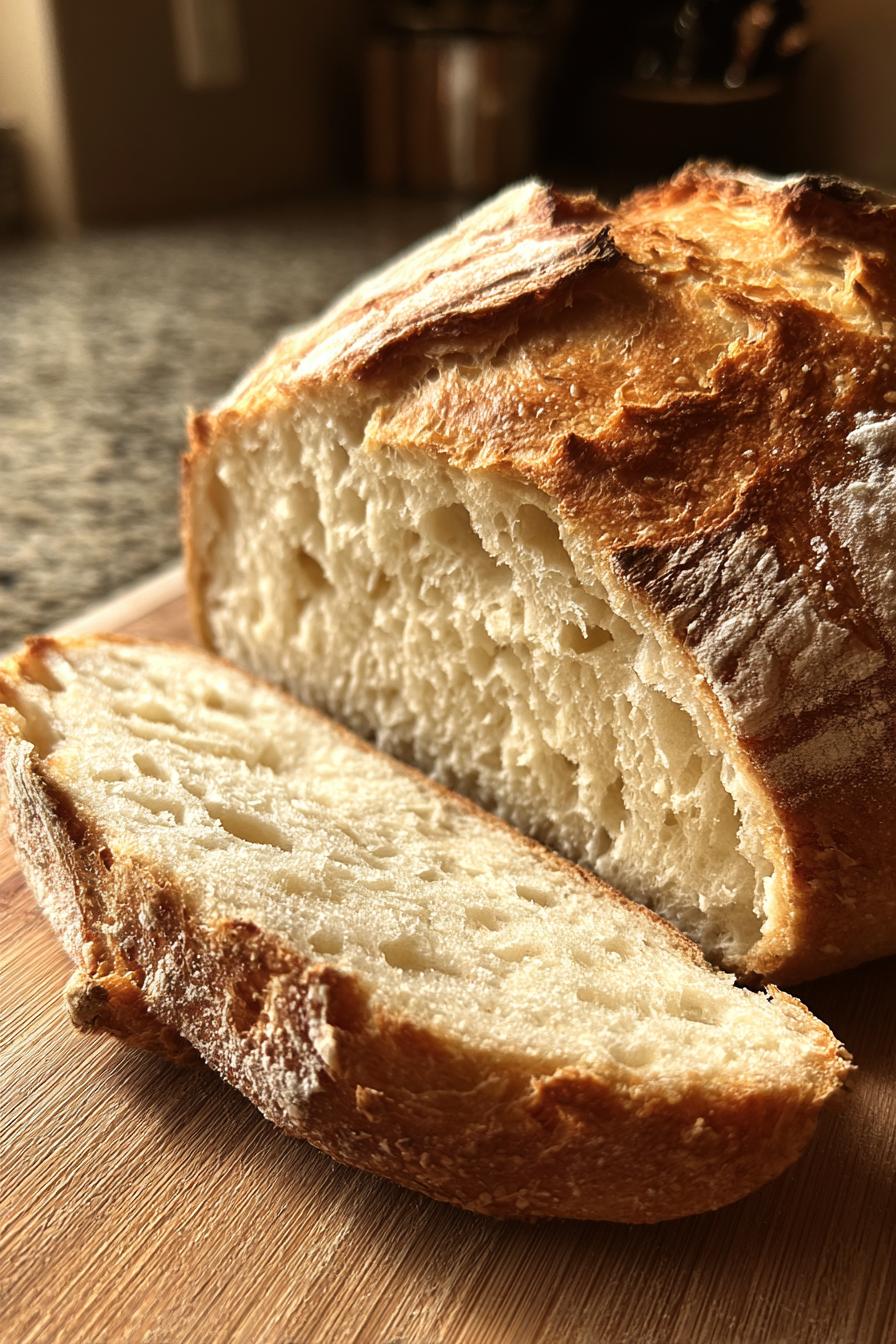
Unbelievably Fluffy Gluten Free Sourdough Bread in 5 Steps
Oh, gluten free sourdough bread – my kitchen nemesis turned love story! For years, I thought giving up gluten meant saying goodbye to that tangy, chewy sourdough I adored. Store-bought versions were either dense bricks or tasted like cardboard. Then I discovered the magic of a good gluten-free sourdough starter and everything changed.
The secret? Patience and the right flour blend. Unlike regular sourdough, gluten-free versions need extra care – they won’t develop that classic stretchy texture naturally. But trust me, when you pull a golden loaf from the oven with that signature crackly crust and soft interior, you’ll forget it’s gluten-free. My first successful bake had me doing a happy dance around the kitchen!
What makes this gluten free sourdough bread special is how it captures the essence of traditional sourdough while being gentle on sensitive tummies. The slow fermentation gives it that distinctive sour flavor and makes it easier to digest. Plus, the smell of it baking? Absolute heaven.
Why You’ll Love This Gluten Free Sourdough Bread
Listen, I know gluten-free baking can seem intimidating, but this sourdough will surprise you! Here’s why it’s become my go-to recipe:
- Shockingly simple – No fancy techniques, just mix, rest, and bake. Even sourdough beginners nail this one!
- That authentic tang – The slow fermentation gives that classic sourdough zing we all crave.
- Softer than you’d expect – Forget dry gluten-free bread. The honey and olive oil keep it moist for days.
- Gentle on your gut – The fermented grains make it easier to digest than regular bread.
- No compromise on flavor – Seriously, my gluten-loving friends keep stealing slices!
The best part? Watching that glorious oven spring when your loaf rises perfectly. Pure baking magic!
Ingredients for Gluten Free Sourdough Bread
Okay, let’s talk ingredients – this is where the magic begins! After dozens of test batches, I’ve nailed down exactly what works for perfect gluten-free sourdough. Trust me, precise measurements matter here (that’s why I list everything by weight). Here’s your shopping list:
- 500g gluten-free flour blend – My favorite is a mix of brown rice, tapioca and sorghum flours. Store-bought blends work too, but check they don’t contain xanthan gum already.
- 350ml water – Filtered is best if your tap water is heavily chlorinated. Room temperature, please – no ice-cold shocks for our sensitive starter!
- 100g active gluten-free sourdough starter – It should be bubbly and pass the float test. If yours is sleepy, wake it up with two feedings before baking.
- 10g salt – Fine sea salt dissolves best. This isn’t just for flavor – it controls fermentation too.
- 1 tbsp honey (optional) – Just a kiss of sweetness to balance the tang. Maple syrup works if you’re vegan.
- 1 tbsp olive oil – The secret to that tender crumb! Don’t skip this – gluten-free dough needs the extra help.
See? Nothing weird or hard to find. Now let’s get our hands floury!
Equipment You’ll Need
Don’t worry – you won’t need fancy gadgets for this gluten-free sourdough bread! Just gather these basics:
- Digital kitchen scale – Gluten-free baking is all about precision!
- Large mixing bowl – Big enough for sticky hands to work comfortably.
- Proofing basket (banneton) – Gives our loaf that beautiful shape.
- Dutch oven – Creates perfect steam for crusty perfection.
- Dough scraper – Your best friend for handling sticky dough.
That’s it! See? Nothing you wouldn’t use for regular baking.
How to Make Gluten Free Sourdough Bread
Alright, let’s get baking! I’ll walk you through each step like we’re standing side by side in my flour-dusted kitchen. Don’t let the length fool you – most of this is hands-off time while the magic of fermentation happens. Here’s exactly how I make my favorite gluten-free sourdough:
Mixing the Dough
First, grab your large mixing bowl and combine the flour, water, and bubbly starter. I like to use a Danish dough whisk (or just a sturdy spoon) to mix until no dry spots remain. The dough will look shaggy – that’s perfect! Cover with a damp towel and let it rest for 30 minutes. This autolyse period helps the flour absorb moisture evenly.
Adding Remaining Ingredients
After the rest, sprinkle in the salt, drizzle the honey and olive oil over the dough. Now comes the fun part – gently kneading! Gluten-free dough won’t get stretchy like wheat dough, so just fold and press for about 3-5 minutes until everything’s incorporated. The texture should be slightly tacky but not stick to clean hands.
First Rise
Cover the bowl with plastic wrap or a shower cap (my quirky trick!) and let it rise at room temperature. This slow fermentation is key – I give it 4-6 hours depending on how warm my kitchen is. You’ll know it’s ready when it’s puffy and dotted with little bubbles. Don’t rush this – the flavor develops beautifully!
Shaping and Final Proof
Now for the satisfying part – shaping! Dust your proofing basket with rice flour (it won’t stick like wheat flour). Gently turn out your dough, shape it into a round ball, and place it seam-side up in the basket. Cover and refrigerate overnight. This cold proof makes the crumb extra tender and develops that signature sourdough tang.
Baking the Gluten Free Sourdough Bread
Next morning, preheat your Dutch oven at 220°C (425°F) for 30 minutes – yes, empty! Carefully flip your loaf into the screaming hot pot, score the top with a razor, and bake covered for 20 minutes. Remove the lid and bake another 20-25 minutes until deeply golden. That crackling sound as it cools? Music to a baker’s ears!
Tips for Perfect Gluten Free Sourdough Bread
After countless loaves (and yes, a few flops!), I’ve picked up some game-changing tricks for gluten-free sourdough success. Here are my must-know tips:
- Water is your secret weapon – Different flour blends absorb differently. Start with 350ml, then add 1 tbsp at a time until the dough feels like thick cake batter.
- Scale never lies – I know it’s tempting to eyeball, but gluten-free baking demands precision. Your 10g of salt makes all the difference!
- The finger poke test – Gently press the risen dough. If it springs back slowly, it’s ready. If it springs fast, give it more time.
- Listen to your loaf – That hollow sound when you tap the bottom? That’s your golden ticket to perfect doneness.
Remember, gluten-free sourdough is a living thing – be patient and trust the process!
Fun Ways to Mix Up Your Gluten Free Sourdough
Once you’ve mastered the basic recipe, let’s play! My favorite part of baking is getting creative with mix-ins. Here are my go-to variations:
- Seeded delight – Fold in 50g of sunflower, pumpkin and flax seeds during kneading
- Rosemary garlic – Add 2 tbsp fresh rosemary and 3 minced garlic cloves
- Sweet cinnamon raisin – Mix in 1 tsp cinnamon and 75g soaked raisins
- Buckwheat boost – Replace 100g flour with buckwheat for earthy depth
See? Endless possibilities to keep your sourdough adventures exciting!
Serving and Storing Gluten Free Sourdough Bread
Resist temptation – I know that warm bread smell is irresistible, but wait at least 1 hour before slicing! Cutting too soon makes gluten-free bread gummy. For storage, my foolproof method is wrapping cooled loaves in a clean kitchen towel, then tucking them into a bread box or paper bag. Stays fresh for 3 days this way!
For longer storage, slice and freeze in a ziplock bag. A quick toast revives it perfectly. And here’s my favorite tip: save the ends for gluten-free breadcrumbs – they toast up beautifully!
Nutritional Information
Just a quick heads up – these numbers are estimates since your exact flour blend and add-ins will change things a bit. But here’s the scoop for one slice (about 1/12th of the loaf):
- Calories: 120
- Carbs: 24g
- Fiber: 3g
- Protein: 4g
- Sugar: 1g (without honey), 2g (with honey)
The best part? Unlike store-bought gluten-free bread, you know exactly what’s in every wholesome slice!
Frequently Asked Questions
Over the years, I’ve gotten so many great questions about gluten-free sourdough – let me share the answers to the ones I hear most often!
Can I use a different gluten-free flour blend?
Absolutely! Just make sure your blend doesn’t already contain xanthan gum. My favorite combo is 300g brown rice flour, 100g tapioca starch, and 100g sorghum flour. The key is keeping about 30% starchy flours for structure. Whatever you choose, stick to the same total weight (500g) for best results.
Why did my loaf turn out dense?
Oh honey, we’ve all been there! Usually it’s one of three things: underproofed dough (give it more time to bubble), overmixed batter (gentle folds only!), or cutting too soon (that hour of cooling is crucial). My first loaf could’ve doubled as a doorstop – now you know why I’m so obsessed with the finger poke test!
How do I keep my starter happy between bakes?
Treat your gluten-free starter like a pet that eats once a week! I keep mine in the fridge and feed it equal parts flour/water every 7 days. If it’s looking sluggish, two back-to-back feedings at room temperature will wake it right up. Pro tip: name your starter – mine’s called Bubbles!
Can I make this without a Dutch oven?
Sure thing! Just create steam another way – I’ve used a baking sheet with boiling water on the oven floor, or even spraying the loaf with water every 5 minutes. The crust won’t be quite as crackly, but it’ll still taste amazing. Improvising is part of the fun!
Share Your Gluten Free Sourdough Bread Experience
I’d love to hear how your gluten-free sourdough adventure turns out! Did you get that perfect oven spring? Try any fun mix-ins? Drop me a comment below – your baking stories make my day!
PrintUnbelievably Fluffy Gluten Free Sourdough Bread in 5 Steps

A simple gluten-free sourdough bread recipe perfect for those avoiding gluten.
- Prep Time: 30 minutes
- Cook Time: 45 minutes
- Total Time: 5 hours 15 minutes
- Yield: 1 loaf 1x
- Category: Bread
- Method: Baking
- Cuisine: International
- Diet: Gluten Free
Ingredients
- 500g gluten-free flour blend
- 350ml water
- 100g active gluten-free sourdough starter
- 10g salt
- 1 tbsp honey (optional)
- 1 tbsp olive oil
Instructions
- Mix flour, water, and sourdough starter in a bowl.
- Cover and let rest for 30 minutes.
- Add salt, honey, and olive oil. Knead lightly.
- Let dough rise for 4-6 hours.
- Shape dough into a loaf.
- Place in a proofing basket and refrigerate overnight.
- Preheat oven to 220°C.
- Bake for 40-45 minutes until golden brown.
- Cool before slicing.
Notes
- Use a digital scale for accuracy.
- Adjust water based on flour blend absorption.
- Store leftovers in an airtight container.
Nutrition
- Serving Size: 1 slice
- Calories: 120
- Sugar: 1g
- Sodium: 200mg
- Fat: 2g
- Saturated Fat: 0.3g
- Unsaturated Fat: 1.5g
- Trans Fat: 0g
- Carbohydrates: 24g
- Fiber: 3g
- Protein: 4g
- Cholesterol: 0mg