Irresistible Keto Tiramisu Cups with Mascarpone Cream
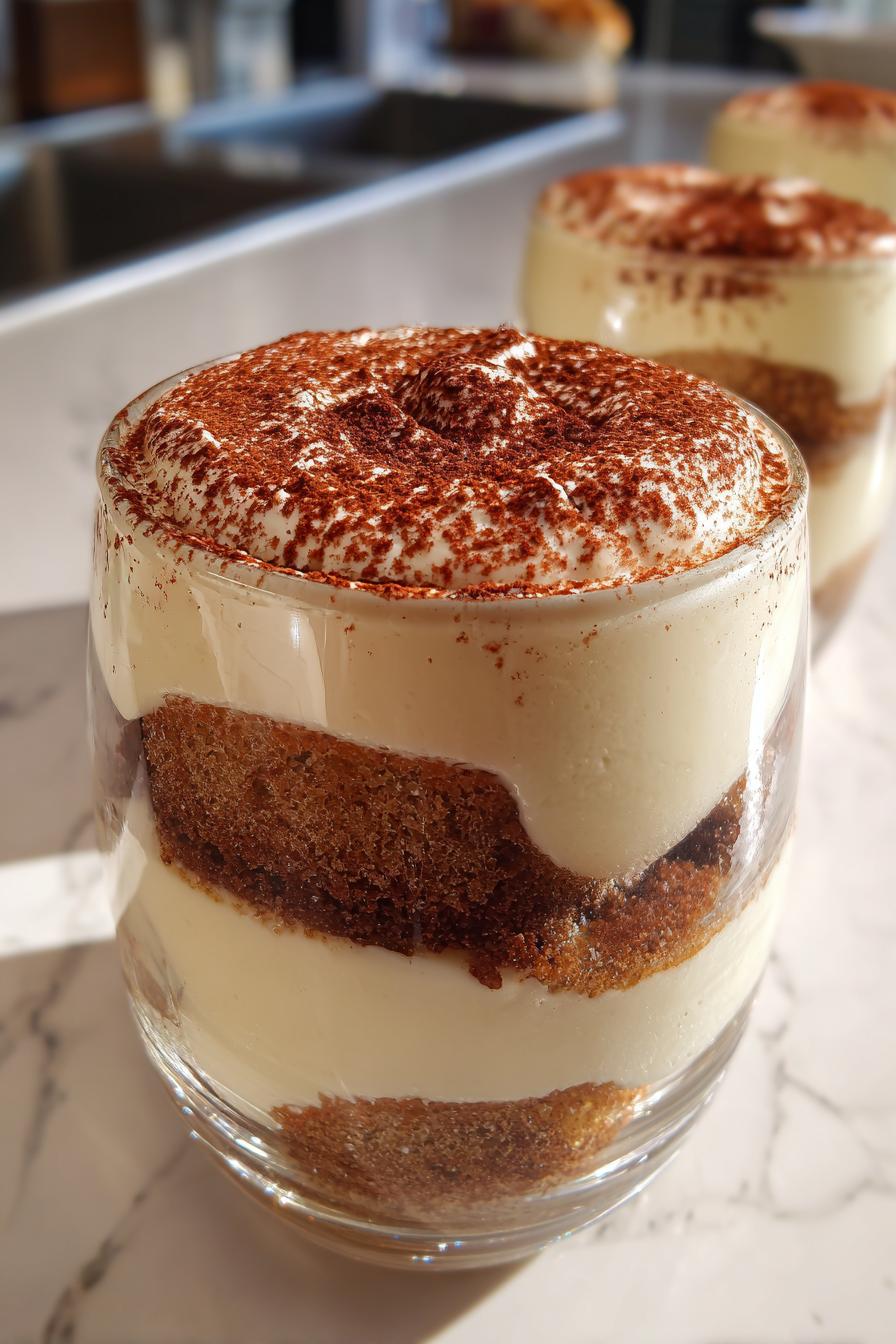
Oh, let me tell you about my keto tiramisu cups – they’re the little lifesavers that got me through my sugar cravings when I first went low-carb! I remember staring longingly at dessert menus until I cracked the code for these rich, creamy mascarpone wonders. The magic? That perfect combo of almond flour crust soaked in coffee and topped with cloud-like mascarpone cream – all without the guilt. These little cups pack all the indulgence of traditional tiramisu while keeping it keto-friendly. Trust me, after one bite of these mascarpone cream delights, you won’t believe they’re actually good for you!
Why You’ll Love These Keto Tiramisu Cups with Mascarpone Cream
Listen, I know what you’re thinking – “keto dessert” sounds like some sad, flavorless compromise. But these little cups? They’re the real deal. Here’s why they’ve become my go-to treat (and probably will become yours too):
- No sugar crash: That mascarpone cream is sweetened with erythritol, so you get all the sweetness without the guilt or energy rollercoaster
- Ready in under 30 minutes active time (plus chilling) – I make these when unexpected guests show up and they think I slaved for hours
- Seriously rich flavor – the coffee-soaked layers with that velvety mascarpone will make you forget it’s low-carb
- Portion control built right in – no more fighting over who gets the bigger slice of tiramisu!
- Easy to customize – add a splash of rum to the coffee or sprinkle with sugar-free chocolate chips if you’re feeling fancy
The best part? My non-keto friends beg me for this recipe. That’s how good these little cups are – they don’t taste like a “diet” dessert at all. Just pure, creamy, coffee-kissed heaven in every bite.
Ingredients for Keto Tiramisu Cups with Mascarpone Cream
Okay, let’s gather our goodies! What I love about this recipe is how simple the ingredient list is – just a handful of keto pantry staples transform into something magical. Here’s everything you’ll need (and yes, I’ve made all the measurement mistakes so you don’t have to!):
- 1 cup almond flour – this is our magic base for that perfect crumbly crust
- 2 tbsp cocoa powder – go for the good stuff, the darker the better
- 1/4 cup melted butter – I use salted because life’s too short for unsalted butter
- 1 tbsp powdered erythritol – for the crust’s subtle sweetness
- 1 cup mascarpone cheese – must be room temperature or it’ll clump
- 1/2 cup heavy cream – cold right from the fridge whips up best
- 2 tbsp powdered erythritol – for the cream layer
- 1 tsp vanilla extract – the real stuff, not that imitation nonsense
- 1/2 cup strong brewed coffee (cooled) – I use espresso when I’m feeling fancy
- 1 tbsp unsweetened cocoa powder (for dusting) – makes it look professional
Ingredient Notes & Substitutions
Now let’s talk swaps and tricks I’ve learned after making these dozens of times:
Almond flour alternatives: If nuts are a no-go, coconut flour works but use only 1/3 cup (it’s way more absorbent). Add an extra tablespoon of butter too.
Sweetener options: Not a fan of erythritol? Monk fruit blend works great. Just know granulated sweeteners might leave a slight grittiness unless you powder them first.
Coffee choices: Use decaf if caffeine keeps you up at night. I’ve even used chicory “coffee” when I was out – surprisingly good! Just don’t skip the coffee entirely unless you want plain mascarpone cups (which, honestly, still taste amazing).
Mascarpone hack: Can’t find mascarpone? Mix 3/4 cup cream cheese with 1/4 cup heavy cream and a squeeze of lemon juice. It’s not exactly the same, but it’ll do in a pinch.
Remember – baking is science, but dessert is love. Don’t stress if you need to make substitutions. The first time I made these, I used hazelnut flour because that’s all I had, and my husband still married me!
How to Make Keto Tiramisu Cups with Mascarpone Cream
Alright, let’s get our hands dirty! Making these keto tiramisu cups is easier than resisting seconds (and trust me, that’s hard). Follow these steps and you’ll be enjoying dessert heaven in no time.
Step 1: Prepare the Crust
First things first – crank that oven to 350°F (175°C). While it’s heating up, grab a mixing bowl and toss in your almond flour, cocoa powder, and powdered erythritol. Give it a good whisk to banish any lumps – nobody wants surprise flour bombs!
Now pour in that melted butter (careful, it’s hot!) and mix until it comes together into a crumbly dough that holds its shape when you squeeze it. If it seems too dry, add another teaspoon of butter. Too wet? A sprinkle more almond flour.
Here’s my favorite part – press about 2 tablespoons of this magical mixture into the bottom of each cup or ramekin. I use the back of a spoon to really pack it down evenly. Pop these bad boys in the oven for exactly 10 minutes – set a timer because they burn fast!
When they come out, resist the urge to touch (I’ve burned my fingers more times than I’ll admit). Let them cool completely – about 20 minutes should do it. This cooling time is crucial for that perfect crispy-yet-not-rock-hard texture.
Step 2: Make the Mascarpone Cream
While those crusts are cooling, let’s whip up that dreamy mascarpone cream. Make sure your mascarpone is at room temperature – cold mascarpone will leave you with lumpy sadness.
In a mixing bowl, beat the mascarpone until it’s smooth and creamy. Now add your powdered erythritol and vanilla extract – beat again until fully incorporated. Here’s where the magic happens: slowly pour in that cold heavy cream while mixing.
Keep beating until soft peaks form – you’ll know it’s ready when the mixture holds its shape but still looks luscious and creamy, like clouds you want to dive into. Don’t overbeat or you’ll end up with mascarpone butter (yes, I’ve done this).
Step 3: Assemble & Chill
Now for the fun part! Take your cooled coffee and lightly brush it over each crust – about 1 teaspoon per cup. You want them moist but not swimming (learned that the messy way).
Spoon or pipe that glorious mascarpone cream over each coffee-kissed crust. I use a piping bag because I’m fancy, but a spoon works just fine – nobody judges dessert!
The finishing touch? A delicate dusting of cocoa powder through a fine sieve. It makes them look professional and adds that classic tiramisu bitterness we all love.
Here’s the hardest part – pop them in the fridge for at least 2 hours. I know, the wait is torture, but trust me, this chilling time lets all the flavors meld together perfectly. If you can resist digging in immediately, you’re stronger than me!
Tips for Perfect Keto Tiramisu Cups with Mascarpone Cream
After making these tiramisu cups more times than I can count (okay fine, I’ve lost track because I eat them so often), I’ve picked up some foolproof tricks to guarantee perfection every time. These little nuggets of wisdom will save you from the mistakes I’ve already made!
Master the coffee soak: That moment when you’re brushing coffee onto the crusts? Go easy, tiger! Too much liquid turns your perfect crust into sad mush. I use a pastry brush and do two light passes rather than one heavy soak. If you accidentally overdo it, pop the cups in the freezer for 5 minutes before adding cream – lifesaver!
Cream stiffness is everything: Your mascarpone cream should hold its shape when you scoop it – think soft-serve ice cream consistency. If it’s too runny, chill the bowl for 10 minutes then whip again. Learned this the hard way when my first batch turned into tiramisu soup!
Chill time isn’t optional: I know it’s tempting to dig in right away (trust me, I’ve been there), but that 2-hour chill is when the magic happens. The coffee flavor mellows, the crust softens just right, and the cream sets up beautifully. For best results? Make them the night before – the flavors develop even more.
Cocoa dusting hack: Want that perfect bakery-style dusting? Place a stencil (I use a paper doily) over the cups before sprinkling cocoa powder. Remove it gently for a fancy pattern that’ll impress everyone.
Troubleshooting tip: If your cream starts to separate while mixing (it happens!), add a tablespoon of cold heavy cream and beat gently until it comes back together. Saved many batches this way!
Remember – even if yours don’t come out perfectly the first time (mine certainly didn’t!), they’ll still taste amazing. The beauty of individual cups? Any “mistakes” just look like rustic charm!
Storage & Serving Suggestions for Keto Tiramisu Cups
Okay, let’s talk about keeping these little beauties fresh and making them look extra special when serving! First rule – these MUST stay refrigerated. That creamy mascarpone layer is basically begging to be kept cold. I learned this the hard way when I left a batch on the counter overnight (RIP, sweet tiramisu cups).
Storage Smarts:
- Covered tightly with plastic wrap or in an airtight container
- They’ll keep beautifully for 3 days in the fridge (if they last that long!)
- For longer storage, freeze without cocoa dusting for up to 2 weeks – just thaw overnight in the fridge
Serving Flair:
Now for the fun part – dressing these up! My family thinks I’m fancy when I add:
- A few fresh raspberries or strawberries on top – the tartness cuts through the richness perfectly
- Shavings of 90% dark chocolate (use a vegetable peeler for those gorgeous curls)
- A sprinkle of cinnamon for warmth
- Edible gold flakes when I’m feeling extra (birthdays deserve sparkle!)
Here’s my pro tip: Serve these chilled but not ice-cold. Take them out of the fridge about 10 minutes before serving – it lets all those amazing flavors really shine. And presentation? Little dessert plates or elegant glass cups make them look like they came from a fancy bakery.
Oh! Almost forgot – these make amazing layered parfaits too. Just crumble the baked crust between layers of mascarpone cream in tall glasses. Top with cocoa powder and berries – instant dinner party wow factor!
Nutritional Information
Now, I’m no nutritionist (just a dessert enthusiast with a measuring cup obsession), but here’s what you should know about these keto tiramisu cups. The beauty of this recipe is that it’s packed with good fats and fiber while keeping carbs super low – exactly what we want in a keto treat!
The almond flour gives you a nice protein boost, and that luxurious mascarpone cream? Pure velvety goodness without the sugar crash. Just remember – nutritional values can vary depending on your specific ingredients and brands (especially with different sweeteners).
My best advice? Enjoy these guilt-free knowing you’re treating yourself to something both delicious and mindful of your health goals. The portion-controlled cups make it easy to satisfy cravings without overdoing it (though I won’t judge if you sneak a second one – I do it all the time!).
As with any recipe, if you’re tracking macros or have specific dietary needs, definitely calculate based on your exact ingredients. But for most of us? These are simply little cups of happiness that happen to fit beautifully into a low-carb lifestyle!
FAQs About Keto Tiramisu Cups with Mascarpone Cream
I get so many questions about these little cups whenever I share them! Here are the ones that pop up most often (and believe me, I asked myself all these too when I first started making them):
Can I use regular sugar instead of erythritol?
Technically yes, but then they wouldn’t be keto! If you’re not watching carbs, you can swap in powdered sugar. Use the same amount – it’ll be plenty sweet. Just know the texture might be slightly different and you’ll lose that sugar-free magic.
How can I make these nut-free?
Absolutely! Swap the almond flour for coconut flour – but only use 1/3 cup since it’s way more absorbent. You might need to add an extra tablespoon of melted butter too. The flavor changes a bit, but it’s still delicious!
Is decaf coffee okay to use?
100% yes! I actually use decaf most of the time because I like enjoying these as an after-dinner treat without the caffeine buzz. The flavor is exactly the same – it’s all about that coffee essence, not the jitters!
Can I make these ahead of time?
You bet! These actually get better after chilling overnight. Just wait to dust with cocoa powder until right before serving so it doesn’t get soggy. They keep beautifully in the fridge for up to 3 days (if they last that long!).
My cream turned out runny – what happened?
Oh, I’ve been there! Usually it means your mascarpone was too cold or you didn’t whip it long enough. Next time, make sure everything’s at room temperature before mixing. If it’s already runny, pop the whole bowl in the fridge for 15 minutes then whip again – often saves it!
Enjoy Your Keto Tiramisu Cups!
There you have it – my foolproof way to enjoy tiramisu without breaking your keto stride! I can’t wait for you to experience that first heavenly bite of coffee-kissed crust and cloud-like mascarpone cream. These little cups have saved me from countless dessert cravings, and I hope they become your new favorite treat too.
If you make them, I’d love to hear how they turned out! Leave a comment below or tag me in your photos – nothing makes me happier than seeing your kitchen creations. And hey, if you’ve got any brilliant twists on the recipe (I’m always looking for new ideas!), share those too. Happy baking, friends – may your tiramisu cups be creamy, your crusts perfectly crisp, and your sweet tooth thoroughly satisfied!
PrintIrresistible Keto Tiramisu Cups with Mascarpone Cream

Delicious keto-friendly tiramisu cups with rich mascarpone cream and coffee-soaked layers. A low-carb dessert that satisfies your sweet cravings.
- Prep Time: 15 minutes
- Cook Time: 10 minutes
- Total Time: 2 hours 25 minutes
- Yield: 4 servings 1x
- Category: Dessert
- Method: Baking
- Cuisine: Italian
- Diet: Low Calorie
Ingredients
- 1 cup almond flour
- 2 tbsp cocoa powder
- 1/4 cup melted butter
- 1 tbsp powdered erythritol
- 1 cup mascarpone cheese
- 1/2 cup heavy cream
- 2 tbsp powdered erythritol
- 1 tsp vanilla extract
- 1/2 cup strong brewed coffee (cooled)
- 1 tbsp unsweetened cocoa powder (for dusting)
Instructions
- Preheat oven to 350°F (175°C).
- Mix almond flour, cocoa powder, melted butter, and erythritol to form a dough.
- Press the dough into the bottom of small cups or ramekins.
- Bake for 10 minutes, then let cool.
- Whip mascarpone, heavy cream, erythritol, and vanilla until fluffy.
- Brush the cooled crusts with coffee.
- Layer the mascarpone cream on top.
- Dust with cocoa powder.
- Chill for 2 hours before serving.
Notes
- Use decaf coffee if avoiding caffeine.
- Store leftovers in the fridge for up to 3 days.
- Replace almond flour with coconut flour for a nut-free version.
Nutrition
- Serving Size: 1 cup
- Calories: 320
- Sugar: 2g
- Sodium: 120mg
- Fat: 30g
- Saturated Fat: 15g
- Unsaturated Fat: 10g
- Trans Fat: 0g
- Carbohydrates: 6g
- Fiber: 3g
- Protein: 7g
- Cholesterol: 80mg