Mumbai Street Style Pav Bhaji Recipe – 4 Secret Tips Inside
There’s something magical about Mumbai’s street food culture – the sizzle of the tawa, the aroma of spices in the air, and the hum of hungry crowds. And right at the heart of it all? Pav Bhaji. This iconic dish, with its buttery buns and spicy, mashed vegetable curry, is pure comfort in every bite. I’ll never forget my first taste of Pav Bhaji from a street vendor near Marine Drive. The vendor’s hands moved like a blur, slathering butter on pav and ladling out steaming bhaji with a flourish. It was love at first bite.
Over the years, I’ve perfected my own Pav Bhaji Recipe (Mumbai Street Style) at home, and I’m so excited to share it with you. This version captures all the authentic flavors – the richness of butter, the warmth of spices, and that irresistible tang from fresh lemon. It’s a dish that’s as fun to make as it is to eat. Trust me, once you try this, you’ll feel like you’re right there on the bustling streets of Mumbai.
Why You’ll Love This Pav Bhaji Recipe
This isn’t just any Pav Bhaji Recipe – it’s your ticket to Mumbai street food magic right in your kitchen. Here’s why you’ll keep coming back to this recipe:
- Tastes like the real deal: That perfect balance of spicy, tangy, and buttery flavors you get from street vendors? We’ve nailed it.
- One-pot wonder: Minimal cleanup means more time enjoying your delicious creation.
- Make it your own: Want it fiery hot? Mild? The spice level is completely in your hands.
- Kid-approved: Sneak in all those veggies – they’ll never know!
- Pantry-friendly: Uses simple ingredients you probably already have.
Once you try this recipe, those boring weeknight dinners are officially over.
Pav Bhaji Recipe Ingredients
Here’s everything you’ll need to make this Pav Bhaji Recipe (Mumbai Street Style) that’ll knock your socks off. Trust me, every ingredient plays a role in creating that authentic street-side flavor. Let’s break it down:
- 4 medium potatoes: Boiled, peeled, and mashed until smooth. This is the heart of your bhaji.
- 1 cup cauliflower: Finely chopped – it adds texture and soaks up all those spices.
- 1 cup carrots: Also finely chopped for a hint of sweetness and color.
- 1 cup green peas: Fresh or frozen, they bring a pop of green and a bit of bite.
- 1 large onion: Finely chopped – don’t skimp here; it’s the base of your flavor.
- 1 large tomato: Finely chopped for that tangy, pulpy goodness.
- 1 tablespoon ginger-garlic paste: A must for that deep, aromatic flavor.
- 2 tablespoons Pav Bhaji Masala: Store-bought or homemade, this is the soul of the dish.
- 1 teaspoon red chili powder: Adjust to your spice level, but don’t skip it!
- 1/2 teaspoon turmeric powder: For that beautiful golden color.
- Salt to taste: Don’t be shy – it brings all the flavors together.
- 2 tablespoons butter: Yes, butter! This is where the richness comes from.
- 1 tablespoon oil: To sauté all those veggies to perfection.
- Fresh coriander leaves: Chopped for a fresh, herby finish.
- 1 lemon: Cut into wedges for serving – that tang is non-negotiable.
- 8 pav: Soft dinner rolls, buttered and toasted to golden perfection.
- Additional butter: For toasting the pav and serving on top. More is always better here!
Gather these up, and you’re ready to make Pav Bhaji that’ll rival any Mumbai street vendor’s!
Essential Equipment for Your Pav Bhaji Recipe
You don’t need fancy gadgets to make amazing Pav Bhaji – just these trusty tools from your kitchen:
- Large heavy-bottomed pan or kadai: Prevents burning when you’re cooking all those veggies.
- Potato masher: Your best friend for getting that perfect bhaji texture.
- Griddle or tawa: For toasting those pav until they’re golden and buttery.
- Basic utensils: Wooden spoon, knife, and chopping board – the everyday heroes!
See? Nothing complicated – just simple tools for spectacular results!
How to Make Pav Bhaji Recipe: Step-by-Step Instructions
Alright, let’s get cooking! Making Pav Bhaji is like conducting a delicious symphony – each step builds on the last to create something magical. Follow these steps, and you’ll have Mumbai street-style Pav Bhaji ready in no time!
Preparing the Spice Base
First, heat that oil and butter in your pan over medium heat. Wait until the butter melts completely – you’ll know it’s ready when it stops sizzling. Now toss in those chopped onions and sauté them until they turn golden brown. This takes about 3-4 minutes, but don’t rush it! Those caramelized onions are flavor gold.
Next up – ginger-garlic paste. Stir it in and let it cook for about a minute until that raw smell disappears and your kitchen starts smelling amazing. Now add the tomatoes and cook them down until they’re soft and pulpy, about 5-7 minutes. You’ll know it’s perfect when the oil starts separating from the mixture.
Cooking and Mashing the Vegetables
Time for the spices! Add your Pav Bhaji masala, red chili powder, turmeric, and salt. Stir everything together and let the spices cook for about a minute – this wakes up all their flavors. Now toss in the chopped cauliflower, carrots, and peas along with about 1/4 cup of water.
Cover the pan and let the veggies steam for 5-7 minutes until they’re tender. Here’s where the magic happens – add the mashed potatoes and another 1/2 cup of water. Now grab your potato masher and go to town! Mash everything together until you get a chunky-smooth consistency. If it seems too thick, add a splash more water until it’s scoopable but not runny.
Final Touches and Serving Your Pav Bhaji
Let your bhaji simmer on low heat for about 10 minutes to let all the flavors marry. Stir occasionally so it doesn’t stick. Right before serving, sprinkle with fresh coriander and add a generous dollop of butter – trust me, this makes all the difference!
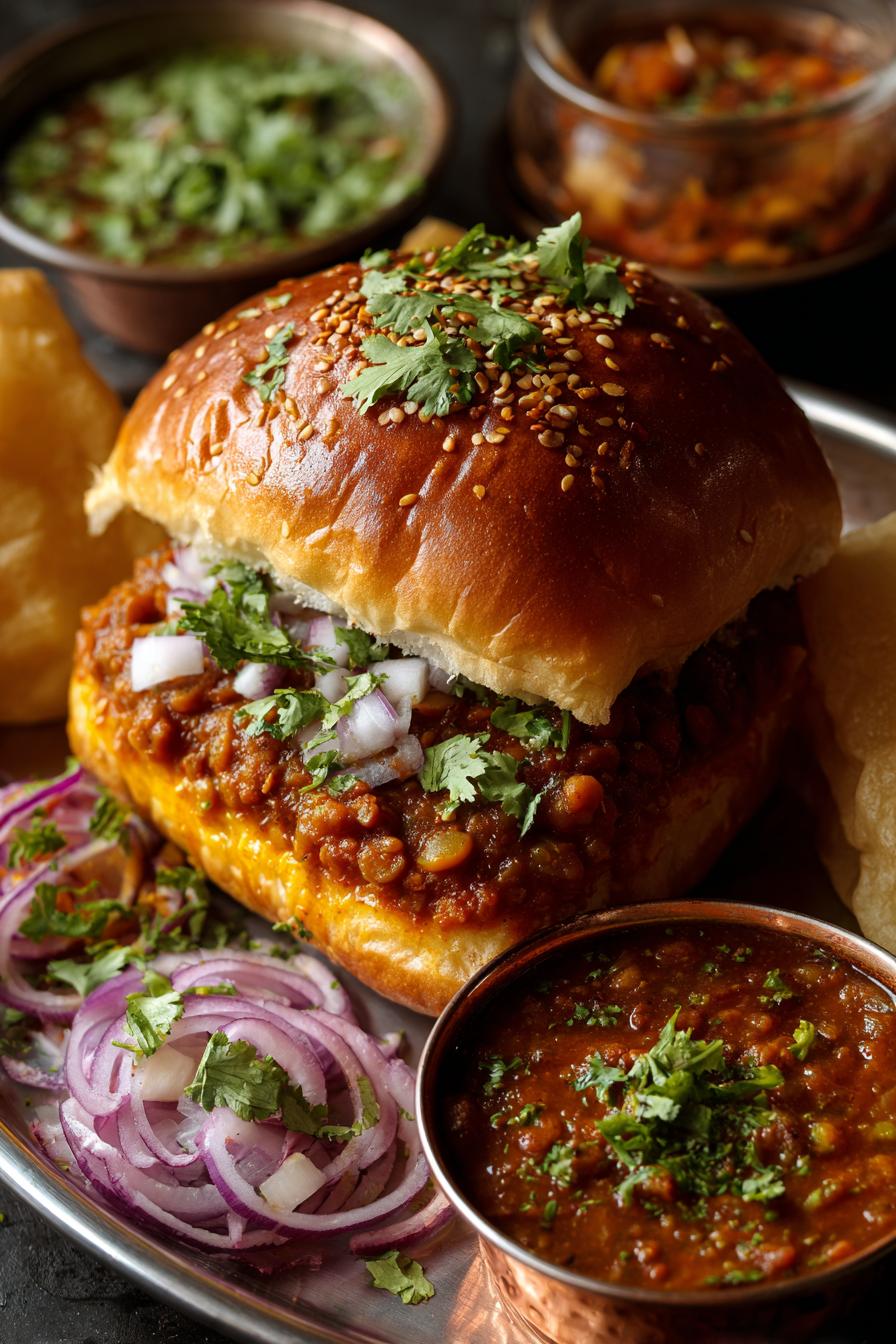
For the pav, heat your griddle and melt some butter. Slice the buns in half and toast them cut-side down until they’re golden and crispy. Serve the bhaji piping hot with the buttered pav, extra butter on top, lemon wedges, and some chopped onion on the side. Dig in immediately – this is comfort food at its best!
Expert Tips for the Best Pav Bhaji Recipe
After making this Pav Bhaji Recipe (Mumbai Street Style) countless times, I’ve learned a few tricks that take it from good to “oh-my-god-I-need-seconds” amazing. Here are my absolute must-know tips:
- Spice it your way: Start with less chili powder if you’re unsure – you can always add more later. The Pav Bhaji Masala already packs heat!
- Fresh is best: While frozen veggies work in a pinch, fresh vegetables give that vibrant texture and flavor street vendors are famous for.
- Mash like you mean it: Don’t be gentle! A thorough mashing creates that perfect scoopable texture that clings to the pav.
- Butter makes it better: Authentic Mumbai-style means generous butter – in the bhaji, on the pav, and extra for serving. No substitutes!
- Low and slow wins: Letting the bhaji simmer develops deeper flavors – resist the urge to rush this step.
Follow these, and you’ll swear you’re eating at a Mumbai street stall!
Serving Suggestions for Your Pav Bhaji
Oh, the joy of serving Pav Bhaji just right! Here’s how we do it Mumbai street-style in my house: First, an extra knob of butter melting into that hot bhaji – because why stop at just what’s in the pan? Then, a side of finely chopped raw red onions for that perfect crunch and bite. And don’t forget those lemon wedges – that bright squeeze at the end makes all the flavors pop. Sometimes I’ll even add a little bowl of spicy green chutney for dipping. Now grab those butter-toasted pav and dive in – hands only, the way it’s meant to be eaten!
Storing and Reheating Your Pav Bhaji Recipe
Got leftovers? Lucky you! Store your bhaji in an airtight container in the fridge for up to 2 days. The mashed potatoes will make it thicken up – no worries! When reheating, just splash in some water (about 1/4 cup) and warm it gently in a pan while stirring. It’ll come back to life with that perfect scoopable texture. Pro tip: Toast fresh pav when serving leftovers – that crispy buttered bread makes all the difference!
Pav Bhaji Recipe FAQs
Can I use frozen vegetables in this Pav Bhaji Recipe?
Absolutely! A frozen mixed vegetable blend works great when you’re short on time. No need to thaw – just toss them straight into the pan from the freezer. You might need to cook them for a few extra minutes to get them nice and tender. While fresh veggies give the best texture, the frozen kind will still make delicious Pav Bhaji when you’re in a pinch.
What can I use if I don’t have Pav Bhaji Masala?
In a bind, you can mix together 1 tbsp coriander powder, 1 tsp cumin powder, 1/2 tsp amchur (dry mango powder), and a pinch of asafoetida. It won’t taste exactly the same as the real deal, but it’ll give you that warm, tangy flavor profile that makes Pav Bhaji so special. Next time you’re at an Indian grocery, pick up some authentic Pav Bhaji Masala – it makes all the difference!
How can I make this Pav Bhaji Recipe spicier?
For extra heat, you’ve got options! Either bump up the red chili powder (start with an extra 1/2 teaspoon) or toss in 1-2 finely chopped green chilies when you’re sautéing the onions. My Mumbai street vendor friend always adds both for that real kick – just be ready with a glass of lassi standing by!
Nutritional Information for Pav Bhaji Recipe
Now, let’s talk about what’s in this deliciousness! A typical serving of Pav Bhaji (1 plate with 2 pav) gives you a good mix of carbs, fiber, and protein from all those veggies. Here’s the general breakdown per serving:
- Calories: Around 350 (mostly from those buttery buns – worth every bite!)
- Carbs: About 50g (hello, energy!)
- Fiber: 8g (all those veggies doing good work)
- Protein: 10g (not bad for a vegetarian dish)
- Fat: 15g (remember, butter is the star here)
Important note: These numbers are estimates and will change based on exactly what ingredients and brands you use. I measured mine with regular salted butter, store-bought pav, and all fresh veggies. If you’re watching specific dietary needs, you might tweak the butter amount or use whole wheat pav. But let’s be real – sometimes you just gotta enjoy the real deal Mumbai-style version!
PrintMumbai Street Style Pav Bhaji Recipe – 4 Secret Tips Inside

A flavorful and spicy Mumbai street food dish made with mashed vegetables and served with buttered buns.
- Prep Time: 15 mins
- Cook Time: 25 mins
- Total Time: 40 mins
- Yield: 4 servings 1x
- Category: Street Food
- Method: Stovetop
- Cuisine: Indian
- Diet: Vegetarian
Ingredients
- 4 medium potatoes, boiled and mashed
- 1 cup cauliflower, finely chopped
- 1 cup carrots, finely chopped
- 1 cup green peas
- 1 large onion, finely chopped
- 1 large tomato, finely chopped
- 1 tbsp ginger-garlic paste
- 2 tbsp pav bhaji masala
- 1 tsp red chili powder
- 1/2 tsp turmeric powder
- Salt to taste
- 2 tbsp butter
- 1 tbsp oil
- Fresh coriander leaves, chopped
- 1 lemon, cut into wedges
- 8 pav (dinner rolls)
Instructions
- Heat oil and 1 tbsp butter in a pan. Add chopped onions and sauté until golden brown.
- Add ginger-garlic paste and sauté for a minute.
- Add chopped tomatoes and cook until they turn soft.
- Add pav bhaji masala, red chili powder, turmeric, and salt. Mix well.
- Add chopped cauliflower, carrots, and peas. Cook for 5 minutes.
- Add mashed potatoes and 1/2 cup water. Mix and mash the vegetables.
- Cook for 10 minutes on low heat, stirring occasionally.
- Garnish with coriander leaves and a dollop of butter.
- Toast the pav with butter on a hot griddle.
- Serve hot with chopped onions, lemon wedges, and extra butter.
Notes
- Adjust spices as per your taste.
- Use fresh vegetables for the best flavor.
- Mash the bhaji well for a smooth texture.
- Add more butter for a richer taste.
Nutrition
- Serving Size: 1 plate
- Calories: 350
- Sugar: 8g
- Sodium: 500mg
- Fat: 15g
- Saturated Fat: 6g
- Unsaturated Fat: 7g
- Trans Fat: 0g
- Carbohydrates: 50g
- Fiber: 8g
- Protein: 10g
- Cholesterol: 20mg