Nut-Free Spring Seed Power Bars: Delicious Energy Boost!
Introduction to Nut-Free Spring Seed Power Bars
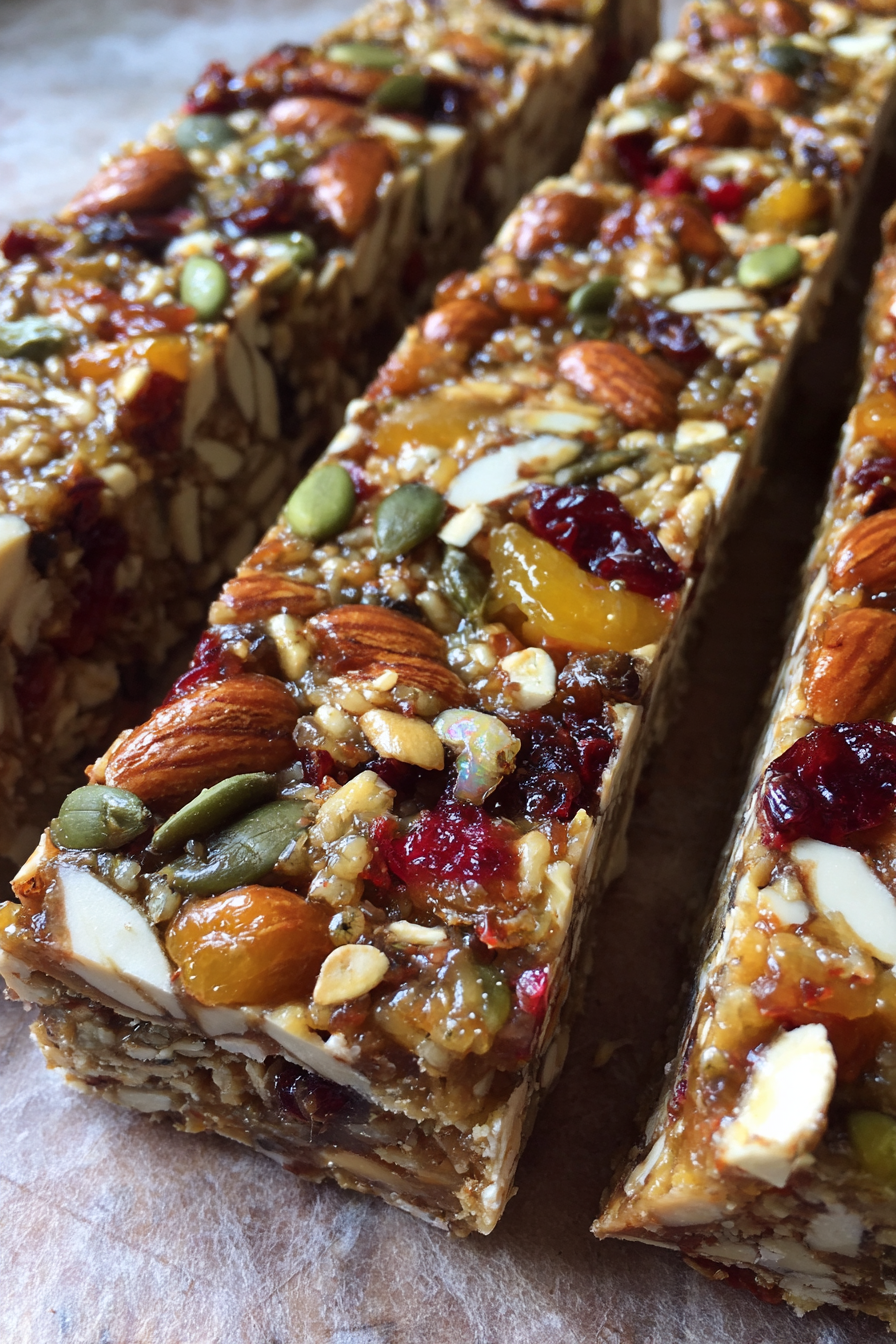
As a busy mom, I know how challenging it can be to find healthy snacks that everyone loves. That’s why I’m excited to share my Nut-Free Spring Seed Power Bars with you! These bars are not only delicious but also packed with energy-boosting ingredients. They’re perfect for a quick pick-me-up during those hectic afternoons or a nutritious treat to impress your loved ones. With just a handful of simple ingredients, you can whip up a batch that will keep you fueled and satisfied. Let’s dive into this delightful recipe together!
Why You’ll Love This Nut-Free Spring Seed Power Bars
These Nut-Free Spring Seed Power Bars are a lifesaver for busy days! They come together in just 40 minutes, making them a quick and easy snack option. The combination of sunflower and pumpkin seeds provides a satisfying crunch, while the sweetness of honey or maple syrup keeps everyone coming back for more. Plus, they’re versatile enough to customize with your favorite dried fruits. What’s not to love?
Ingredients for Nut-Free Spring Seed Power Bars
Gathering the right ingredients is the first step to creating these delightful Nut-Free Spring Seed Power Bars. Here’s what you’ll need:
- Sunflower seeds: These little powerhouses are rich in healthy fats and protein, giving your bars a satisfying crunch.
- Pumpkin seeds: Also known as pepitas, they add a nutty flavor and are packed with magnesium and zinc.
- Rolled oats: A great source of fiber, oats help bind the bars together while providing a chewy texture.
- Honey or maple syrup: This natural sweetener not only adds flavor but also helps hold the bars together. Choose maple syrup for a vegan option.
- Coconut oil: This healthy fat adds richness and helps with binding. It also gives a subtle tropical flavor.
- Dried fruit: I love using cranberries or apricots for a touch of sweetness and chewiness. Feel free to mix and match!
- Chia seeds: These tiny seeds are a nutritional powerhouse, adding fiber and omega-3 fatty acids to your bars.
- Vanilla extract: A splash of vanilla enhances the overall flavor, making these bars even more irresistible.
- Salt: Just a pinch balances the sweetness and enhances the flavors of the other ingredients.
For exact measurements, check the bottom of the article where you can find everything listed for easy printing. Remember, you can always customize these ingredients based on your preferences or what you have on hand!
How to Make Nut-Free Spring Seed Power Bars
Now that we have our ingredients ready, let’s get to the fun part—making these Nut-Free Spring Seed Power Bars! Follow these simple steps, and you’ll have a delicious snack in no time.
Step 1: Preheat the Oven
First things first, preheat your oven to 350°F (175°C). This step is crucial because it ensures even baking. While the oven warms up, line a baking dish with parchment paper. This will make it easier to remove the bars later. Trust me, you’ll thank yourself for this little prep work!
Step 2: Combine Dry Ingredients
In a large bowl, combine the sunflower seeds, pumpkin seeds, rolled oats, dried fruit, chia seeds, and salt. Mix them well! This is where the magic begins. The seeds and oats will create a hearty base, while the dried fruit adds a delightful sweetness. Make sure everything is evenly distributed for the best flavor in every bite.
Step 3: Prepare the Wet Mixture
In a small saucepan, melt the honey (or maple syrup) and coconut oil over low heat. Stir gently until they’re fully combined. This step is important because it helps the ingredients blend seamlessly. The warm mixture will act as a glue, holding everything together. Once melted, remove it from the heat and stir in the vanilla extract. The aroma will make your kitchen feel like a cozy bakery!
Step 4: Mix Wet and Dry Ingredients
Now, pour the warm wet mixture over the dry ingredients. Use a spatula or wooden spoon to mix everything together until well combined. You want a sticky, cohesive mixture that holds together. If it feels too dry, add a splash of water or more honey. The right consistency is key to achieving those perfect bars!
Step 5: Press and Bake
Transfer the mixture into your prepared baking dish. Press it down firmly with your hands or the back of a spatula. This step is essential for ensuring the bars hold their shape. Bake in the preheated oven for 20-25 minutes, or until they turn golden brown. The smell will be heavenly, and you’ll be counting down the minutes!
Step 6: Cool and Cut
Once baked, remove the dish from the oven and let it cool completely. This is crucial! If you cut them too soon, they might crumble. Once cooled, lift the bars out using the parchment paper and cut them into squares or rectangles. Store them in an airtight container, and enjoy your Nut-Free Spring Seed Power Bars whenever you need a quick energy boost!
Tips for Success
- Make sure to pack the mixture tightly in the baking dish for firm bars.
- Experiment with different dried fruits like raisins or figs for variety.
- For a sweeter bar, add a bit more honey or maple syrup.
- Store bars in the fridge for an extra chewy texture.
- Use a sharp knife to cut the bars for clean edges.
Equipment Needed
- Baking dish: A 9×9 inch dish works well, but any similar size will do.
- Parchment paper: If you don’t have this, greasing the dish with coconut oil is a good alternative.
- Mixing bowls: Use any large bowl for combining ingredients.
- Spatula or wooden spoon: These are perfect for mixing and pressing the mixture.
- Sharp knife: Essential for cutting the bars into neat pieces.
Variations
- Chocolate Chip Delight: Add a handful of dairy-free chocolate chips for a sweet twist that kids will love.
- Spiced Up: Incorporate a teaspoon of cinnamon or nutmeg for a warm, cozy flavor that’s perfect for chilly days.
- Protein Boost: Mix in a scoop of your favorite protein powder to make these bars even more filling and nutritious.
- Fruit Fusion: Try using different dried fruits like mango, blueberries, or figs for a burst of flavor.
- Seed Medley: Swap in other seeds like hemp or flaxseeds for added nutrition and variety.
Serving Suggestions
- Pair your Nut-Free Spring Seed Power Bars with a refreshing smoothie for a balanced snack.
- Serve them alongside a cup of herbal tea for a cozy afternoon treat.
- For a fun presentation, stack the bars on a colorful plate and garnish with fresh fruit.
- Wrap them in parchment paper for a delightful on-the-go snack.
FAQs about Nut-Free Spring Seed Power Bars
Can I make these Nut-Free Spring Seed Power Bars gluten-free?
Absolutely! Just ensure you use certified gluten-free rolled oats. This way, you can enjoy these bars without any gluten concerns.
How long do these bars last?
When stored in an airtight container, your Nut-Free Spring Seed Power Bars will stay fresh for up to a week. For longer storage, consider freezing them!
Can I substitute the honey with something else?
Yes! Maple syrup is a great vegan alternative. You can also use agave nectar if you prefer a different sweetener.
What if I don’t have chia seeds?
No worries! You can skip them or replace them with flaxseeds. They’ll still provide a nice texture and nutritional boost.
Can I add protein powder to these bars?
Definitely! Adding a scoop of your favorite protein powder is a fantastic way to make these Nut-Free Spring Seed Power Bars even more filling and nutritious.
Final Thoughts
Creating these Nut-Free Spring Seed Power Bars has been a delightful journey for me, and I hope it will be for you too! They’re not just a snack; they’re a little bundle of joy that brings energy and satisfaction to busy days. Whether you’re enjoying them on a hike, at your desk, or as an after-school treat, these bars are sure to brighten your day. Plus, the customization options mean you can make them uniquely yours. So, roll up your sleeves and dive into this recipe—your taste buds will thank you, and your family will love you for it!
PrintNut-Free Spring Seed Power Bars: Delicious Energy Boost!
Nut-Free Spring Seed Power Bars are a delicious and healthy snack option packed with energy-boosting ingredients, perfect for a quick pick-me-up.
- Prep Time: 15 minutes
- Cook Time: 25 minutes
- Total Time: 40 minutes
- Yield: 12 bars 1x
- Category: Snack
- Method: Baking
- Cuisine: American
- Diet: Vegan
Ingredients
- 1 cup sunflower seeds
- 1 cup pumpkin seeds
- 1/2 cup rolled oats
- 1/2 cup honey or maple syrup
- 1/4 cup coconut oil
- 1/2 cup dried fruit (e.g., cranberries, apricots)
- 1/4 cup chia seeds
- 1/2 teaspoon vanilla extract
- 1/4 teaspoon salt
Instructions
- Preheat the oven to 350°F (175°C) and line a baking dish with parchment paper.
- In a large bowl, combine sunflower seeds, pumpkin seeds, rolled oats, dried fruit, chia seeds, and salt.
- In a small saucepan, heat honey (or maple syrup) and coconut oil over low heat until melted and combined.
- Remove from heat and stir in vanilla extract.
- Pour the wet mixture over the dry ingredients and mix until well combined.
- Press the mixture firmly into the prepared baking dish.
- Bake for 20-25 minutes or until golden brown.
- Allow to cool completely before cutting into bars.
Notes
- Store in an airtight container for up to a week.
- Feel free to customize with your favorite seeds or dried fruits.
- For a crunchier texture, bake a little longer.
Nutrition
- Serving Size: 1 bar
- Calories: 180
- Sugar: 10g
- Sodium: 50mg
- Fat: 8g
- Saturated Fat: 4g
- Unsaturated Fat: 3g
- Trans Fat: 0g
- Carbohydrates: 24g
- Fiber: 4g
- Protein: 6g
- Cholesterol: 0mg