15-Minute Phantom Cheesecake Bites – Effortless Bliss!
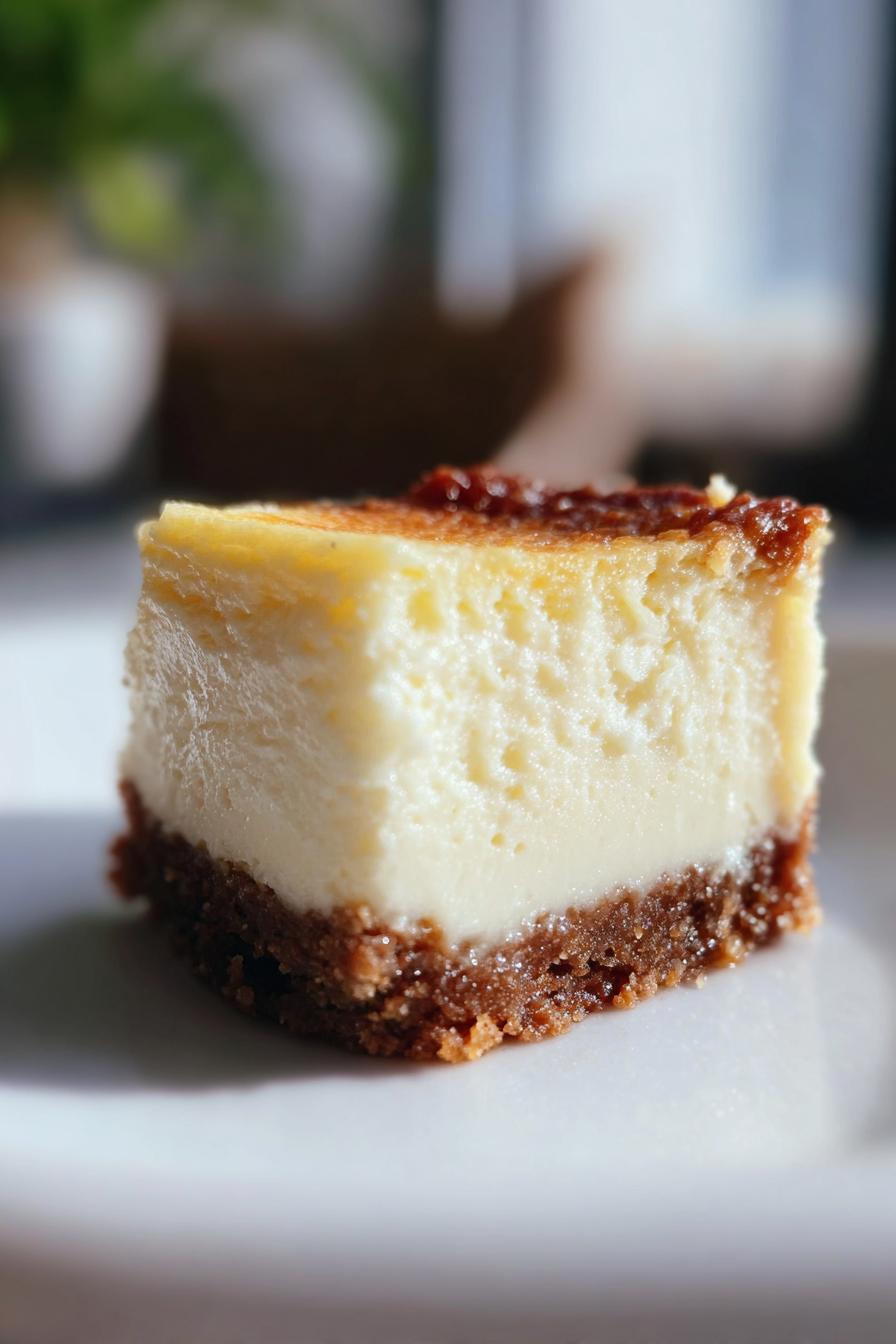
You know those moments when you need a dessert that looks fancy but takes almost zero effort? That’s exactly why I fell in love with these Phantom cheesecake bites. No oven, no stress—just creamy, dreamy little bites of happiness. I’ve been making these for years, ever since I first whipped them up for a last-minute book club meeting (and let’s just say, no one suspected they came together in 15 minutes!).
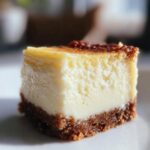
The magic? A buttery cookie crust—graham crackers, Oreos, whatever you’ve got—paired with a cloud-like filling that’s sweet but not too rich. They’re my go-to for potlucks, girls’ nights, or when I just want something sweet without turning on the oven. Trust me, once you try these, you’ll keep the ingredients stocked at all times. And the best part? Kids and adults alike go crazy for them. Just don’t blame me if they disappear before you even get to taste one!
Why You’ll Love These Phantom Cheesecake Bites
Oh, where do I even start? These little bites are pure magic. First off, no oven required—perfect for summer when you can’t bear to turn on the heat. They come together in a flash, with just 15 minutes of hands-on time (hello, last-minute cravings!).
The texture? Dreamily creamy—like biting into a cloud with a buttery cookie hug. And the best part? You can customize them endlessly: swap the crust (Oreos! Shortbread!), drizzle with caramel, or top with fresh berries. They’re foolproof, portable, and disappear faster than you can say “cheesecake.” Seriously, what’s not to love?
Ingredients for Phantom Cheesecake Bites
Okay, let’s talk ingredients—because trust me, the simplicity here is downright thrilling. You probably have most of this in your pantry right now, and if not, a quick grocery run will fix that!
- 1 1/2 cups crushed graham crackers (that’s about 12 full sheets—just smash ‘em in a bag with a rolling pin!) or swap in Oreos, vanilla wafers, even gingersnaps if you’re feeling wild
- 1/4 cup melted butter (salted or unsalted both work, but I’m team salted for that extra oomph)
- 8 oz cream cheese, softened to room temperature—this is NON-NEGOTIABLE unless you want lumpy filling (learned that the hard way)
- 1/4 cup sugar (granulated works perfectly, but brown sugar adds a caramel twist)
- 1 tsp vanilla extract (the real stuff, please—imitation vanilla and I aren’t on speaking terms)
- 1/2 cup whipped cream (from a can is fine, but if you’ve got 2 minutes to whip heavy cream yourself? Game changer)
See? Nothing fancy, just pantry staples that transform into something downright magical. The beauty is in the ratios—too much butter and your crust gets soggy, too little sugar and the filling falls flat. But stick with these measurements, and you’re golden.
Equipment You’ll Need
Grab these basics—you likely have them already! A mini muffin tin (standard works too, but bites won’t be as cute), a mixing bowl for that dreamy filling, and an electric mixer to beat the cream cheese smooth. That’s it! No fancy gadgets required—just your trusty kitchen staples.
How to Make Phantom Cheesecake Bites
Alright, let’s get to the fun part—making these irresistible little bites! Don’t let the fancy look fool you; this is seriously easy stuff. Just follow these steps, and you’ll have cheesecake magic in no time.
Step 1: Prepare the Crust
First, grab those crushed cookies and melted butter—this is where the magic starts! Mix them together until it looks like wet sand (you’ll know it’s right when you can pinch it and it holds its shape). Now, here’s my pro tip: press the mixture FIRMLY into your mini muffin tin cups. I mean it—get in there with your fingers or the back of a spoon. If you don’t press hard enough, the crust will crumble when you try to eat them, and nobody wants that. Fill each cup about halfway up—just enough to give your cheesecake a sturdy little base.
Step 2: Make the Filling
Okay, this is where room-temperature cream cheese becomes your best friend. Cold cream cheese? Lumpy disaster. Softened cream cheese? Silky-smooth perfection. Beat it with the sugar and vanilla until it’s completely smooth—no grainy bits allowed! Then, gently fold in the whipped cream. Don’t go crazy stirring; you want to keep all that airy fluffiness intact. The filling should be light, creamy, and dreamy—like cheesecake clouds!
Step 3: Assemble and Chill
Spoon the filling over your crusts, filling them almost to the top (they won’t rise, so no worries there). Now, here’s the hardest part: you MUST chill these for at least 2 hours. I know, waiting is torture, but trust me—it’s the difference between a sad, melty mess and perfect little bites that hold their shape. If you’re feeling extra impatient, pop them in the freezer for 30 minutes first—just don’t skip the chilling! Once they’re set, gently twist each bite out of the tin, and voilà—phantom cheesecake perfection.
Tips for Perfect Phantom Cheesecake Bites
After making these bites more times than I can count (and yes, eating my fair share of “test batches”), I’ve picked up some game-changing tricks. Here’s how to nail them every single time:
1. Liners are your friends
Those mini muffin tins? They can be sneaky. For foolproof removal, I swear by parchment paper liners—just press them into the cups before adding the crust. No sticking, no crumbling, just perfect little bites popping right out. (Bonus: they look adorable for parties!)
2. The cream cheese temperature rule
I know I already yelled about this, but it’s THAT important. Your cream cheese should be so soft that your finger leaves an indent without resistance. Too cold? You’ll overmix trying to beat out lumps. Too warm? The filling gets soupy. Let it sit on the counter for 1-2 hours—patience pays off!
3. Fold like you mean it
When adding whipped cream, use a spatula and cut through the center, then fold gently from the bottom. Overmixing deflates all that airy goodness. Stop when you still see a few streaks—they’ll disappear with the last folds. Your filling should look like softly whipped clouds.
4. The overnight secret
Got time? Let them chill overnight. The flavors deepen, the crust firms up beautifully, and the texture becomes even creamier. I’ve been known to stash a secret batch in the fridge just for me—shhh!
5. Topping timing
Adding fruit or drizzle? Wait until right before serving. Fresh berries weep, and chocolate hardens weird in the fridge. I keep toppings separate and let everyone customize their bites—more fun that way!
Variations & Serving Ideas
Oh, the possibilities! These little cheesecake bites are like a blank canvas—you can dress them up a million ways. Here are my favorite twists and serving tricks that always wow a crowd (or just my very lucky family on a Tuesday night).
Crazy-Good Crust Swaps
Graham crackers are classic, but why stop there? Crushed Oreos make a killer chocolate crust (use the whole cookie—cream filling and all!). For a nutty twist, try gingersnaps or Biscoff cookies—they add this warm, spiced flavor that pairs perfectly with the creamy filling. And if you’re feeling extra fancy, pulverize some pretzels for a salty-sweet situation that’ll have people begging for the recipe.
Top It Off
This is where the magic happens. Right before serving, I love to:
- Drizzle with warm caramel sauce (the kind that pools in the little divot on top—heaven!)
- Add a spoonful of tart berry compote (raspberry is my go-to for that perfect sweet-tart balance)
- Melt some chocolate chips with a splash of cream for an easy ganache drizzle
- Crush freeze-dried strawberries for a pretty pink dusting that packs a flavor punch
The Perfect Pairings
These bites are stellar on their own, but oh boy—serve them with:
- A strong cup of coffee (the bitterness cuts through the sweetness perfectly)
- Sparkling rosé for girls’ night (because everything’s fancier with bubbles)
- Vanilla ice cream if you want to go full dessert decadence (just sandwich a bite between two small scoops—trust me)
My favorite part? Setting up a “toppings bar” at parties with little bowls of crushed nuts, mini chocolate chips, and fruit sauces. Let people DIY—it’s always a hit! Just watch how fast these disappear once word gets out.
Storage & Reheating
Alright, let’s talk about keeping these little bites happy after you’ve made them—because let’s be real, you might actually have leftovers (though in my house, that’s rare!). Here’s the scoop on storing them so they stay as delicious as day one.
Fridge Smarts
Pop those cheesecake bites into an airtight container—I like layering them with parchment paper between layers so they don’t stick together. They’ll keep beautifully in the fridge for up to 3 days. The crust softens slightly over time, but the filling stays gloriously creamy. If you see any condensation when you open the container, just dab it gently with a paper towel—no big deal!
Freezer Magic
Yes, you can freeze these! Arrange them in a single layer on a baking sheet first (so they don’t freeze into one big lump), then transfer to a freezer bag once solid. They’ll last up to 1 month—though good luck resisting them that long! To thaw, leave them in the fridge overnight or on the counter for about 30 minutes. Pro tip: The texture’s best if you don’t refreeze them after thawing.
A Quick Note on Serving
Straight-from-the-fridge bites are perfect—no reheating needed! If they’ve been frozen, letting them sit out for 10 minutes takes the chill off just enough. And remember: add any fresh toppings right before serving so they don’t get soggy. Now go stash some away for future you—you’ll thank yourself later!
Phantom Cheesecake Bites Nutrition
Okay, let’s talk numbers—but first, the fine print: These values are estimates and can change based on your exact ingredients (like using Oreos instead of grahams or adding extra toppings). I calculate nutrition info as honestly as possible, but your bites might vary slightly!
For one standard bite (made with graham crackers and no extra toppings), here’s the breakdown:
- Calories: 120
- Sugar: 8g (that’s why I sometimes cut the sugar to 3 tbsp—still sweet!)
- Fat: 8g (hello, cream cheese and butter—worth every bite)
- Carbs: 10g
- Protein: 2g (surprisingly satisfying for a tiny treat)
A few swaps can tweak these numbers: sugar-free cookies cut carbs, low-fat cream cheese reduces fat (though texture changes slightly), and whipped coconut cream makes them dairy-free. But honestly? Life’s too short not to enjoy the full-fat, full-joy version sometimes!
FAQs About Phantom Cheesecake Bites
I get so many questions about these little bites—which means you’re all as obsessed with them as I am! Here are the answers to the ones I hear most often, straight from my kitchen to yours.
Can I use low-fat cream cheese?
Technically? Yes. Should you? Well… The filling won’t be as luxuriously creamy, and it might weep a bit after chilling. If you must, go for Neufchâtel (the “1/3 less fat” kind)—it behaves better than full low-fat versions. But between us? The real deal is worth the splurge for that melt-in-your-mouth texture.
Why did my crust crumble when I tried to remove the bites?
Ah, the heartbreak! Two likely culprits: Not enough butter in the crust (it should hold together when pinched) or not pressing firmly enough into the tin. Next time, really pack it in there—I use the back of a teaspoon to get good pressure. Parchment liners are a game-changer too!
Can I make these without a muffin tin?
Absolutely! Press the crust into a small square pan (like an 8×8″), spread the filling over it, and chill. Cut into squares instead of bites—just as delicious! Bonus: no wrestling with mini molds. You’ll lose the cute shape, but gain zero frustration.
How do I fix lumpy filling?
First, always soften that cream cheese properly (I leave mine out for 2 hours). If you’ve got lumps anyway, don’t panic! Run the filling through a fine mesh sieve—it’s a pain, but it works. Or blend it briefly with an immersion blender. Future tip: beat the cream cheese alone first until smooth, then add other ingredients.
Can I freeze these with toppings already on?
Only if you like sad, soggy toppings! Freeze them plain, then add fresh berries, sauces, or drizzles after thawing. The one exception: chocolate shavings or sprinkles hold up fine. Everything else? Wait until serving for maximum wow factor.
Final Thoughts
There you have it—your new secret weapon for effortless, irresistible desserts! These phantom cheesecake bites have saved me more times than I can count, from last-minute potlucks to “I need something sweet NOW” moments. I can’t wait to hear how yours turn out!
Did you try a fun variation? Run into any kitchen adventures? Drop a comment or rating below—I love seeing your creations! And if you snapped a photo of your beautiful bites (we all know the first batch disappears too fast for pictures), tag me so I can cheer you on. Happy no-bake baking, friends—may your cheesecake dreams be creamy and your crusts never crumble!
Print15-Minute Phantom Cheesecake Bites – Effortless Bliss!
Easy no-bake cheesecake bites with a cookie crust and creamy filling.
- Prep Time: 15 mins
- Cook Time: 0 mins
- Total Time: 2 hrs 15 mins
- Yield: 12 bites 1x
- Category: Dessert
- Method: No-Bake
- Cuisine: American
- Diet: Vegetarian
Ingredients
- 1 1/2 cups crushed graham crackers or cookies
- 1/4 cup melted butter
- 8 oz cream cheese, softened
- 1/4 cup sugar
- 1 tsp vanilla extract
- 1/2 cup whipped cream
Instructions
- Mix crushed cookies with melted butter.
- Press the mixture into mini muffin tins to form crusts.
- Beat cream cheese, sugar, and vanilla until smooth.
- Fold in whipped cream.
- Spoon the filling over the crusts.
- Chill for at least 2 hours before serving.
Notes
- Use any cookie type for the crust.
- Add fruit topping if desired.
- Store in the fridge for up to 3 days.
Nutrition
- Serving Size: 1 bite
- Calories: 120
- Sugar: 8g
- Sodium: 90mg
- Fat: 8g
- Saturated Fat: 4g
- Unsaturated Fat: 3g
- Trans Fat: 0g
- Carbohydrates: 10g
- Fiber: 0g
- Protein: 2g
- Cholesterol: 20mg