Spooky Spiderweb Brownies: 5-Step Halloween Magic
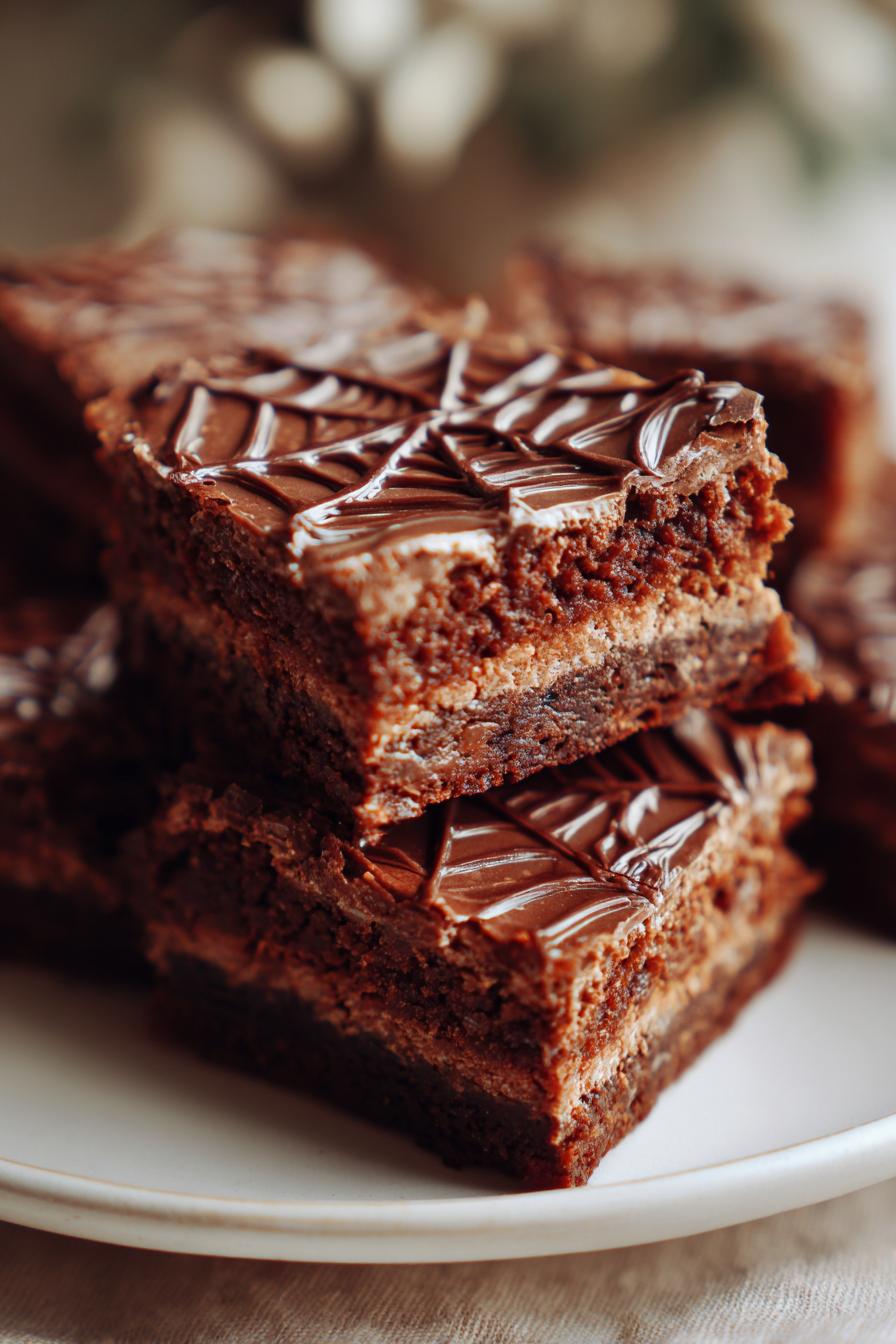
Halloween desserts should be equal parts delicious and delightfully creepy, and these Spooky Spiderweb Brownies nail it! Imagine rich, fudgy brownies topped with a mesmerizing white chocolate web – it’s way easier to make than it looks, I promise. I’ve been making these for years, and they’re always the star of any Halloween party. Kids gasp when they see them, and adults sneak seconds when they think no one’s looking. The best part? You probably have most of the ingredients in your pantry already. Trust me, once you see how simple (and fun!) it is to create this edible spiderweb, you’ll want to make them every October.
Why You’ll Love These Spooky Spiderweb Brownies
These brownies aren’t just dessert—they’re edible Halloween magic! Here’s why they’re my go-to every October:
- Foolproof decorating: The spiderweb looks fancy but takes minutes—just drizzle and drag!
- Ultra-fudgy texture: Melted butter and extra eggs keep them rich (no cakey disappointments here).
- Total crowd-pleaser: Kids adore the spooky vibe, while chocolate lovers sneak thirds.
- Pantry-friendly: No obscure ingredients—just cocoa powder, eggs, and a little Halloween spirit!
Seriously, they disappear faster than ghosts at sunrise.
Ingredients for Spooky Spiderweb Brownies
Grab these simple ingredients – chances are you’ve got most of them already! I always line everything up before starting because nothing’s worse than realizing mid-mix that you’re out of eggs. (Trust me, I’ve done the frantic neighbor-knocking before.) Here’s what you’ll need:
- Dry Ingredients:
- 1 cup all-purpose flour (spooned & leveled)
- 1/2 cup cocoa powder (I use Dutch-process for that deep, dark color)
- 1/2 teaspoon salt (don’t skip – it balances the sweetness!)
- 1/2 teaspoon baking powder
- Wet Ingredients:
- 1 cup unsalted butter (2 sticks, melted but not hot)
- 2 cups granulated sugar
- 4 large eggs (room temperature – they incorporate better)
- 1 teaspoon vanilla extract (the good stuff makes a difference)
- For the Spooky Decor:
- 1/2 cup white chocolate chips (for the web – don’t use candy melts!)
- 1/4 cup black icing gel (the squeeze tube kind works best)
See? Nothing crazy! Now let’s make some magic happen in the kitchen.
How to Make Spooky Spiderweb Brownies
Alright, let’s get baking! These brownies come together in a snap, and the decorating is so much fun you’ll feel like a pastry artist. I’ve made these dozens of times (my kids demand them annually), so I’ll walk you through every step to ensure perfect, fudgy brownies with that wow-factor spiderweb.
Baking the Brownies
First things first – preheat that oven to 350°F (175°C) and grease your 9×13-inch pan really well. Nothing’s sadder than brownies stuck to the pan! I like to line mine with parchment paper too – makes cleanup a breeze.
- Whisk together all your dry ingredients (flour, cocoa powder, salt, and baking powder) in a medium bowl. No need to sift unless your cocoa’s lumpy.
- In a big mixing bowl, stir the melted butter and sugar until they’re best friends. Then add eggs one at a time, mixing well after each. Splash in that vanilla – your kitchen should smell amazing already!
- Gently fold the dry ingredients into the wet mix. Stop as soon as you stop seeing flour streaks – overmixing makes tough brownies. The batter will be thick and glossy, like chocolate lava.
- Spread it evenly in your prepared pan and bake for 25-30 minutes. They’re done when the edges pull away slightly and a toothpick comes out with a few moist crumbs (not wet batter!).
Now the hard part – let them cool COMPLETELY. I know, it’s torture, but warm brownies will melt your spiderweb decor into a spooky mess!
Creating the Spiderweb Design
Here’s where the magic happens! This looks fancy but is seriously simple:
- Melt your white chocolate chips in 15-second bursts in the microwave, stirring between each. It should be smooth but not hot.
- Use a spoon to drizzle concentric circles on the cooled brownies – start small in the center and work outward. Don’t stress about perfection!
- Take a toothpick or thin knife. Starting at the center, gently drag lines outward to create the web effect. Wipe your toothpick between drags for clean lines.
- For extra creep factor, add a few “spiders” with dots of black icing gel. Or just go full web – it’s your Halloween masterpiece!
Pro tip: Chill the brownies for 10 minutes after decorating to set the design before slicing. Then watch them disappear – both from the plate and from happy, sugar-buzzed guests!
Tips for Perfect Spooky Spiderweb Brownies
After years of trial and error (and a few web-tastrophes!), I’ve nailed down these foolproof tricks for showstopping brownies every time:
- Chill before slicing: Pop decorated brownies in the fridge for 10 minutes – clean cuts without smudging your masterpiece!
- Toothpick magic: Use a fresh toothpick for each web line drag – sticky ones make messy strands.
- White chocolate temp: Let melted chocolate cool slightly before drizzling or it’ll sink into warm brownies.
- Go big with cocoa: Dutch-process cocoa gives that intense, Halloween-worthy dark color.
Bonus: Leftover black icing? Pipe little spiders in the corners for extra screams!
Ingredient Substitutions & Notes
Don’t stress if you’re missing something—here are my go-to swaps and why certain ingredients are non-negotiable:
- Gluten-free? Swap all-purpose flour for a 1:1 gluten-free blend. Just make sure it includes xanthan gum for structure.
- Dairy-free butter works fine, but avoid oil—it messes with the fudgy texture.
- Dutch-process cocoa is key for that deep, dark color. Natural cocoa works, but the brownies will be lighter.
- Eggs are crucial—they’re the backbone of the fudgy texture. No swaps here, sorry!
Trust me, sticking to these tips ensures your brownies are both spooky and spectacular!
Storing and Serving Spooky Spiderweb Brownies
These brownies are best served at room temperature so the chocolate stays soft and fudgy. I usually set them out an hour before guests arrive – the spiderweb design holds up beautifully! Store leftovers (if you’re lucky enough to have any) in an airtight container for up to 3 days. The white chocolate might lose its shine after day 2, but they’ll still taste amazing. Pro tip: Layer them between parchment paper to prevent the webs from sticking together!
Nutritional Information
Here’s the scoop per brownie (but let’s be real – no one eats just one!): 280 calories, 14g fat (8g saturated), 35g carbs, 2g fiber, 25g sugar, and 4g protein. Remember, nutritional values are estimates and vary by ingredients/brands.
Frequently Asked Questions
Got questions? I’ve got answers! Here are the ones I hear most when making these spooky treats:
Can I use milk chocolate instead of white?
Totally! The web won’t be as ghostly, but milk chocolate tastes delicious. Just melt it slowly – it burns easier than white chocolate.
Help! My icing is too runny.
No panic! Stick the tube in the fridge for 10 minutes. Too thick? Knead it gently in your hands first to warm it up.
Can I make these ahead?
Absolutely! Bake them 1-2 days early, but wait to decorate until the day-of so the web stays crisp.
Any other Halloween dessert ideas?
Try piping “spiderwebs” on cupcakes or cookies! Same technique, smaller canvas.
Why do my brownies sink?
Usually means they’re underbaked. Next time, test with a toothpick until it comes out with just crumbs, not batter.
Spooky Spiderweb Brownies: 5-Step Halloween Magic

Decadent brownies decorated with a spiderweb design, perfect for Halloween.
- Prep Time: 15 minutes
- Cook Time: 25 minutes
- Total Time: 40 minutes
- Yield: 12 brownies 1x
- Category: Dessert
- Method: Baking
- Cuisine: American
- Diet: Vegetarian
Ingredients
- 1 cup all-purpose flour
- 1/2 cup cocoa powder
- 1/2 teaspoon salt
- 1/2 teaspoon baking powder
- 1 cup unsalted butter
- 2 cups sugar
- 4 large eggs
- 1 teaspoon vanilla extract
- 1/2 cup white chocolate chips
- 1/4 cup black icing gel
Instructions
- Preheat oven to 350°F (175°C). Grease a 9×13-inch baking pan.
- Mix flour, cocoa powder, salt, and baking powder in a bowl.
- Melt butter and stir in sugar. Beat in eggs one at a time, then add vanilla.
- Fold dry ingredients into the wet mixture until just combined.
- Spread batter evenly in the pan. Bake for 25-30 minutes.
- Cool completely. Melt white chocolate and drizzle in a spiral pattern.
- Use black icing to draw lines from the center to create a web.
Notes
- Let brownies cool before decorating.
- Store in an airtight container for up to 3 days.
Nutrition
- Serving Size: 1 brownie
- Calories: 280
- Sugar: 25g
- Sodium: 120mg
- Fat: 14g
- Saturated Fat: 8g
- Unsaturated Fat: 5g
- Trans Fat: 0g
- Carbohydrates: 35g
- Fiber: 2g
- Protein: 4g
- Cholesterol: 70mg