8 Sinfully Delicious Vampire Velvet Cake Jars Recipe
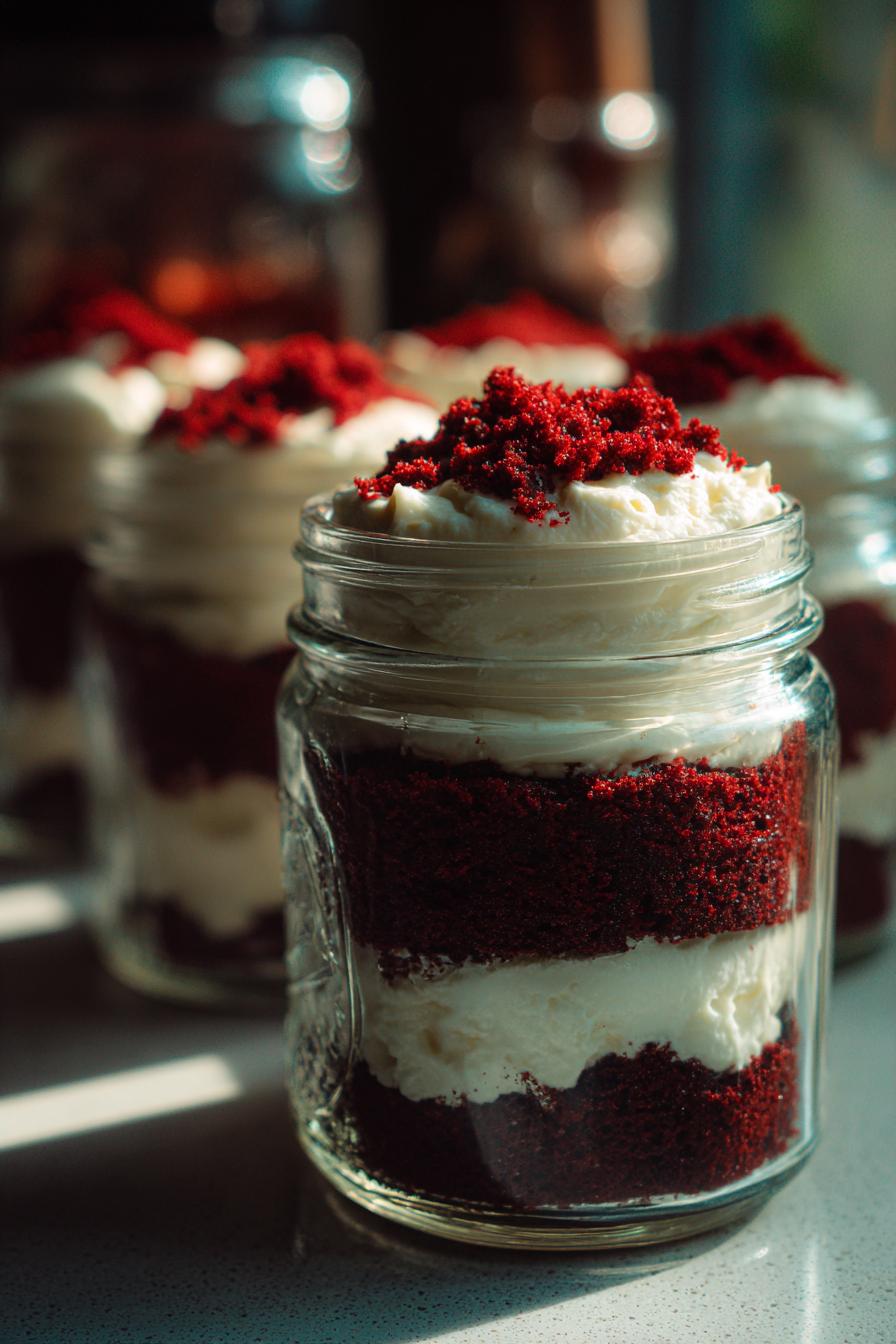
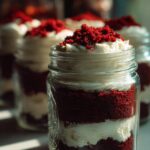
There’s something hauntingly delicious about vampire velvet cake jars. They’re the perfect blend of gothic elegance and convenience, making them a showstopper at any Halloween party. I first made these for a spooky get-together last October, and they disappeared faster than a ghost in the night. The rich, dark chocolate cake layers paired with the velvety cream cheese frosting create a decadent treat that’s as indulgent as it is eerie.
What I love most is how these individual jars make serving a breeze—no slicing, no mess, just grab and go. Plus, the optional red food coloring in the frosting adds a vampiric “blood” effect that’s perfect for the season. Trust me, once you try these, they’ll become a Halloween tradition in your home too.
Ingredients for Vampire Velvet Cake Jars
Gathering the right ingredients is half the magic when making these decadent vampire velvet cake jars. Here’s exactly what you’ll need to create this gothic treat:
- 1 box (15.25 oz) dark chocolate cake mix – The richer the chocolate, the better! I always use devil’s food for that deep, almost-black color.
- 1 cup water – Room temperature works best for smooth mixing
- 1/2 cup vegetable oil – This keeps our cake super moist
- 3 large eggs – Take them out of the fridge at least 30 minutes before baking
- 8 oz cream cheese, softened to room temperature – Don’t even think about using the cold stuff straight from the fridge!
- 1/2 cup unsalted butter, softened – I leave mine on the counter for 2 hours before frosting time
- 4 cups powdered sugar – Sift it if you want extra smooth frosting
- 1 tsp pure vanilla extract – The good stuff makes all the difference
- Red gel food coloring (optional) – Gel works WAY better than liquid for that dramatic bloody red color without thinning your frosting
Pro tip: If you’re going for that true vampire aesthetic, grab some black cocoa powder too – it’ll make your cake layers look almost black when baked!
How to Make Vampire Velvet Cake Jars
Making these vampire velvet cake jars is as fun as it is delicious. Let’s break it down into easy steps so you can create your own gothic masterpiece!
Bake the Chocolate Cake Layers
First, preheat your oven to 350°F and grab a 9×13-inch baking pan. I like to grease mine with a little butter or cooking spray to make sure the cake pops out easily later. Now, grab your dark chocolate cake mix and whisk it together with the water, vegetable oil, and eggs until it’s smooth and glossy. Pour that beautiful batter into your prepared pan and pop it in the oven. Bake for 25-30 minutes—you’ll know it’s done when a toothpick comes out clean. Let it cool completely before you start crumbling. Trust me, warm cake is a nightmare to work with in these jars!
Prepare the Vampire-Inspired Frosting
While your cake cools, let’s make that luscious cream cheese frosting. In a mixing bowl, beat the softened cream cheese and butter together until they’re creamy and smooth. Gradually add the powdered sugar, about a cup at a time, and keep mixing until it’s fluffy. Add the vanilla extract for that extra depth of flavor. Now, if you’re going for that vampiric vibe, this is where you’ll add the red gel food coloring. Start with a small amount and keep adding until you get that perfect “blood” shade. Gel coloring is key here—it gives you intense color without watering down your frosting.
Layer Your Vampire Velvet Cake Jars
Now comes the fun part—assembling your vampire velvet cake jars! Take your cooled cake and crumble it into small, bite-sized pieces. Grab your jars and start layering: a spoonful of cake crumbs, then a dollop of frosting, and repeat until the jar is filled. I usually go for 2-3 layers, depending on the size of the jar. The trick is to press the cake crumbs gently into each layer so they hold together when you dig in. Finish with a final swirl of frosting on top for that extra spooky elegance. Pop them in the fridge for about an hour to set, and you’re ready to serve!
Expert Tips for Vampire Velvet Cake Jars
Want to take your vampire velvet cake jars to the next level? Here are my tried-and-true tips for making them absolutely unforgettable:
- Use gel food coloring: It’s way more vibrant than liquid and won’t thin out your frosting. A little goes a long way for that perfect “blood red” effect.
- Chill before serving: Let the jars sit in the fridge for at least an hour. This helps the layers set and makes every bite firm and satisfying.
- Add chocolate shavings: Sprinkle some on top for a “dirt” garnish—it’s spooky and delicious. Dark chocolate works best for that gothic vibe.
- Layer with care: Press the cake crumbs gently into each layer so they hold together when you dig in.
These little tricks will make your jars look as good as they taste!
Storing and Serving Vampire Velvet Cake Jars
Once your vampire velvet cake jars are assembled, pop them in the fridge to keep them fresh. They’ll stay delicious for up to 3 days—perfect for making ahead of your Halloween bash! When you’re ready to serve, let them sit at room temperature for about 15 minutes. This takes the chill off the frosting and lets the cake layers soften just enough for the perfect texture. Trust me, the slight warmth makes every bite even more decadent and spooktacular!
Vampire Velvet Cake Jars Variations
Who says vampire velvet cake jars have to stick to just one look? Here are some of my favorite twists to keep things exciting:
- Strawberry “Blood” Version: Swap the chocolate cake mix for strawberry—those pink layers with red frosting look eerily beautiful. My niece calls these “vampire princess” jars!
- Graveyard Crunch: Mix crushed Oreos into the cake crumbs and sprinkle on top for an edible “dirt” effect. Add candy tombstones for Halloween flair.
- Mocha Madness: Add a shot of espresso to the cake batter and mix cocoa powder into the frosting for an adult-friendly caffeine kick.
- Purple Potion: Use blackberry or grape jam between layers instead of frosting for a gooey, jewel-toned surprise.
The best part? These variations all keep that signature jar presentation that makes serving so easy!
Nutritional Information
Okay, let’s talk numbers—but remember, these are just estimates. I’m not a nutritionist, just a home cook who likes to keep things real. Each vampire velvet cake jar packs about:
- 420 calories – Hey, it’s dessert! And totally worth every bite.
- 45g sugar – That cream cheese frosting and cake combo is sweet bliss.
- 5g protein – Thank the eggs and cream cheese for this little boost.
- 22g fat – Mostly from that luscious butter and oil in the cake.
- 55g carbs – Perfect fuel for your next vampire hunt… or Netflix marathon.
These numbers can vary depending on how generous you are with the frosting layers (no judgment here!) and the exact brands you use. I always say—enjoy in moderation, but don’t skip the fun!
Common Questions About Vampire Velvet Cake Jars
Q1. Can I make these ahead?
Absolutely! These vampire velvet cake jars can be assembled up to 24 hours in advance. Just keep them covered in the fridge until you’re ready to serve. The chilling time actually helps the layers set perfectly.
Q2. How much food coloring should I use?
Start with 1 teaspoon of red gel food coloring and add more as needed. Gel coloring is super concentrated, so a little goes a long way. You’ll want a deep, blood-red hue for that vampiric touch.
Q3. Can I freeze them?
I wouldn’t recommend it. Freezing can make the cream cheese frosting grainy and affect the cake’s texture. These are best enjoyed fresh or stored in the fridge for up to 3 days.
Share Your Vampire Velvet Cake Jars Creations
I’d love to see how your vampire velvet cake jars turn out! There’s nothing more fun than spotting these gothic treats popping up on social media. If you share photos of your creations, tag me—I’m always looking for fresh inspiration (and I might just feature your masterpiece on my page). Happy baking, fellow night creatures!
Print8 Sinfully Delicious Vampire Velvet Cake Jars Recipe
Decadent chocolate cake layered with rich cream cheese frosting, served in individual jars for a stylish and easy dessert.
- Prep Time: 20 minutes
- Cook Time: 30 minutes
- Total Time: 1 hour 50 minutes
- Yield: 6 jars 1x
- Category: Dessert
- Method: Baking
- Cuisine: American
- Diet: Vegetarian
Ingredients
- 1 box dark chocolate cake mix
- 1 cup water
- 1/2 cup vegetable oil
- 3 eggs
- 8 oz cream cheese, softened
- 1/2 cup unsalted butter, softened
- 4 cups powdered sugar
- 1 tsp vanilla extract
- Red food coloring (optional)
Instructions
- Preheat oven to 350°F. Grease a 9×13-inch baking pan.
- Mix cake mix, water, oil, and eggs until smooth. Pour batter into the pan.
- Bake for 25-30 minutes or until a toothpick comes out clean. Let cool.
- Beat cream cheese, butter, powdered sugar, and vanilla until fluffy. Add red food coloring if desired.
- Crumble the cake into small pieces.
- Layer cake crumbs and frosting in jars, alternating until filled.
- Chill for 1 hour before serving.
Notes
- Use gel food coloring for a vibrant red hue.
- Store leftovers in the fridge for up to 3 days.
- Top with chocolate shavings for extra flair.
Nutrition
- Serving Size: 1 jar
- Calories: 420
- Sugar: 45g
- Sodium: 380mg
- Fat: 22g
- Saturated Fat: 10g
- Unsaturated Fat: 10g
- Trans Fat: 0g
- Carbohydrates: 55g
- Fiber: 2g
- Protein: 5g
- Cholesterol: 85mg