“Victoria Sponge Cake: Discover the Secret Recipe Today!”
Introduction to Victoria Sponge Cake
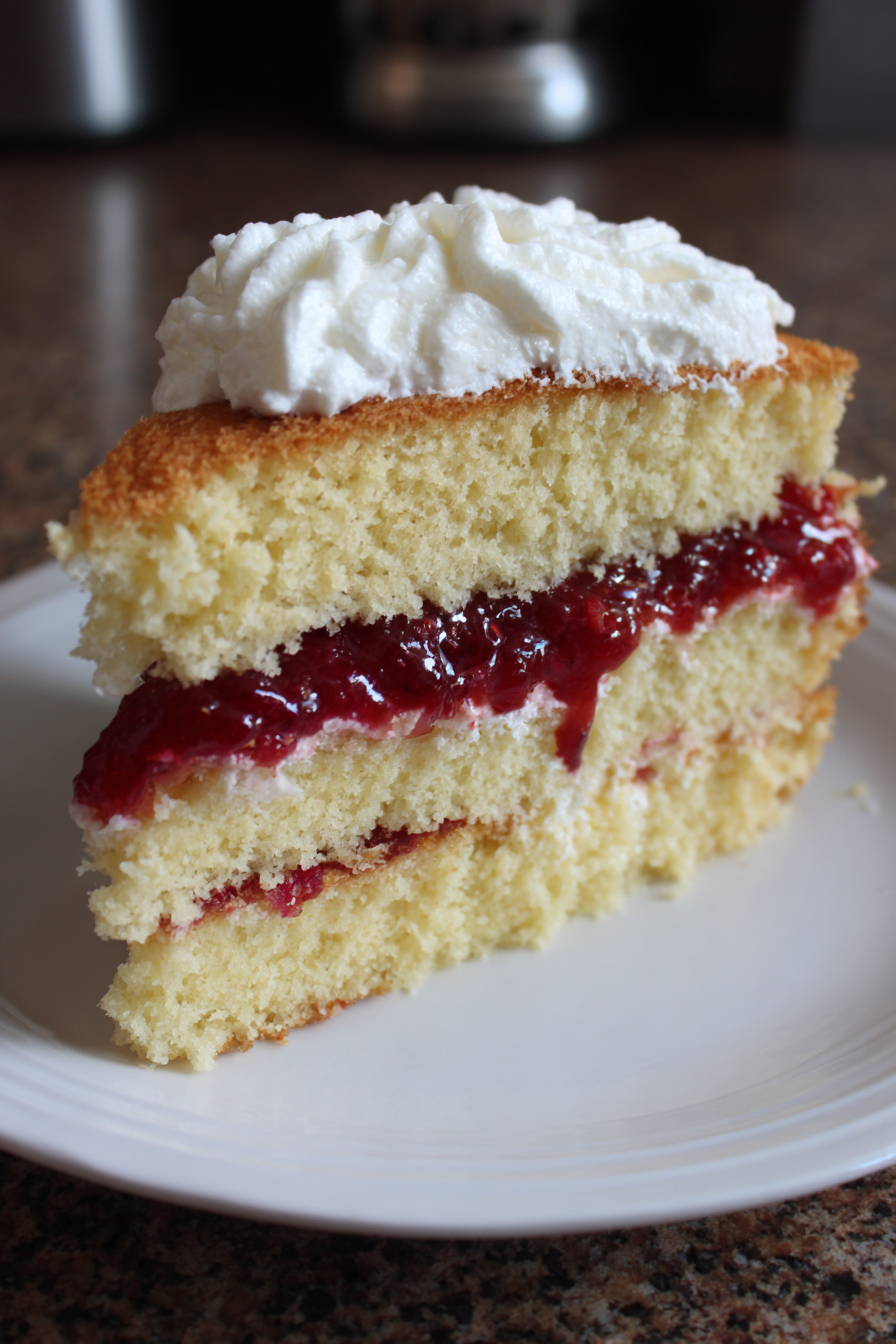
Ah, the Victoria sponge cake! This classic British delight is like a warm hug on a plate. I remember the first time I baked one; the aroma filled my kitchen, and my family couldn’t resist sneaking bites before it even cooled. Perfect for a quick afternoon treat or an impressive dessert for guests, this cake is light, fluffy, and oh-so-satisfying. Whether you’re a busy mom juggling schedules or a professional looking to unwind, this recipe is your secret weapon. Trust me, once you try it, you’ll want to make it again and again!
Why You’ll Love This Victoria Sponge Cake
This Victoria sponge cake is a dream come true for busy lives. It’s quick to whip up, taking just about 50 minutes from start to finish. The taste? Oh, it’s a delightful balance of sweetness and creaminess that will have your taste buds dancing. Plus, it’s versatile enough to impress guests or satisfy a family craving. With minimal fuss, you can create a show-stopping dessert that feels like a special occasion every time!
Ingredients for Victoria Sponge Cake
Gathering the right ingredients is the first step to baking a perfect Victoria sponge cake. Here’s what you’ll need:
- Unsalted butter: This is the base of your cake, providing richness and moisture. Make sure it’s softened for easy creaming.
- Granulated sugar: Sweetness is key! It helps create that lovely fluffy texture when creamed with butter.
- Large eggs: Eggs add structure and moisture. They also help the cake rise beautifully.
- All-purpose flour: The backbone of your cake, giving it body. Sifting it ensures a light and airy texture.
- Baking powder: This leavening agent is essential for that perfect rise, making your cake light and fluffy.
- Vanilla extract: A splash of vanilla adds warmth and depth to the flavor. For a richer taste, consider using vanilla bean paste.
- Raspberry jam: This is the star filling! It adds a fruity sweetness that pairs perfectly with the cake.
- Heavy cream: Whipped to soft peaks, it adds a luscious layer of creaminess that elevates the cake.
- Powdered sugar: A light dusting on top not only looks beautiful but adds a touch of sweetness.
For those looking to customize, you can swap the raspberry jam for strawberry or apricot, depending on your preference. All ingredient quantities are listed at the bottom of the article for easy reference and printing!
How to Make Victoria Sponge Cake
Now that you have your ingredients ready, let’s dive into the delightful process of making a Victoria sponge cake. Each step is simple, yet it builds up to something truly special. Follow along, and I promise you’ll be rewarded with a cake that’s light, fluffy, and utterly delicious!
Step 1: Preheat the Oven
First things first, preheat your oven to 180°C (350°F). This step is crucial because it ensures your cake bakes evenly. A hot oven helps the batter rise beautifully, giving you that perfect fluffy texture. So, don’t skip this step!
Step 2: Prepare the Cake Pans
Next, let’s get those cake pans ready. Grease two 8-inch round cake pans with a bit of butter or cooking spray. Then, line the bottoms with parchment paper. This little trick makes it super easy to remove the cakes later. Trust me, you’ll thank yourself when it’s time to serve!
Step 3: Cream Butter and Sugar
In a mixing bowl, cream together the softened unsalted butter and granulated sugar until the mixture is light and fluffy. This process is essential because it incorporates air into the batter, which helps your cake rise. You want it to look pale and creamy, almost like a cloud!
Step 4: Add Eggs
Now, it’s time to add the eggs. Crack them in one at a time, mixing well after each addition. This method ensures that the eggs are fully incorporated, which is key for a smooth batter. Plus, it helps maintain that lovely airy texture we’re aiming for!
Step 5: Combine Dry Ingredients
In a separate bowl, sift together the all-purpose flour and baking powder. Sifting is important because it breaks up any lumps and aerates the flour. This step contributes to the lightness of your cake, making it a true Victoria sponge cake!
Step 6: Fold in the Batter
Now, gently fold the dry ingredients into the wet mixture. Use a spatula and be careful not to overmix. The goal is to keep as much air in the batter as possible. Think of it as a gentle hug for your cake mixture!
Step 7: Bake the Cakes
Divide the batter evenly between the prepared cake pans. Bake in your preheated oven for 25-30 minutes. To check for doneness, insert a toothpick into the center of the cakes. If it comes out clean, they’re ready! If not, give them a few more minutes.
Step 8: Cool the Cakes
Once baked, let the cakes cool in the pans for about 10 minutes. Then, carefully transfer them to a wire rack to cool completely. This step is crucial because frosting a warm cake can lead to a melty mess. Patience is key here!
Step 9: Assemble the Cake
When the cakes are completely cool, it’s time to assemble! Spread a generous layer of raspberry jam on one cake layer. Then, whip the heavy cream until soft peaks form and spread it over the jam. Place the second cake layer on top, creating a delicious sandwich of flavors!
Step 10: Dust with Powdered Sugar
Finally, for that finishing touch, dust the top of your cake with powdered sugar. Not only does it look beautiful, but it also adds a hint of sweetness. Serve it up with a smile, and watch your loved ones enjoy every bite of this delightful Victoria sponge cake!
Tips for Success
- Always use room temperature ingredients for better mixing and texture.
- Don’t rush the creaming process; it’s key for a light cake.
- Use a kitchen scale for precise measurements, especially for flour and sugar.
- Let the cakes cool completely before frosting to avoid melting.
- Experiment with different jams or add fresh fruit for a twist!
Equipment Needed
- Mixing bowls: A set of various sizes is handy; you can use any large bowl if needed.
- Electric mixer: A stand mixer or hand mixer works best, but a whisk can do in a pinch.
- Measuring cups and spoons: Essential for accuracy; a kitchen scale is a great alternative.
- Spatula: A rubber spatula helps with folding; a wooden spoon can work too.
- Cake pans: Two 8-inch round pans are ideal; you can use square pans if that’s what you have.
Variations of Victoria Sponge Cake
- Chocolate Victoria Sponge: Replace a portion of the flour with cocoa powder for a rich chocolate twist.
- Lemon Victoria Sponge: Add lemon zest to the batter and use lemon curd instead of jam for a zesty flavor.
- Gluten-Free Version: Substitute all-purpose flour with a gluten-free blend to accommodate dietary needs.
- Fruit-Infused Cake: Incorporate fresh berries or sliced peaches into the batter for added flavor and texture.
- Vegan Option: Use plant-based butter, flax eggs, and non-dairy cream for a delicious vegan version.
Serving Suggestions for Victoria Sponge Cake
- Pair with a cup of freshly brewed tea for a classic afternoon treat.
- Serve alongside a scoop of vanilla ice cream for a delightful contrast.
- Add fresh berries on the side for a pop of color and flavor.
- Garnish with mint leaves for an elegant touch.
- Present on a beautiful cake stand to impress your guests!
FAQs about Victoria Sponge Cake
What makes a Victoria sponge cake different from other cakes?
The Victoria sponge cake is unique due to its light and airy texture, achieved by creaming butter and sugar together. It’s traditionally filled with jam and whipped cream, making it a delightful treat for afternoon tea. This classic British cake stands out for its simplicity and elegance.
Can I use other types of jam for the filling?
Absolutely! While raspberry jam is the classic choice, you can use strawberry, apricot, or even lemon curd for a zesty twist. The key is to choose a flavor that complements the lightness of the cake.
How do I store leftover Victoria sponge cake?
To keep your cake fresh, store it in an airtight container at room temperature for up to three days. If you want to keep it longer, consider refrigerating it, but be aware that the cream may lose some of its texture.
Can I freeze Victoria sponge cake?
Yes, you can freeze the cake! Wrap the layers tightly in plastic wrap and then in aluminum foil. When you’re ready to enjoy it, let it thaw in the fridge overnight. Just add the jam and cream after thawing for the best results.
What can I serve with Victoria sponge cake?
This cake pairs beautifully with a cup of tea, but you can also serve it with fresh berries, a scoop of ice cream, or even a dollop of custard. The options are endless, making it a versatile dessert for any occasion!
Final Thoughts
Baking a Victoria sponge cake is more than just following a recipe; it’s about creating memories in your kitchen. The joy of watching it rise, the sweet aroma wafting through your home, and the smiles on your loved ones’ faces as they take that first bite are priceless. This cake is a celebration of simplicity and flavor, perfect for any occasion. Whether it’s a quiet afternoon or a festive gathering, this delightful treat brings people together. So, roll up your sleeves, embrace the process, and enjoy every moment of baking this classic British delight!
Print“Victoria Sponge Cake: Discover the Secret Recipe Today!”
A classic British cake, the Victoria sponge is light, fluffy, and filled with jam and cream, perfect for afternoon tea.
- Prep Time: 20 minutes
- Cook Time: 30 minutes
- Total Time: 50 minutes
- Yield: 8 servings 1x
- Category: Dessert
- Method: Baking
- Cuisine: British
- Diet: Vegetarian
Ingredients
- 200g unsalted butter, softened
- 200g granulated sugar
- 4 large eggs
- 200g all-purpose flour
- 2 tsp baking powder
- 1 tsp vanilla extract
- 100g raspberry jam
- 100ml heavy cream
- Powdered sugar for dusting
Instructions
- Preheat your oven to 180°C (350°F).
- Grease and line two 8-inch round cake pans.
- In a mixing bowl, cream together the butter and sugar until light and fluffy.
- Add the eggs one at a time, mixing well after each addition.
- Sift in the flour and baking powder, then fold gently until combined.
- Stir in the vanilla extract.
- Divide the batter evenly between the prepared cake pans.
- Bake for 25-30 minutes or until a toothpick inserted in the center comes out clean.
- Let the cakes cool in the pans for 10 minutes, then transfer to a wire rack to cool completely.
- Once cooled, spread the raspberry jam on one cake layer and whip the cream until soft peaks form, then spread it over the jam.
- Place the second cake layer on top and dust with powdered sugar before serving.
Notes
- For a richer flavor, use vanilla bean paste instead of extract.
- Ensure all ingredients are at room temperature for best results.
- Store leftovers in an airtight container for up to 3 days.
Nutrition
- Serving Size: 1 slice
- Calories: 350
- Sugar: 20g
- Sodium: 150mg
- Fat: 18g
- Saturated Fat: 10g
- Unsaturated Fat: 8g
- Trans Fat: 0g
- Carbohydrates: 40g
- Fiber: 1g
- Protein: 4g
- Cholesterol: 80mg